Spaghetti Carbonara with Poached Eggs

breakfast-carbonara-4.jpg

I mentioned this in my last post, and I feel a bit weird about announcing it over the internet, but here goes: Over the holidays Jordan proposed, and I said yes. It has been a magnificent couple of weeks, full of celebrating with friends and family. Jordan told me that the wedding is off if I go on a “wedding diet” and I assured him that it wouldn’t happen, because it can’t happen. Because everywhere I turn these days someone is pouring me a glass of bubbly, and then refilling it, and then refilling it again. Let me tell you friends, it is hard to stay sober when you’re recently engaged.

So this post is against all the new years resolutions, and against the very principle of a wedding diet, because it is hang-over food.

Spaghetti Carbonara, or “bacon and egg bascetti” as I used to call it when I was wee, it basically just that- bacon, eggs, parmesan, and loads of black pepper. You don’t need to cook the sauce, it cooks as the it’s tossed with the hot pasta. You can easily make this without the poached egg of course, but there is something about adding that makes the pasta feel like breakfast. Which is sometimes just the ticket.

breakfast-carbonara-2


Spaghetti Carbonara with Poached Eggs


1 lb Spaghetti

7 Eggs (use good quality free range organic ones, it really will make a difference)

400g Bacon (good smoky stuff please!)

200g Parmesano Reggiano, or Grana Padano

Salt and Pepper


Cut the bacon into ½ inch pieces and cook them in a small frying pan over medium heat for about 15 minutes, or until they are crunchy, but not burning.

Strain the fat off into a jar of can. Put the bacon aside.

Fill a large and a medium sized pot with water and bring to a boil.

Meanwhile grate the parmesan and mix it in a large bowl with 3 of the eggs and healthy cracking of black pepper.

When the large pot of water comes to a boil, season it liberally with salt and cook the pasta to the directions on the package.

Just as the pasta is done and you’re about to strain it, crack the eggs into the remaining medium sized pot.

Strain the pasta and add it, and the bacon to the egg and parm mixture. Stir vigorously until it has completely combined, making sure it doesn’t curdle.

Divide among 4 bowls.

Using a slotted spoon remove the eggs from the water- testing to make sure they are done by gently poking at the yolk and white with your finger, ensuring that the white is hard but the yolk is soft.

Put the eggs on top of the pasta and enjoy immediately!

breakast-carbonara-1

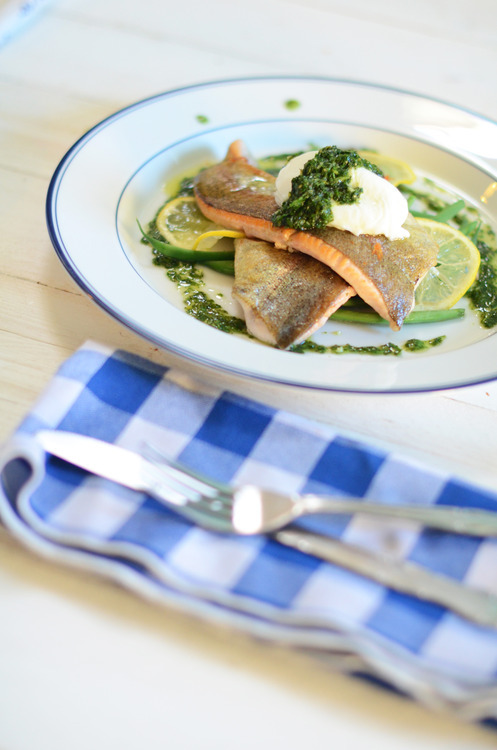
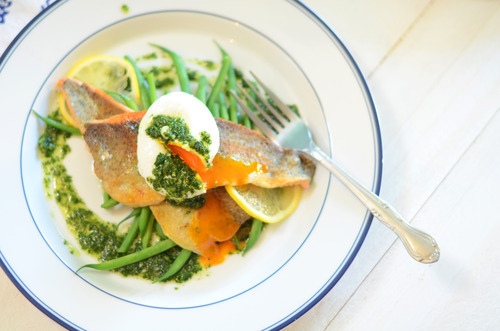
Poached Eggs with Seared Trout and Minty Pesto

tumblr_inline_n2szi49T9a1qfrmur.jpg

My Mom grew up with what she calls “Depression Era” food. The sort of get-as-much-fat-in-you-while-you-can-because-you-don’t-know-when-food-will-be-around-next. The sort of food inspired by the hardships her parents faced when they were young. She had never had a green bean not cooked in cream sauce until her twenties. It wasn’t food that was based around quality ingredients, or fresh ingredients, or local produce, except incidentally. In fact I’ve only really heard her talk about a handful of things she ate as a kid. Mostly we talk about her moms “cloud” biscuits, which are legendary in my family. They are outrageously good. As are Grammy’s gingerbread cookies and her pies. The other food-things that my mom talks about from when she was wee, is corn and trout, which are things her dad made.

For corn, my Grampy would have a pot of water boiling on the stove, and then, and only then, would he go outside and cut the corn, shuck it, and bring it inside to boil. The pot had to be boiling. It’s the only way to eat corn.

The other thing my Grampy did was go trout fishing. He’d wake up at the crack of dawn and escape the kids and watch the sunrise. And then he’d fry up trout for breakfast for the family. My mom starts smiling when she talks about those trout.

I’ve been thinking an awful lot about Grampy lately. I cleaned out my desk the other day and found a slew of cards I’ve written him and never sent. Which is ridiculous. I’ve got stamps, I’ve got envelopes. I’ve got cute little cards. They have thoughtful notes written out. Why haven’t I sent them? They do no good here.

The other thing I found was all these letters that he’s sent me. His is so witty, and smart, and funny and charming. There is so much of his personality in those letters, a personality I don’t know very well because we live so far apart.

So the other day I was thinking about him, still kicking it at 94, when I walked by my local fishmonger and there were the most beautiful little trout in the window. And I knew I had to get some for breakfast.

I’m sure this is not how my Grampy made trout. I can’t imagine him making a pesto or poaching an egg, although it’s possible that those are two skills he has that I don’t know about. But it’s a very me breakfast, poached eggs and beans and pesto, with a bit of him thrown in, in the form of little river fish.

And it was wonderful.

Poached Eggs with Seared Trout and Minto Pesto and Green Beans

Serves 2

  • 1/2lb Green Beans, cleaned with the woody ends picked off
  • 2 small Trout, or one larger one. Gutted and filleted.
  • 2 good quality Free Range Eggs
  • 1 small Handful of Mint
  • 1 large Handful of Parsley
  • 1 small clove of Garlic, peeled and coarsely chopped.
  • 1 Lemon
  • 1/3 cup Olive Oil
  • Salt and Pepper

In a food processor blitz together the parlsey, mint, garlic and ¼ cup of the olive oil. Zest half of the lemon in and add in a healthy pinch of salt. Pulse a couple times. Check for seasoning. Put aside.

Fill a medium pot with water and bring to a boil. Add a pinch of salt.

Meanwhile bring a small frying full of water to a boil. Add the beans and cook for 2 minutes. Strain and set aside.

Rinse out the frying pan and put it back on the stove over medium heat.

Let it warm up and then add the remaining olive oil.

Season the trout liberally with salt.

When the pan is quite hot (but not smoking) put the fish fillets in skin side down. Immediately shake the pan a bit to move the fish around. That will make sure they don’t stick.

Cook the trout on the skin side until it’s about ½ way cooked. Flip them over, and cook for 30 more seconds.

Put the fish on a plate.

Once you’ve flipped the fish crack your eggs into your boiling water. Turn the water down to a simmer. And cook for about 3 mintues for nice runny eggs.

Put them on top of the fish with the beans and spoon the sauce on top. Serve Immediately.

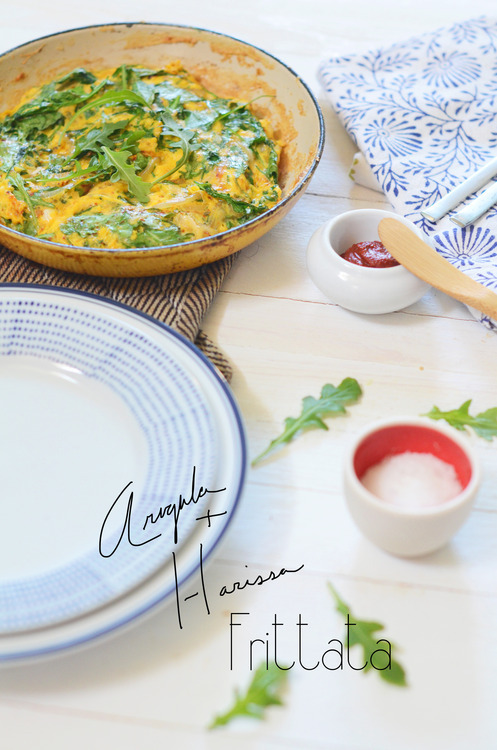
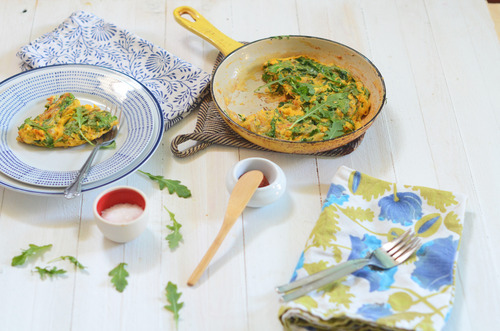
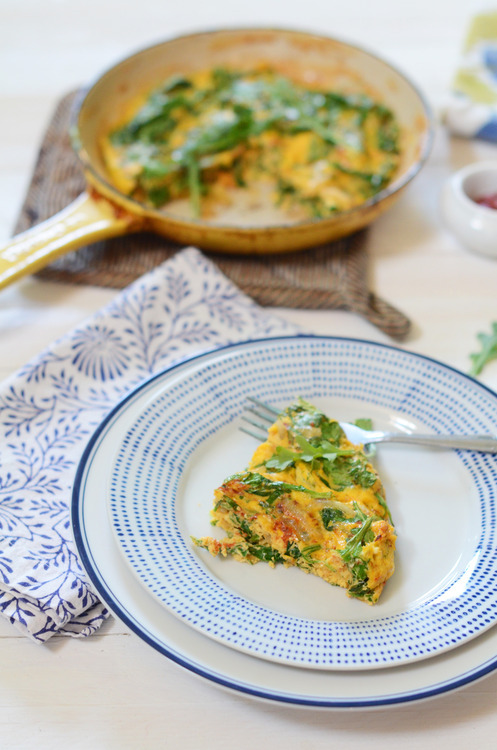
Arugula and Harissa Frittata

Breakfast is not my favorite meal of the day, at least during the week. During the week it’s an apple, maybe some green juice if I was on top of things to buy it (I don’t have a jucier, not do I have space in my tiny kitchen!). On a good day I’ll scramble and egg and throw some salsa on top. Totally premade, store bought crappy salsa. I’m too busy. I’m not organized enough to make overnight oats. Every few months I’ll make a batch of homemade instant oatmeal and think “I should do this more often!” and then I eat them all and don’t make it again for 4 months.

Breakfast is not my place to shine on a weekday.

Weekends though? That’s another story.

I love brunch, in a major way. Soft poached eggs, potatoes, vegetables cooked in interesting ways. Bacon. Sausages.

I have two qualms with most brunches though, the first, is that, unless I got too deep into some bourbon the night before, I want my brunch to be light enough that I still want to move afterwards. I love me some bacon, but maybe I need some salad with it, so shoot me. The second is that, and I am totally tooting my own horn here, but I’m pretty good at cooking brunch. If I go out I want those eggs to be perfect. And if they aren’t I’m going to feel a bit jilted. A good brunch doesn’t come cheap, and I want it flawlessly.

Which means I end up making brunch at home a lot of the time. I’m just a bit finicky about some things, especially in the mornings.

So this is the sort of thing I end up making. It’s incredibly simple, very satisfying, rich without being heavy, and almost foolproof to execute. It’s just the ticket for an no fuss brunch in .


Arugula and Harissa Frittata

Serves 2

1 Shallot, peeled and thinly sliced

4 cups Baby Arugula

1 tbsp Harissa Paste*

2 tbsp Olive Oil

4 Eggs

Salt and Pepper

  • Harissa is a Moroccan spice hot sauce. You can find it at most meditteranean stores, but in a pinch you can mix1 tsp  Sambal (rooster sauce) with 1 tsp ground cumin for this recipe.

Preheat your oven to broil.

Crack the eggs into a small bowl and mix vigorously for 2 minutes.

In a small frying pan over medium heat warm up the olive oil.

Put in the shallots and let cook slowly for about 10-15 mintues until they start to color.

Add in a healthy pinch of salt and stir in the harissa.

Cook the harissa for about a minute and then add in the arugula, a handful at a time so it doesn’t overflow in the pan.

Let it start to wilt and then add in the next handful, You don’t want to cook the arugula entirely, just let it start to wilt.

Add in the eggs with another pinch of salt and stir it up, like your making scrambled eggs. Keep stirring until it’s about half way cooked- but the top still is still smooth.

Take the pan off the heat and put it under the broiler.

Cook until the top gets puffy and the edges are a little bit browned.

Serve immediately. 

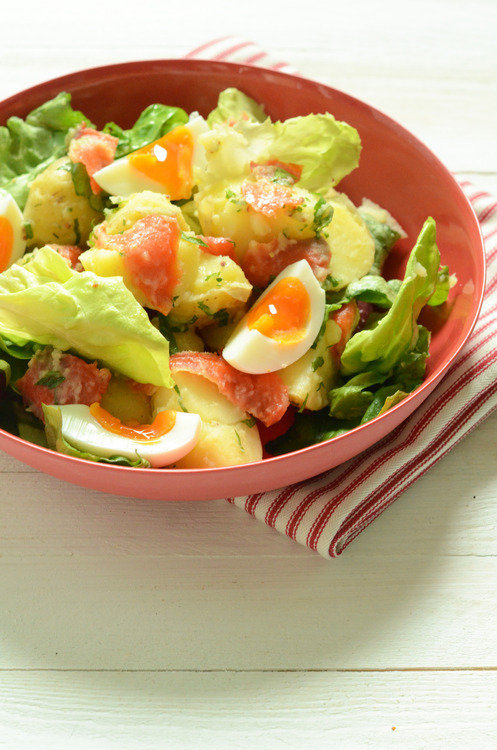
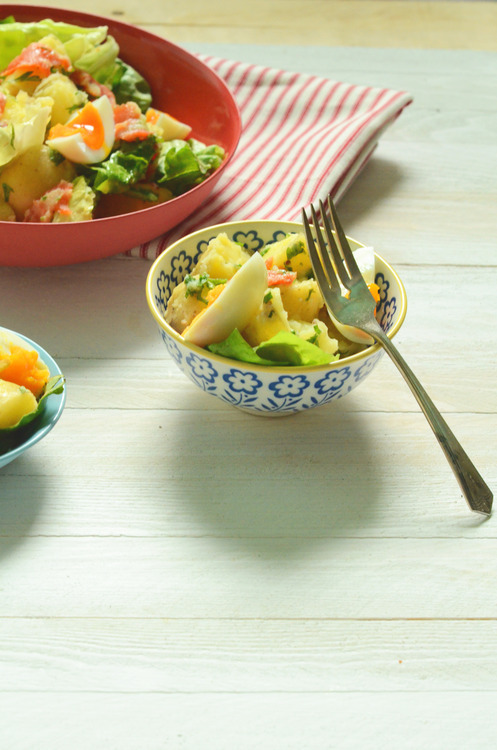
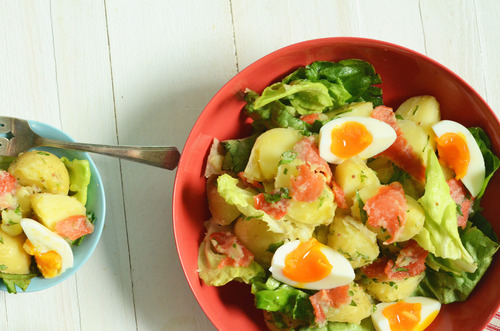
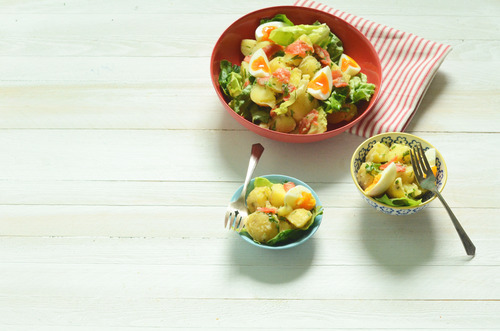
Sunday Salads- Potato, Lox, and Boiled Egg Salad

image

Last night was girls night. I kicked Jordan out of the apartment for the evening, and had some quality girlfriend time. 

It’s hard to come by these days I think, we’re all so busy all of the time and it’s so much easier it seems to get together when the guys are with us, but man did I need some girl time. 

We danced around to the Pointer Sisters, we cried, we watched the Brene Brown TedTalk on vulnerability, and we cried some more. We played the Dirty Dancing soundtrack, and watched the scene at the end where they do the lift. 

We talked about the totally unrealistic relationship expectations we have because John Hughes created Jake Ryan. We laughed. We laughed a lot.

And we drank wine. Cleaning up this morning made me realize just how much wine. And sake. And mojitos. I don’t feel terrible this morning, I’m actually not feeling bad at all. But I do feel like I need to eat something substantial. Something that’s going to soak up some booze. Something a bit heartier, not not greasy, not heavy. 

Enter the smoked salmon, potato, boiled egg, salad.

A salad that is filling and rich and just what is required of a hangover salad.

It’s a salad to eat for supper. Or at 10 am after girls night.

Sometimes, that’s just the thing.

 image

Boiled Potato Salad with Lox, Dill and Eggs

4 cups Fingerling Potatoes, or waxy Nugget Potatoes

4 Free Range Eggs

150g Smoked Salmon or Lox (I like lox best)

1 Lemon

½ cup Olive Oil

1 tbsp Dijon Mustard

¼ cup Dill

Salt and Pepper

 image

Scrub the potatoes. Cut them in half and put them in a pot. Cover with cold water and a healthy pinch of salt and put the pot on a burner with medium high heat.

Bring to a boil.

Reduce heat to simmer and cook until the potatoes are fork tender, but still holding their shape- about 15 minutes.

Strain and run cold water on them, stirring often until they are cooled.

Meanwhile bring a small pot filled with water to a boil.

Put the eggs in with a slotted spoon, first dipping them in, and then putting them in entirely- this will help prevent the shells from cracking.

Reduce the heat to medium and set a timer for 7 minutes. When the timer goes off remove the pot from the heat, strain off the hot water and fill with cold running water, stirring often until the eggs are cooled.

Peel and quarter them.

Meanwhile make the dressing- in a large bowl juice the lemon.  Mix in the Dijon with a pinch of salt.  Slowly add in the olive oil whisking vigorously to emulsify it in (it will still be tasty if it splits though so don’t worry too much if it does)

Taste for seasoning and add more lemon, olive oil, or salt as you see fit.

When the potatoes are cooked and cooled toss them into the dressing with the dill. To serve toss in the arugula, portion onto plates and tear pieces of the lox on top.  Place 4 quarters of eggs per plate seasoning each with salt.

Serve immediately. 

image

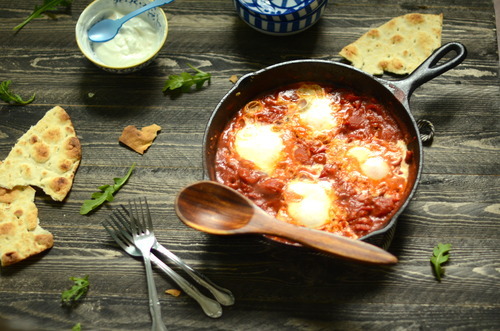
Shakshuka

image

When I was about eight, and my sister was twelve, she became a vegetarian. And because I wanted to be just like my older sister, I followed suit. She stopped after a couple years, but to make sure my family didn’t think I was just copying her I ended up staying vegetarian for nine years. I copied a lot of what my sister was doing. She was a trend setter.

I now eat meat, and I love it I do, but I’m pretty sure I could be vegetarian 75% of the time. I love veggie dishes. I’m all about them really, but I live with a man who expects meat with every meal.

This is a totally novel idea to me, and if we’re being honest, it’s a pretty novel idea for mankind.

So I’m always making vegetarian dishes and hoping he doesn’t notice. This pretty much never works, but I try friends. For purposes of money and health, I try.

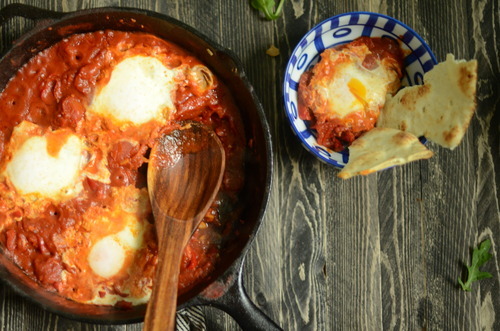
But then something amazing happened. I made this breakfast and Jordan said it was the best breakfast he had ever had. And this breakfast was essentially a thick tomato sauce, filled with peppers and spiked with cumin and coriander, that you make little hole in and cracked eggs into. It’s rich without being heavy and it’s balances the salty, spicy, tart, sweet thing perfectly. On top of that it’s super healthy, takes half an hour to make from start to finish, and it also only takes one frying pan to make, and as someone without a dishwasher, let me tell you, that is wildly important.

image

Shakshuka

(Not surprisingly this recipe is adapted from Jerusalem, the amazing book by Sami Tamimi and Yotam Ottolenghi. This book is amazing, truly, I can’t recommend it enough.)

2 Red Sweet Peppers, thinly sliced

1 can Plum Tomatoes or Cherry Tomatoes (look for brands that don’t add citric acid)

1 Onion, thinly sliced

2 cloves Garlic, minced

1 1/2 tsp Ground Cumin

1 1/2 tsp Ground Coriander

1 tsp Ground Pepper flakes, or in a pinch some Siracha will do

4 Eggs (the best free-range ones you can find!)

Salt and Pepper

3 tbsp Olive Oil

Toast to serve with.

In a large frying pan (cast iron if you have it) warm the olive oil over medium-low heat.

Add in the peppers and onions and cook until the peppers are very soft and the onions are just starting to brown around the edges, about 7-10 minutes

Add in the garlic, stir for about a minute, then add in the spices.

Stir them in until they are fragrant but not burning at all.

Add in the tomatoes and mix.

Bring heat up to medium-high and let simmer for 10 minutes, stirring regularly, until the sauce has thickened.

Bring heat down to medium, and make 4 divets in the sauce.

Crack the eggs into the holes, and cover with a lid for 3 minutes.

While this is happening you can warm up some naan or toast.

When the yolks are still soft but the whites are firm remove the shakshuka from the heat and serve immediately, with thick toast to sop up all the sauces.

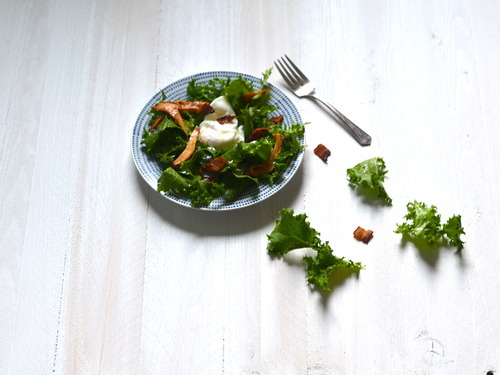
Sunday Salads- Curly Endive Salad with Bacon, Chanterelles, and a Poached Egg

image

Friends. I have no been eating enough salad lately.

I came back from visiting a few months ago on a veggie eating mission. I was so excited about vegetables! And lettuce! I was eating so much lettuce.

I am embarrassed to tell you how much cake I’ve eaten in the last week. How many gross sugary candies that have been put near me that I have scarfed down. How much bread I’ve consumed. It hasn’t been good. I’m not going to give you numbers.

So it’s probably time to get jazzed about salad again. It’s already started a little bit, I walked by my favourite green grocer and they had the most beautiful swiss chard out, and something stirred in me. The part of me that loves healthy foods. The part of me that has been pushed down in favour of sour cherries and fuzzy peaches.

I never eat candy. What is up with me lately?

Anyways. Salad.

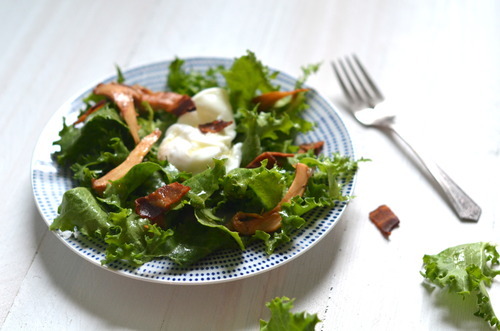
This salad is a slight twist on a French bistro classic. Slightly bitter frissee lettuce, tossed with a dijon vinegrette, sprinkled with flecks of bacon, and topped with a poached egg. It is the best salad. And you can eat it for any meal of the day. It’s a brilliant thing.

There are two twists on this staple. The first was just that I couldn’t find frissee. So I used curly endive. It’s fabulous, but use frissee if you can. Butter lettuce would also be appropriate here.

The second twist is the addition of some beautiful chanterelle mushrooms. I just added these on because I couldn’t resist buying them. I love chanterelles, and there season is so fleeting. You have to put them on everything while you can.

Of course, you could omit them, or use another kind of mushroom, I wouldn’t judge you for that. But if you can find chanterelles. Do it.

image

Curly Endive and Bacon Salad with a Poached Egg, and Chanterelles.

3 cups Curly Endive, washed and torn into small pieces.

100 grams Thickly Cut Smoked Bacon, cut into small rectangular pieces.

200 grams Chanterelle Mushrooms

2 Eggs

1/4 cup + 2 tbsp Extra Virgin Olive Oil

1 tsp Grainy Dijon

2 tbsp Lemon Juice

Salt and Pepper

Bring a large pot of water to a boil.

In a frying pan over medium-low heat slowly render out of the bacon, so it get’s nice and crisp but doesn’t dry out.

Scoop bacon pieces out of the fat and put them on a towel lined plate to cool.

Clean the chanterelles- with a pastry brush, carefully brush out all the dirt. With a paring knife cut the very bottom of the mushroom off, just a tiny bit, and then cut the mushrooms into wuaters or sixths, depending on the size.

In a small frying pan warm up the extra 2 tbsp of olive oil.

Add in the mushrooms and cook until the mushrooms are nicely browned. Season generously with salt and pepper and set to the side.

In a small bowl mix together the remaining olive oil, lemon juice and dijon.

Poach your eggs- gently crack your eggs into the pot of gently boiling water.

Let them cook for about 3 minutes, or until, when gently lifted from the water with a slotted spoon, the whites feel hard but the yolk still feels soft.

Mix the endive with the dressing. Divide it into two bowls.

Sprinkle the bacon and chanterelles onto the lettuce, and then place a poached egg onto each bowl.

And done. Get it in you.

Pumpkin Loaf, and Fun New Jobs.

image

I think it’s safe to say that I always have a project on the go. I’m adding new things to roster all the time, and currently I juggle 6 jobs. Some of them pay, some of them don’t, some of them are things I love, and one of them, serving at a restaurant, is something I do just to make ends meet. It’s a hectic life. But it’s a fun one.

One of the best parts about it, is that I am always meeting new people, doing new things, trying new recipes. And one of my favourite projects right now is with my friend Brett Holland. He is an exceptionally handy guy, who built a solar powered coffee food cart on wheels, that he bikes throughout the city, selling great coffee, and some darn good pastries, if I do say so myself. It’s called On the Grind Cafe

As he’s working out the kinks of the cart, he’s parking at the corner of Union and Jackson (right on the Strathcona bike path!), and if you’re passing by the area, you should probably pop by, drink some coffee, and perhaps get a pastry that I’ve baked.

Right?

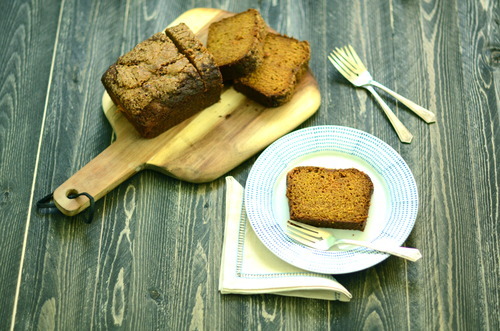
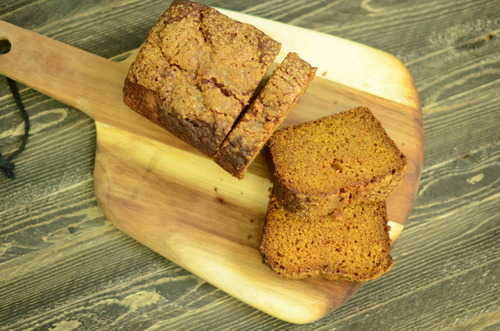
And if you don’t live close by, and can’t get a slice of my pumpkin loaf, you should definitely make some yourself.

It is so moist, and so simple to make, and it just feels like fall. It makes a great breakfast with a coffee in the morning, but it’s also darn good slightly warmed before bed, with a cup of tea.

image

Pumpkin Loaf

Loosely adapted from Smitten Kitchen

1 1/2 cups AP Flour (or whole wheat pastry flour)

1 tsp Baking Powder

1/2 tsp Baking Soda

1 tsp Cinnamon

1/2 tsp Nutmeg

1 cup Pureed Pumpkin

1/2 cup Olive Oil

1 1/4 cup Brown Sugar

2 Eggs

Coarse Sugar to sprinkle on top.

Preheat oven to 350F

Line loaf pan with parchment paper.

In a large bowl mix together to the oil and sugar.

Add in the eggs.

Mix in the pumpkin.

Gently stir the dry ingredients in until just combined.

Pour the batter into the prepared pan and level with a spatula.

Sprinkle the coarse sugar on top and cook until an inserted skewer comes back with only a few moist crumbs- about 30 minutes.

Allow to cool before removing from pan.

Maple Peach Dutch Baby Pancake

image

It has been a whirlwind. There have been parties and weddings and wedding cakes. There have been new jobs, and exciting starts and, of all things, boxing matches. There have been hiking trips and visits from friends, and long summer days.

It has been fun. It has been stressful and crazy and overwhelming but it has been fun.
I am feeling pretty lucky these days.

But it’s time to put my nose to the grindstone. It’s time to start writing here more, in this wonderful little piece of the internet that I love so much. It’s time to start really pushing myself again, and it’s something I’m surprisingly looking forward to.

It’s time.

None of that has anything to do with dutch baby pancakes. Nothing at all really.

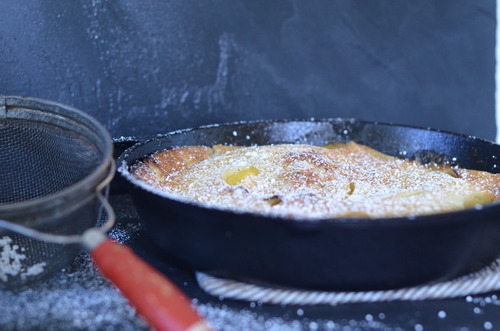
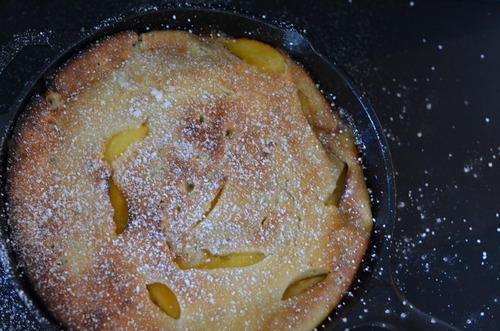
But everything I’ve said thus far has been very honest, and I’m going to stick with that theme and tell you this; this dutch baby pancake is all kinds of wonderful. It’s soft and eggy and filled with peaches, which, and I’m going to make a bold statement right now, are my favourite fruit.

You should probably make it right now. It’s happy as a dessert, but it’s equally as at home as a sweet breakfast, although I’l admit, I ate a whole lot more then I should have for lunch! 

image

Maple Peach Dutch Baby Pancakes

Adapted from a recipe from Bon Apettit

4 medium super ripe peaches

1/4 cup Maple Syrup

4 tbsp Butter

1tbsp Sugar

3/4 cup Flour

3/4 cup Milk

1 tsp Salt

1 tbsp Vanilla Extract

Preheat the oven to 400F

Bring a medium pot of water to a boil.

With a pairing knife cut an X shape into the bottom of the peaches.

Put the peaches in the water for about 15 seconds.

Immediately strain and rinse with cold water until they have cooled.

Again with the pairing knife, gently peel back the skin of the peaches. It should be very easy and have no resistance.

Cut them into 1/4 inch slices.

Melt 2 tbsp of the butter.

Scrape the butter into a blender and add the sugar, flour, vanilla extract, salt, and milk. Blend until smooth.

In a 12 inch cast iron pan over medium heat, melt the remaining butter. Add in the maple syrup stir to combine, then add in the peaches.

Cook, stirring often, for about 7 minutes, or until the peaches are cooked through.

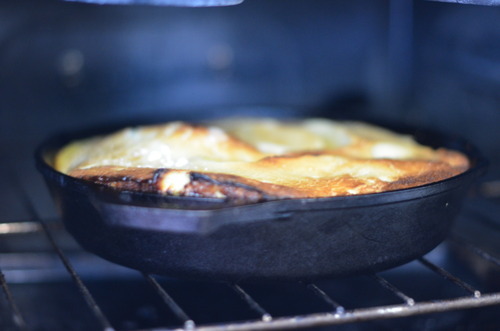
Pour in the batter and move the pan to the oven and bake for about 17 minutes until puffed and brown.

Serve immediately- but don’t worry as the pancake sinks a bit, it will happen no matter what you do!

image

Tuesday Tutorials- Choux Paste + Strawberry Rose Eclairs

image

Choux paste is magical stuff. It’s a simple mix of eggs, flour, butter and milk, but the result is glorious. Mix some cheese into it and once it’s baked it becomes gougeres. Boil small pieces of it and it’s Parisienne gnocchi. Add some apples to the mix and fry it and it’s a fritter. Pipe it into little balls and your nearly at a profiterole, or cream puff. Pipe it a bit longer and you’ve nearly made an eclair.

Seriously, there is little that choux paste can’t do. It’s pretty amazing. You should learn how to make it. Stat.

I don’t know if this happens to everyone, but people always make professional jokes about me, the most common is calling me eclair. This is the lame joke that every man over the age of 65 says when I say I’m a baker

“Oh, really? Should we call you Eclair?” No dude, Claire will do just fine.

But to avoid being bitter and I’ve decided I just need to get crazy good at making eclairs. Somehow this feels like retaliation, even if almost no one knows how good I am at them but me. This way I can chuckle to myself and think at how awesome my eclairs are when old men say this to me.

It’s silly, I know it. But it makes me feel better.

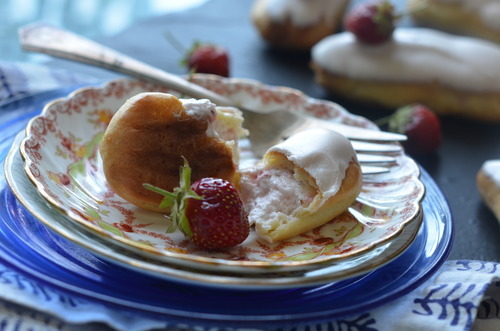
This eclairs are pretty fantastic, if I may. They are super fresh tasting, filled with a whip cream that’s spiked with crushed strawberries, and a bit of vanilla. Then they are carefully dipped into fondant that’s scented with rosewater.

These are kind of ridiculously good. I ate an astonishing number of them.

So many in fact, that I lied to my boyfriend about how many I made. And then I felt no guilt. About the eating or the lying. They were that good.  

image

Rose Eclairs

Adapted from the Bouchon Bakery Cookbook

1 1/4 c AP Flour

2tbsp Sugar

1cup Water

4oz Butter

1 tsp Salt

1cup Eggs

Strawberry filling:

1 cup Whipping Cream

1 cup Strawberries

2 tbsp Icing Sugar. 

Glaze:

1 cup White Fondant

1 tsp Rosewater, or as needed. 

In a medium pot, melt the butter. 

Add in the water and bring to a boil. 

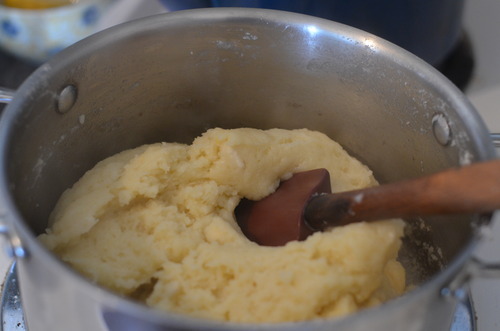
Mix in the salt and flour and stir for about 4 minutes, until it is very thick and the flour is cooked. 

Put the flour mixture into the bowl of a standing mixer fitted with the paddle attachment. 

Start beating on medium speed. Add in one egg.

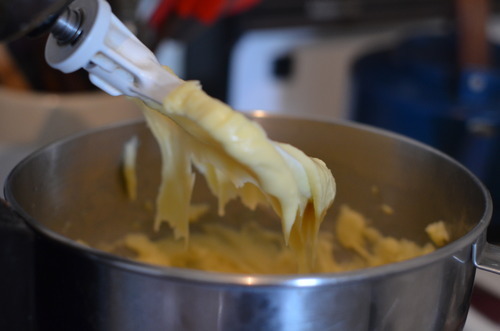
Wait until it is fully combined before adding the next, continueing this until all the eggs are combined and the mixture is soft, shiny and smooth. This is your choux paste!

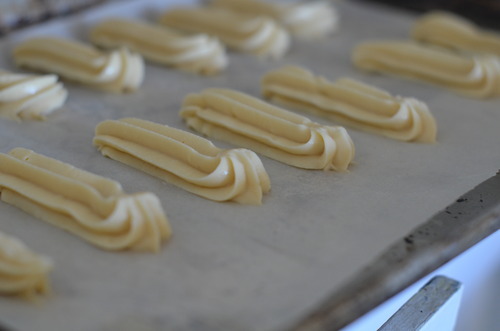
Fit a piping bag with a large star tip, and transfer the choux paste into it. Pipe the shape of an eclair onto your prepared trays, being as careful as you can to make them the same sizes. 

Bake for about 25 minutes, rotating the tray half way through baking. 

Allow to cool. 

Meanwhile make the filling:

Mash up strawberries as finely as you can- this can be done in the food processor or simply with a fork. Strain them through a fine seive. 

Whip the cream to stiff peaks, mix in the icing sugar.  

Fold the strawberry puree in. Transfer to a piping bag with a thin round tip and move to the fridge until ready to use. 

Glaze:

In a double boiler melt the fondant. 

Add in the rosewater and stir to combine. Check for taste. 

image

image

image

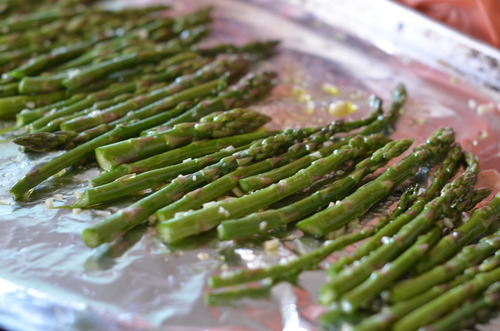
Poached Eggs Toast with Roasted Asparagus and Herbed Ricotta

Unless you’re a cook, I’m not sure if you will appreciate what I’m about to tell you. I’m not sure if you’ll understand that gravity of my next statement, unless you have spend countless years working every evening and weekend of my entire adult life, but I, Claire Lassam, don’t work on weekends any more.

To non cooks let me tell you this- for the first time in our 6 year relationship, my boyfriend and I have the same days off.

It is amazing.

I am not exaggerating when I tell you it’s a small miracle.

I am so very very happy about it.

Jordan on the other hand, is working all the blooming time these days, and about once a week he’s taking the ferry over to Victoria. So I thought I should meet him on the island and we should escape for a couple days. Actually I’m thinking we should do this all the time.

Oh man I love Vancouver Island. I really really really do.

The people are so nice, the weather is so much better, the scenery is totally comparable to where I currently live.

I just love it.

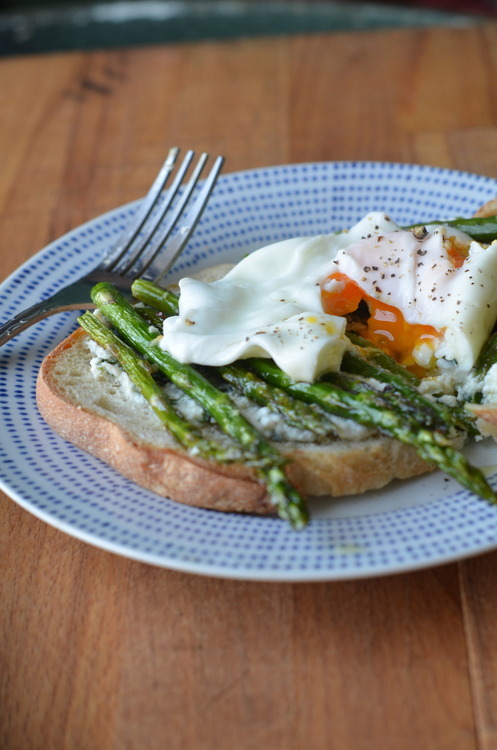
While we were away I made this little breakfast. Nothing fussy- just some toast and asparagus and ricotta with an egg on top, but it’s rich and comforting and so simple to make. And it was just about the perfect thing to eat while sipping hot tea, reading a book, and just generally being very calm, very relaxed, and very happy.

Poached Eggs with Roasted Asaparagus, Ricotta, and Sourdough Toast

4 Eggs

4 pieces Sourdough Bread

1 cup Ricotta

zest of 1 Lemon

2 tbsp Parsley, chopped finely

1 bunch Asparagus

Olive Oil

Salt and Pepper

Preheat oven to 400F

Break the bottoms of the asparagus- don’t cut them, they will break where the woody part ends.

On a lined baking tray spread out the asparagus, and mix with a good glug of olive oil, some and pepper.

Bake for about 15 minutes, or until the tips are crispy, but they aren’t soggy.

Bring a large pot of water to a boil.

Meanwhile mix the ricotta with the zest, parsley, salt and pepper.

Poach the eggs- break them into the large pot of water and turn the water down to a low boil. Cook for about 3 minutes for soft poached eggs.

Toast the bread.

Spread the ricotta mixture on the toast, put a handful of asparagus on top of that, and top each piece with an egg.

Sprinkle some more salt on top and enjoy!

Cinnamon Roll Biscuits

image

People always ask me what my favourite thing is to bake. I tell them I’m a baker and it’s the first question. And here’s the thing of it; I never know what to say.

There are things that I don’t love baking- macarons for instance, which are delicious and wonderful, are also the bane of my existance. Puff pastry, with it’s tedious rolling and folding would fall into that category, but favourites? They’re harder to come by.

But recently I’ve decided. They’re something friends always ask me to make, and then continue to talk about long after the last one has been scarfed up, and they’re something I genuinely really enjoy making.

Biscuits.

Guys, I’m willing to put it down into the internet, a place where things are never deleted. I make great biscuits, and I love making them.

The simple act of cutting in the butter, folding in the buttermilk, pressing out the dough with my finger tips. They are my favourite. I love them.

Which is a good thing, because man oh man, have I made a lot of biscuits lately. I’d say about 300 last week alone.

Oy.

See I work for a Southern restaurant which opened up last week as a pop up fried chicken shack. And what is fried chicken without biscuits? Not much apparently, because those things were flying out of the kitchen. It was all biscuits all the time.

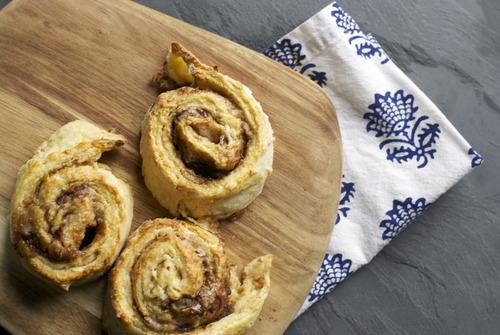
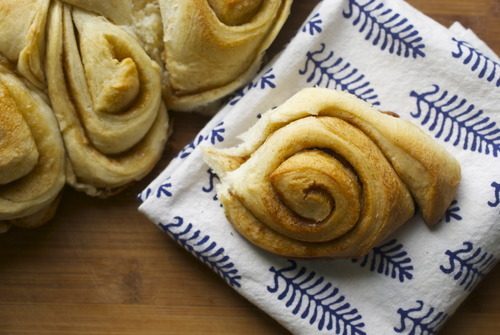
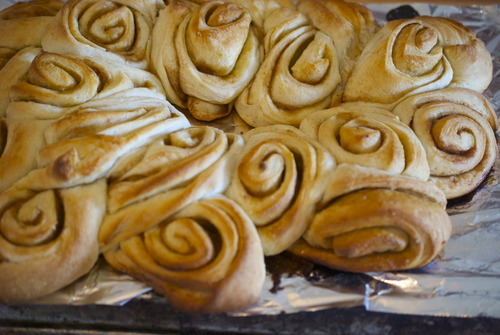
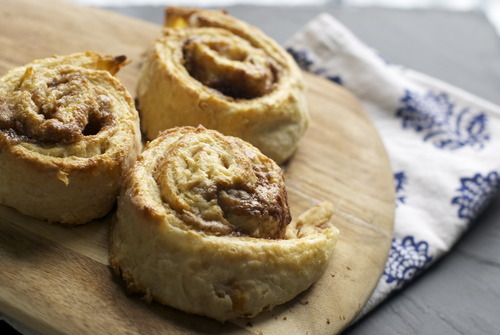
So with the scrappy bits that were left over and a bit to tough to serve, I rolled them out , sprinkled them with cinnamon and brown sugar and rolled them up. They’re like the cookies my mom used to make with left over pie dough, except much, much, bigger and fluffier.

And seriously, those things were delicious. Like, proper, all kinds of wonderful, I will sell these one day when I open a bakery, delicious.

They were one part biscuit, one part cinnamon bun, and all parts fantastic. So there you go.

Biscuits, they are my favourite, whether for dinner, or for breakfast, or for shoving in your face when they’re covered in cinnamon and sugar and still hot from the oven.

image

Cinnamon Roll Biscuits

Adapted from the Tartine Bakery Cookbook

3 3/4 cup AP Flour

1 tbsp Baking Powder

3/4 tsp Baking Soda

1 tsp Salt

1/4 cup Sugar

1 1/2 cups Buttermilk

1 cup Butter, very cold, cut into small cubes

Filling:

1 cup Brown Sugar

2 tbsp Cinnamon

Egg Wash:

1 egg yolk

1tbsp Cream/milk

Preheat your oven to 375F

In a large bowl mix together the flour, baking soda, baking powder, salt, and white sugar.

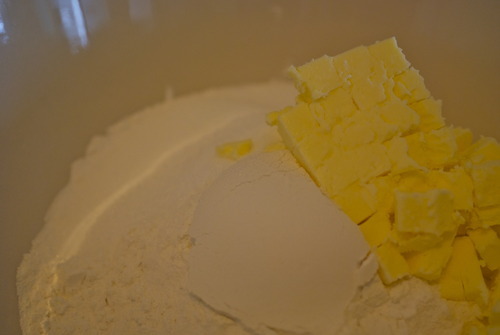
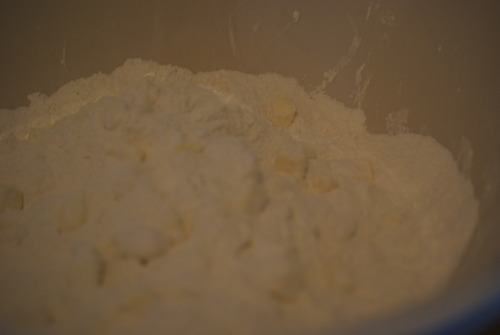
Put in the cold butter and with your hands break the butter into pieces. You want the butter to be in big pieces and very cold- it’s this cold big butter that goes into the hot oven and causes steam which makes the biscuits rise. The pieces of butter should be somewhere between a pea and a fava bean.

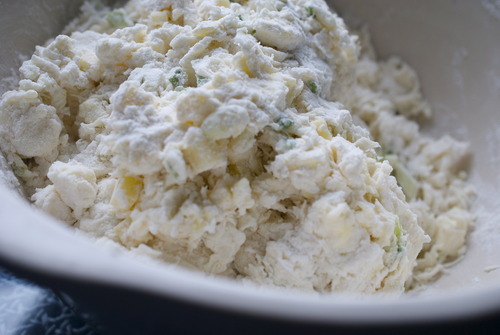
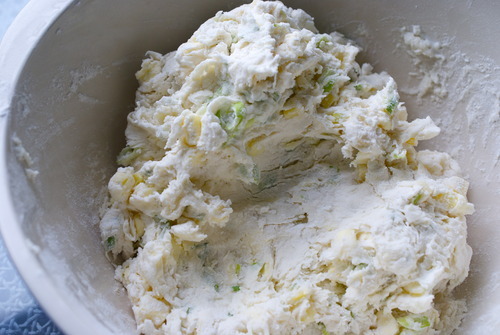
Slowly add in the buttermilk and fold it in gently, adding more if you need it, to make the dough just come together. Make sure your scooping all the dry bits from the bottom of the bowl.

On a well floured surface fold the dough, flatten it out, and fold it again, about 5 times until the dough has come together nicely but isn’t getting firm.

With a rolling pin roll out the dough to about 3/4 inch thick, being liberal with the flour so it doesn’t stick.

Sprinkle the brown sugar and cinnamon on top and roll up the dough into a log.

Cut the dough into 2 inch pieces.

Put on a baking tray and refridgerate for 20 minutes.

In a small bowl mix together the egg yolk and the milk/cream.

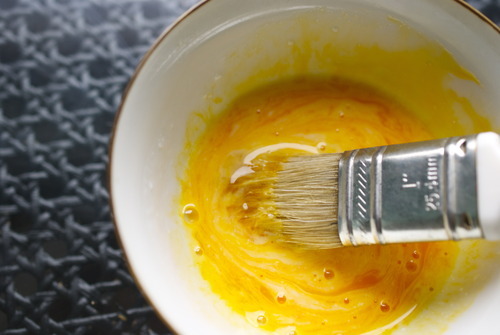
With a pastry brush, brush the tops of the scones with the egg wash and put into the oven right away.

Bake for about 20 minutes or until the tops are starting to brown and your whole house smells incredible.

Let cool for at least 10 minutes before digging in!

Tuesday Tutorials- Danishes!

When I was little my parents had it all figured out. They decided when we were very young, that we could make our own breakfast. And on Saturdays, starting when perhaps parents would decide was too young today, we walked the block and a half to Second Cup and bought breakfast. It was a tiny cafe, part of a larger franchise in Canada, but one where they did all the baking in house. And every Saturday in the summer we would get a cinnamon danish with peach drink, and every Saturday in the winter we would get a peach danish and a hot chocolate. We were creatures of habit.

The couple that owned it were endlessly sweet to us, and we adored this little tradition. Then they hired an extremely rude girl who would serve the adults instead of us and be mean to us kids, so we wrote a very stern letter and we wrote each line in a different colour marker, so you know we meant business. And we never went back. For a few months we tried different cafes that were close to us, but it was never the same. Not long after we started making our own elaborate breakfasts which was, in fact, the beginning of a whole other exciting era. BUT there was a very sweet couple of years in which my sister, my next door neighbour and I ate danishes every Saturday. And it was a wonderful time.

Which is all a long way of saying that I love danishes. An awful lot.

Danish dough is what’s called a laminated dough, because you roll out the dough with a big block of butter in the middle. And then you fold the dough, and roll and fold and roll and fold, and as you do this the butter laminates the layers of dough. This is the same premise behind puff pastry, but here the dough is also yeasted so it rises even more, and has more flavour. The dough is similar to a croissant dough, which I might do a tutorial for soon -let me know if you’d like that in the comments!

Danishes

Makes 32 danishes

3 1/2 tsp Dry yeast

1/2 cup Sugar

1 cup +2 tbsp Milk, warmed

7-8 cups AP Flour

1 tbsp Salt

1/2 cup Butter, soft

2 Eggs

1 1/2 lb (3 cups) Butter

Egg wash (1 egg yolk and 2 tbsp milk/cream)

And your filling! I used raspberry jam- about 2 cups of it.

*This makes a very large batch, which I like because then I freeze half of it, but you can half this easily as well.

Make sure the milk is not to warm, it should just be body temperature. If it’s too hot it will kill the yeast.

Mix the milk, yeast and sugar together. Let it sit until it gets foamy on the top, about 5 minutes. If it doesn’t get foamy it means the yeast is dead, start over!

In the bowl of a standing mixer or in a large bowl if you’re planning on doing it by hand, combine the dry ingredients, only 6 cups.

Add in the yeast-milk mixture in and combine until it starts to come together. If it is still very wet add in a bit more of the flour until the mixture is still soft but not sticky.

Add in the 1/2 cup soft butter bit by bit until it is fully combined, and keep mixing until the dough does the window test- when you take a small bit of dough and stretch it slowly in your hands, it gets so thin you can see through it. If it doesn’t keep mixing!

Now form the dough into the a ball and put it in a clean bowl, cover it with a clean tea towel and let it rise until it has doubled in size, about an hour.

In between two sheets of parchment roll out the butter into a square about 1 1/2 inches thick, put it in the fridge.

On a well floured surface place the ball of dough. Cut 4 slits into the dough at 12-3-6-9 o clocks, about half way in.
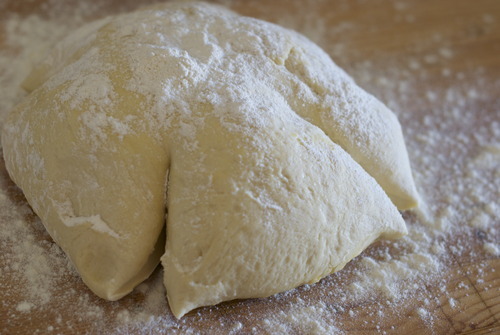
Now roll it out- so that you form a large x shape.

Put the block of butter into the middle
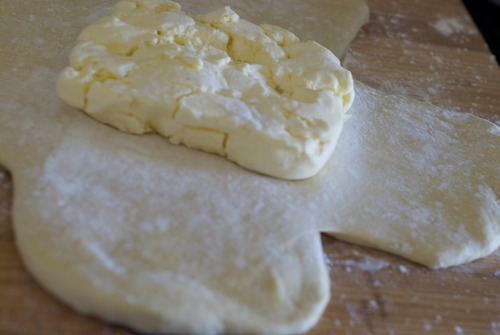
and fold the other pieces on top of it to seal it in.
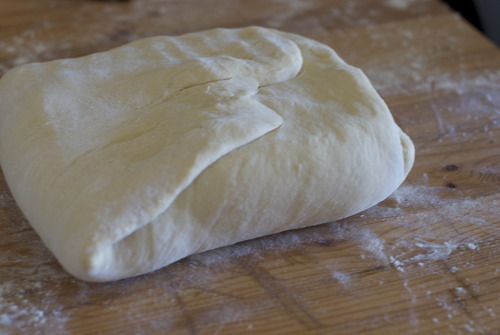
Flour your surface again and place the folded side down.

Roll out the dough to a large rectangle, being careful to make sure the dough is rolled evenly and keeps it’s rectangular shape.
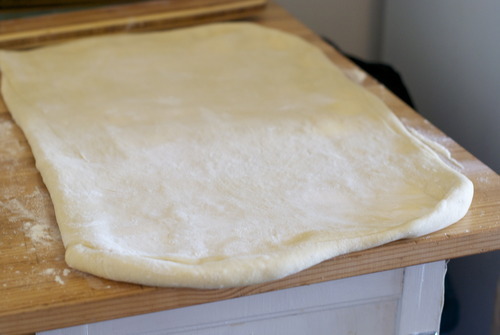
Now fold the dough in thirds like you were folding a letter.
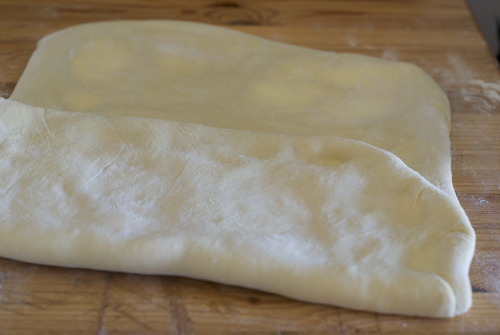
Wrap up this piece of dough, put it on a baking sheet and put it in the fridge for twenty minutes.

After it has chilled repeat this twice more, rolling, folding, and chilling.

Let the dough chill for another 40 minutes.

At this point I cut the dough in half and put half of it in the freezer, but if you are making a large batch you can use it all!
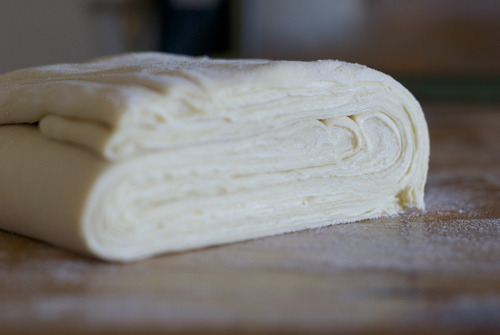
Now roll out the dough! Roll it until it’s about 1/3 inch thick into a large rectangle. You can make any number of shapes with this dough now. Here is how I like to do it best.

Cut it into squares- half a batch of this dough will make 16 danishes.

IMPORTANT! The way you cut the dough will make or break your danishes. You must cut straight down. DO NOT twist a cutter or slice through. Cut straight down. Otherwise your layers will be sealed together.

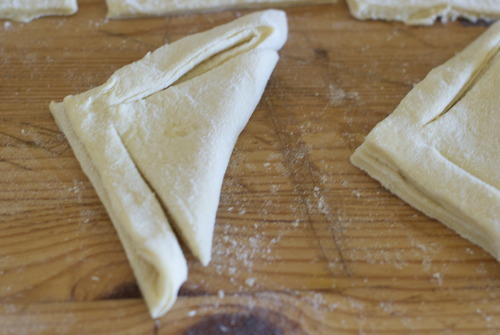
SO I cut them into squares, then fold them diagonally.
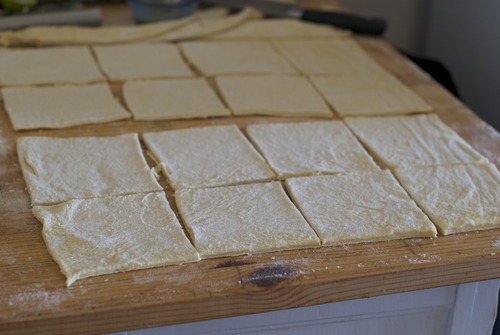
Cut slits in them so that the outsides are disconnected from the middles except on two opposing corners. Unfold them and put them on a parchment lined baking sheet.
Brush with egg wash like I’ve shown here
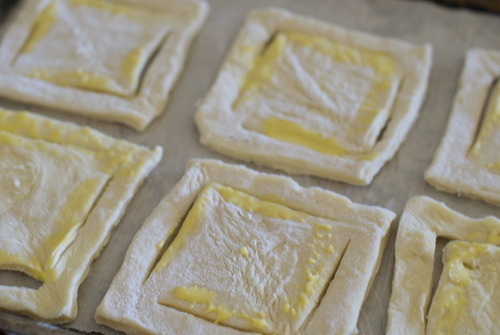
And fold the pieces over.

Now fill them up with whatever filling you have. I used raspberry jam.

Let them sit until they have puffed up nicely, about another 45 minutes.

If there are some scrappy bits of dough from the edges, I recommend sprinkling some cinnamon and sugar on them and rolling them up into straws. You can proof and cook them along with the others no problem.

Meanwhile, preheat the oven to 375F

Use your egg wash once again to brush the tops of the danishes.

Bake until the dough is nicely browned, about 20-30 minutes.

Allow to cool a bit before eating- and I like to top up the middle with some more jam!

And that’s that!

Valentines Breakfast for Dinner- Pancakes with Raspberry Rose Syrup

Here’s the thing of it, guys just don’t like Valentines Day. I have never heard a man sound excited about buying flowers that are suddenly double the price two weeks into February. I have never been told that a male friend is really excited to take their girl out for dinner, or to a show, and I think that’s mostly because men really don’t like being told what to do. So they don’t like being told they have to be romantic. They’re stubborn like that.

Here’s the other thing, all girls like Valentines. Even the tomboy-est of ladies wants a day of the year where the door is opened for her, and roses are sitting out on the table when she gets home. It’s a silly day, but it’s also wonderful. It’s a day of romance, and it’s a day for pink. And I will make no claims pretending to be above it.

It’s just fun.

But what isn’t fun is how expensive it is to go out on Valentines, how much more restaurants charge for things, and how busy it is. Which is why, when I’m not working, Jordan and I make dinner in on Valentines. And this year, I’m proposing pancakes.

I love breakfast for dinner. It is my absolute favourite. It is simple, and not fussy, but it feels special. It feels indulgent, and it feels a little bad for you, and if you have pancakes for dinner, you’ve already had your sweets and you don’t need dessert!
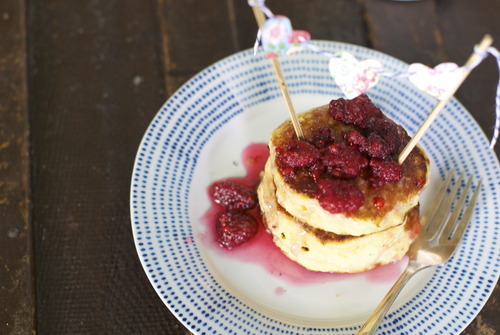
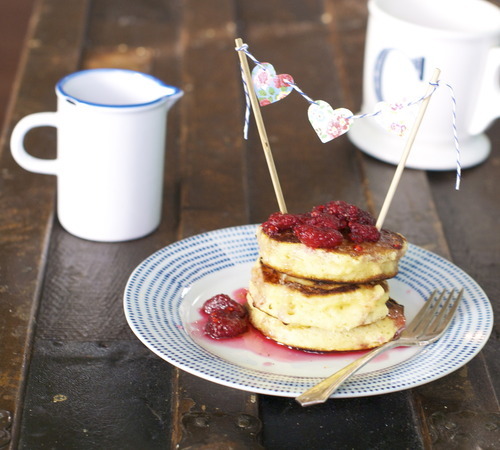
It’s extra festive if you cut out some hearts from pretty paper and sew them onto string, and tie that string onto a couple of skewers so that you have heart bundting on your pancakes. But you don’t have to.

These pancakes are incredibly good, they are the lightest fluffiest pancakes I have ever encountered, and they are best when they are smothered with this raspberry-rose sauce. Just please don’t go and buy the raspberries that are imported from Argentina (unless you live in Argentina, in which I’m super jealous) I used some lovely frozen local ones and they are all kinds of delicious.

Super Fluffy Pancakes with Raspberry Rose Syrup

Syrup:

1 1/2cups Sugar

1/3 cup Water

1cup Raspberries

1 tsp Rosewater- or to taste

Pancakes:

(adapted from Oh So Sinfully Delicious)

2cups AP Flour

1 tbsp Baking Powder

1/2 tsp Salt

1/4 cup Sugar

1 cup Buttermilk, or regular milk with a tsp of lemon juice mixed in.

1/4 cup Melted Butter

2 Eggs

In a small saucepan mix the water and sugar, and over low heat allow all the sugar to dissolve. Add in the raspberries and bring to a boil. Add in the rosewater, adding more depending on your preference and how strong your rosewater is- just don’t add so much it gets perfumey.

In a medium sized bowl mix together all the dry ingredients.

In another bowl mix together the milk, butter and eggs.

Quickly pour the wet ingredients into the dry ingredients and mix until barely combined and still lumpy.

Warm a frying pan to a low heat and add in the oil. Add in big spoonfuls of the batter into the pan. When bubbles start to appear in the top fly the pancakes over.

Cook over low heat- the batter is very thick and they will take a little longer to cook then you may be used to, but don’t rush it by raising the temperature or they will burn.

Just put them on a plate and smother then with syrup and eat up!

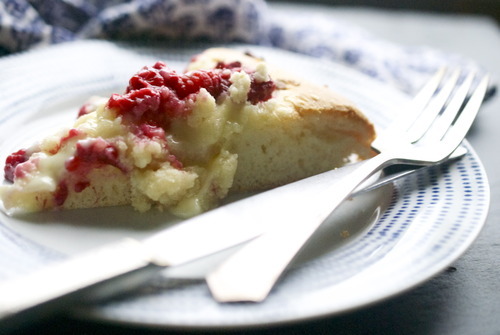
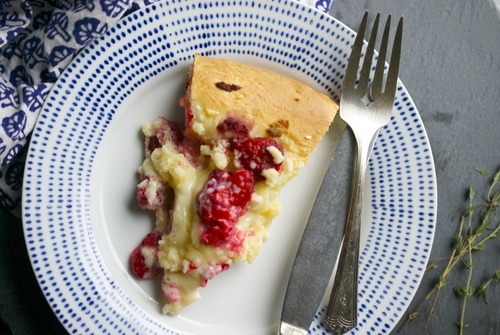
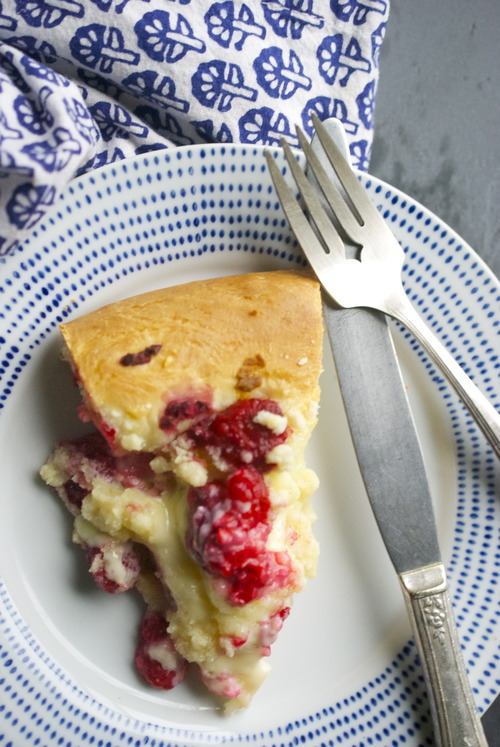
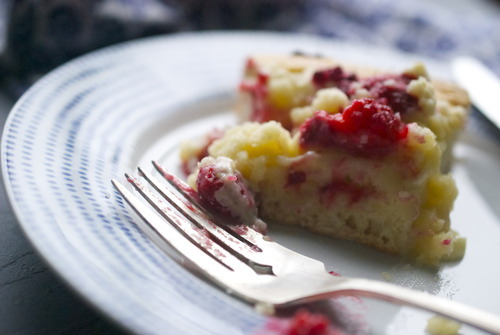
Raspberry and Mascarpone Brioche Galette with Almond Crumble

Now is the time of year I start to miss summer fruit. In the fall there are quinces and apples to get me through, and then the fun of Christmas takes over and I can get excited about mashed potatoes, but by mid January I am sick of it. I want red berries.

It was glee, pure, unadulterated glee that took over me when, at my local market, I noticed some local raspberries in the freezer.

Apparently this dive-y rundown market that I frequent for their unbelievable deals on pecans just froze all of the berries that they didn’t sell this summer. Firstly, this makes perfect sense. Secondly, how did I only just see them?

Oh lord. My week has been made.

We had some friends over recently, and as Jordan and I were flipping through cookbooks deciding what to make, he made several pointed comments about a brioche tart in the Ottolenghi book.. So I, being that lovely charming girlfriend that I am, (self proclaimed at least) decided to make it.

This is the most perfect breakfast. We ate it for dessert, and it was great, but for serious friends, eat this for breakfast. Next time you have people over for brunch, put this out on the table. I promise, they will be friends for life. The whole thing is somewhere between a coffee cake, a tart, and yet so much better. So very much better.

Raspberry, Mascarpone, Brioche Tart

Adapted loosely from Ottolenghi

Brioche:

2tbsp barely warm water

1tsp Dry Active Yeast

1 1/2 cups AP Flour

1/2 tsp Salt

2 tbsp Sugar

2 Eggs

1/2 cup Butter

Filling

3/4 cup Mascarpone

3 tbsp Icing Sugar

1 tsp Vanilla Extract

Zest of 1 Lemon

2-3 tbsp Cream

1 1/2 cup Raspberries, or other red berry

Almond Crumble

1/2 cup Ground Almonds

1/2 cup AP Flour

1/3 cup Brown Sugar

1/3 cup Butter, cut into small cubes

In the bowl of a standing mixer fitting with the dough hook combine all ingredients except butter and mix until it comes together. Continue mixing until you can take a small piece of the dough and, when you stretch it carefully, it will stretch so thin you can see through it. This is called the window test. If the dough rips then keep kneading the dough until you can.

OR You can do this in a food processor fitted with a dough blade, OR by hand. If doing it by hand just mix it all into a bowl until it comes together, then move the dough to a lightly floured surface and push your heels of your hands into the dough. Then fold it onto itself, and repeat this pushing and folding motion until you do the window test.

Put the dough into a clean bowl and let it rise until it has doubled in size, this should take about an hour.

Punch the dough down. You can use the dough right away, but if you’ve planned long enough in advance, the dough will be even better if you put it in the fridge overnight.

If you do put it in the fridge, you will need to take the dough out about an hour before you start to bring the dough back up to room temperature.

When the dough is ready put it onto a lightly floured surface and with your hands stretch the dough out into a large circle. Using a rolling pin will flatten lots of the air bubbles that the dough has been working so hard on producing, so instead use your hands to push from the center out. It does not have to be perfect. This is a free formed galette, and it being a little rough around the edges is totally okay. Pick up the dough carefully and put it on a well floured cookie pan.

Preheat oven to 375F

In a small bowl mix the mascarpone, icing sugar, lemon zest and vanilla together. Add in the cream, tablespoon by tablespoon until you get a texture that is thin enough to spread, but not so thin it will be runny.

Spread this on the brioche dough leaving about an inch around the edges.

Now top with the raspberries.

In another small bowl mix together all the ingredients for the crumble, and with your hands break the butter into the other ingredients. You don’t want to form a cohesive dough, just a crumbly mixture.

Sprinkle this on top of the raspberries. 

Let this sit out for about 20 minutes as a last proof, and then bake until the crust is nicely browned and the center just barely wiggles when you shake it. Take it out of the oven and let it cool for at least 20 minutes before serving.

Tuesday Tutorials- The Best Biscuits

The second instalment in my new weekly column, where I talk about food basics, and give you the step by step know-how to do it at home.

The restaurant where I work recently started to do brunch, and before we opened I was chatting with the chef about what kinds of pastries he might want. The original idea was croissants which, despite obviously being delicious, are also so tedious to make, especially in a kitchen with as little counter space as ours, so I threw out the idea of making biscuits.

This did not go over.

Biscuits are dry, biscuits are bland, biscuitsare over done, and never delicious.

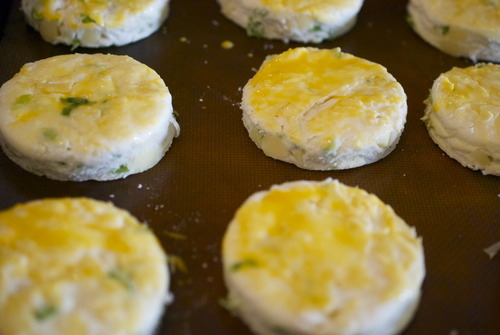
So I, being the super competitive person that I am, decided to make him some. I made savoury biscuits, ones with chunks of cheddar and dots of scallions, and let the restaurant fill up with the smell of cooking butter and melting cheese. And then I dared him not to like them.

He is not the first person I have converted to a biscuit lover, but if we’re being real here, most of this credit can go to my Grammy.

Grammy made “Cloud Biscuits”, light, airy, full of layers and always moist. Growing up they were always made with fish chowder, or if we were lucky, for breakfast. Hers was a different recipe than this, because hers was a different time. In the Great Depression butter was a serious luxury, so the cloud biscuits were always made with shortening, and just a tablespoon or so of the good stuff to give it flavour. But it was the texture that got me hooked.

Which is funny, because most people complain about the texture, they think dry, over cooked, bland. So here is THE way to make the perfect biscuit.

Let’s start out with a couple basics first

  • The way you get layers is by using big chunks of really cold butter. When that cold butter goes into the hot oven it produces steam, and if you have the right formations of butter you get perfect light fluffy biscuits.

  • You need to knead, but not too much. Flour has gluten in it, and gluten will make your biscuits tough. But you need to knead your dough in order to get in the layers. This means really feeling the dough, as you knead it when it starts to get tough, it’s time to stop.

  • Use good ingredients. If your going to add cheese to your biscuit, make it good aged cheese. There are only a few things in your biscuits, make sure they’re adding something.

  • Be creative! There are a million things you can do to a biscuit, don’t limit yourself and have fun with the possibilities!

Biscuits

(Adapted from the Tartine Bakery Cookbook)

4 1/2 cups All Purpose Flour

1tbsp Baking Powder

1tsp Baking Soda

11/2 tsp Salt

1/4 cup Sugar

1cup Unsalted Butter, very cold, cut into cubes

1 3/4 cup Buttermilk

Eggwash

1 Egg Yolk

1tbsp Cream, milk, or buttermilk

Option

1 1/2 cup Aged Cheddar, chopped

1 bunch Scallions

In a large bowl mix together all the dry ingredients.

Add in the butter and with your hands, or a pastry scraper, break the butter up into lima bean sized pieces, or about the size of your pinky finger nail.

Add in any flavourings, in these ones I used cheddar and scallions, but the world is your oyster on this one.

Carefully pour the buttermilk in and mix it with a spatula or spoon until it just begins to come together.

Push the dough down with the palms of your hands and then fold the dough in half. Continue doing this 4-6 times or until you just start to feel resistance.

Put the dough onto a lightly floured surface and roll out to about 3/4 inch thick.

Cut the dough out into whatever shapes you like, traditionally savoury are round and sweet ones are cut into triangles.

Put them on a baking sheet lined with a silpat or parchment paper and put them in the freezer for 15 minutes.

While the biscuits are chilling preheat your oven to 400F

Take the biscuits out of the freezer and brush the tops with your egg wash.

Put them in the oven and immediately turn the temperature down to 350F

Don’t open the door for the first 12 minutes, afterwards you can open it and turn the pan so that it cooks evenly.

After about 20 minutes the tops should be nicely browned and you should be able to see a significant rise. Allow to cool before eating.

Finnish Cardamon Bread

Sometimes in Vancouver it rains. Some might say that most of the time it rains but I’m feeling optimistic so I’m going to say sometimes.

Sometimes in Canada it gets bloody freezing. That doesn’t happen much in Vancity, but it has this deep humid chill that gets into your bones. It’s a wet cold that creeps into your shoes, and blows down your neck, and sneaks behind your ears.

Sometimes around here you wake up and think “I can’t possibly go outside, it is to cold, what can do to justify just not leaving the house.”

Sometimes, you need to stop feeling guilty and just make Finnish Cardamon Bread.

You need to have your whole house smell like rising bread, and you need to feel that comforting squish of yeasted dough between your fingers, and you need to sprinkle cardamon on it, which seems at first a wee bit crazy, but very quickly becomes the best idea you’ve had all day.

Sometimes you just need to let it rain, you need to make a strong cup of tea, and you need to eat Finnish cardamon bread.

And you need to be happy.

Finnish Cardamon Bread

Adapted from Pure Vegetarian By Lakshmi

2 cups Lukewarm water

1 1/2 tsp Dry Yeast

1 cup Sugar

1 tbsp Cardamon, ground

5-6 cups AP Flour

1 cup Butter

Brown sugar and cinnamon for sprinkling

In a small bowl mix together the water, yeast and a pinch of the sugar.

Let this get foamy on the top- that’s how you know your yeast is still alive. If after about 5 minutes you see no movement start over. Make sure the water is about the temperature of your hand- much hotter and you’ll kill it, much colder, and you’ll make it dormant.

In the bowl of a standing mixer fitted with the dough hook, OR in a food processor with the dough attachment, OR in a bowl with some serious arm muscles, put the remaining sugar, salt, cardamon and flour and mix in the yeast mixture.

Continue kneading the dough until it all comes together, and when you stretch a small piece of it, it gets thin enough to see light through.

Shape it into a ball, put back in the bowl and cover it. Wait until the dough has doubled in size, about an hour- an hour and a half.

Prepare a pan by covering it with parchment paper.

On a lightly floured surface roll out the dough into a large rectangle, about a foot and a half by 3/4 of a foot.

Sprinkle the brown sugar and cinnamon on top- use as much or as little as you want, I used about a cup and a half of sugar and a teaspoon of cinnamon.

Roll the dough a long the long end so that you have a long thin roll.

You can either cut them into rounds and place them on a pan, or you can cut slices almost all the way through, on a diagaonal. Then flip every other slice to the other side side so that going left right left right and you can see all the pretty slices.

This is easier to do on the pan then on a board and then have to move it.

Cover the dough with a tea towel and wait until it has doubled in size again, another hour or so.

Preheat the oven to 350F.

Bake your bread until it is golden brown.

Wait at least 15 minutes before getting into them! (Bread that is still hot is hard to digest!)

Apple Donuts at Edible Vancouver

Last week I threw out my back. I could barely walk, I couldn’t work, and mostly I just moped around, and the handsome man I live with was unbelievably nice to me. Made me dinner every night, helped me in and out of baths, brought me ice packs, and hot packs, and just generally got a lot of bonus boyfriend points. 

So I thought I should throw some love his way, and when I was feeling a bit better I woke him up with homemade apple donuts. 

To see the recipe, check out a (self proclaimed) charming story about my dad, and see some more pictures you can head over to Edible Vancouver. 

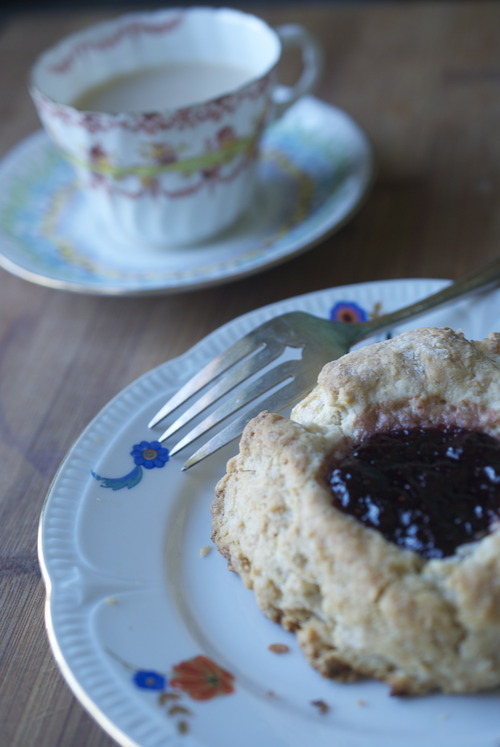
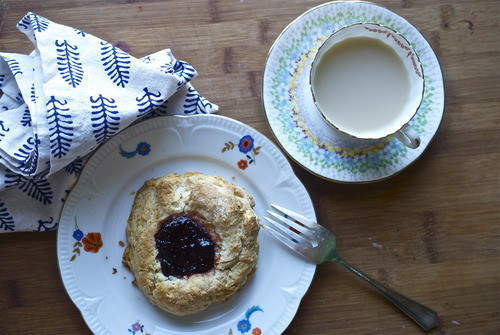
Birds Nest Scones- AKA Coconut and Jam Scones

It’s the time of year where my apartment starts filling up with canned goods. I swear it’s by osmosis, I couldn’t possibly spend this many hours, this often, making preserves and yet there they are, slowly taking over cupboards and shelves, the pickles(!), the peppers(!), the peaches(!). It gets out of control.

This is the sort of thing that drives someone a bit batty at times, but in the winter when all is dark, this is a glorious glorious thing, one that should not to be scoffed at.

However, it is also the time of year where scrap bits of jams begin to accumulate. The parts that don’t quite fill a jar, so get pushed into old jars and thrown in the fridge where I begin to forget about them. I do, I’ll confess to that.

So lately I’ve been trying to use up these scrappy bits, sandwich them with cookies, spread them on the morning toast, or today, bake them into scones.

My favourite way is to put them into birds nest cookies, you know, the coconut ones with the raspberry jelly in the middle. But today I didn’t feel like cookies, I felt like breakfast, and while there is definitely overlap there, birds nest cookies lie firmly on the side of unhealthy inappropriate breakfast choices. So instead, I made coconut scones and put a big blob of jam in there. It’s like having someone put jam on your scone for you, and it’s also like eating a cookie for breakfast. By which I mean, it’s the best thing ever. And you should probably make these. Stat.

1 cup AP Flour

1/2 cup Spelt flour/whole wheat flour/AP flour, whatever you prefer

2 tbsp Baking Powder

1 cup Unsweetened Shredded Coconut

1/4 tsp Salt

1/2 cup Butter, very cold, chopped into cubes

2/3 cup Coconut Milk

1/2 cup Jam (any flavour you like)

Preheat oven to 400F

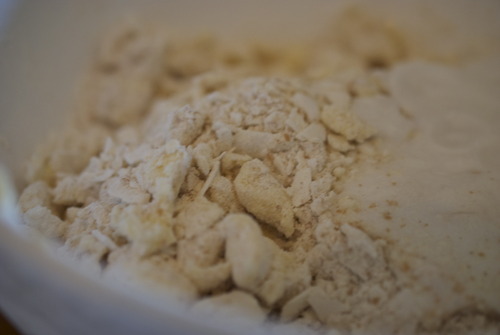
In a medium sized bowl mix together all the dry ingredients.

Add in the butter and mix with your hands until the pieces of butter are the sizes of large peas.

Add in the coconut milk and mix until just combined.

Carefully mix in any bits of flour that are on the bottom of the bowl by folding the dough a few times, in half pressing it down, then folding it in half again. You’ll want to do this at least 5 or 6 times. If the dough gets wet add a speck more coconut milk.

Chill dough for at least 20 minutes.

Remove from freezer and divide into 6 pieces.

Without squishing or removing the layers you’ve just folded in shape them into circles and then press deep imprints in the middle. I don’t think I added enough, so if your judging by the pictures above, I’d use a bit more.

Divide the jam in the middle of the scones and chill for another 10 minutes.

Bake for 20 minutes or so, until the tops are getting golden brown and the jam has set a bit in the middle.

Allow to cool slightly before serving!

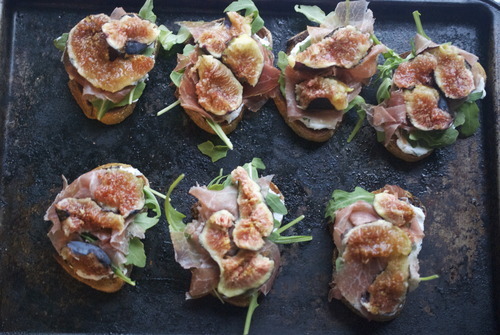
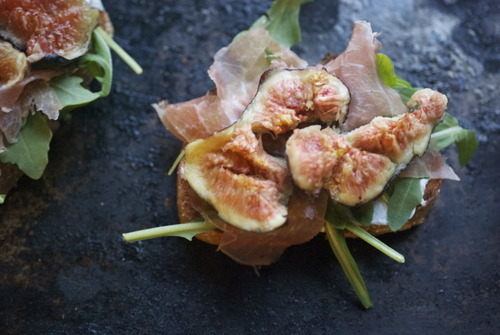
Fig and Prosciutto Toasts with Minted Ricotta

Anyone who knows me knows that I love meat. I have worked at butcher shops, I have an inordinate love of game meats, and God knows I love bacon. But a lesser known fact is that I was a vegetarian for 8 years growing up. I gave up a proscuitto-free life a long long time ago, with some serious pushing and prodding by a chef I worked for, but on the condition that I would only eat meat I could feel ethical about. Free-range, organic whenever possible, and way less meat then the American dream.

The lovely man that I live with is a very accomodating sort, he puts up with me, which does say quite a bit, but he puts his foot down on a few matters, that the floor gets swept every night, that windows should be open while we sleep, and there should always be meat with dinner. Now, I’m all for keeping the floor clean, and I have an extra quilt at the foot of my bed to stay warm but we definitely disagree on the meat issue.

So we’ve started compromising by using a little bit of meat. It’s unusual for us to eat a whole chicken breast, or 8oz of steak each, but it’s common to find some bacon in a pasta, or some local prawns in curries, or in this case, a few slices of proscuitto.

It’s not much, it isn’t. But it is enough to make him feel like he’s getting some meat in a meal, and it’s small enough to make me feel ethical about the whole thing.

And that doesn’t touch on taste, which is big and important here. There are few things better in life than figs and prosciutto. But on top of crispy bread with ricotta? We is very close to perfection.

4 slices of good crusty bread

1/2 cup Ricotta Cheese

6 slices of Prosciutto, very thinly sliced.

8 large Mint Leaves, finely sliced

Zest of 1 lemon

6 Figs

Handful of Arugula

Olive Oil

Salt and Pepper

In a small bowl mix the ricotta with the mint, lemon zest, salt and pepper.

Cut the bread in half and toast until just getting warm.

Spread the ricotta mixture on the toasts.

Put a few leaves of arugula on top.

Tear apart the prosciutto and figs and layer them atop of the arugula.

Drizzle with olive oil and eat eat eat!