Entertaining- Late Summer Provence Menu

image

There is little I like more than having friends over for dinner. There is the prepping, the cooking and the baking, things I love and do every day. But that is followed up with wine, and eating, and laughing. It is the most satisfying thing to me. I love entertaining.

Here’s a secret too- I kind of think I’m awesome at it.

I know that sounds like I’m blowing my own horn, and that’s totally because I am. But I have a cute little apartment, and I can bake a mean cake, and Jordan- the handsome man who lives with me- stirs a great cocktail. We have people over fairly often, and I think we’re good at it.

image

There are reasons for that though, and mostly it’s because I have cooked, and currently bake, professionally, and Jordan used to bartend. After cooking for a hundred people a night for 5 years making dinner for a few friends doesn’t seem so hard. And when you paid your way through school keeping people liquored up, it’s almost second nature in your own home to keep wine glasses filled.

I’m often surprised though when we head over to other peoples houses how stressed out they get. They often make things fussier than they ought to be, or doubt their skills, or find themselves rushing around at the last second.

So I thought that I might start writing about throwing a great party. About planning a menu that is simple and elegant, what you can make in advance, and little ways to make your dinner table pop. And, with the help of Jordan, I think I’ll also give some suggestions for drinks.

And so, without further ado, here is our first Entertaining section!
image

Menu

Warmed Spiced Olives

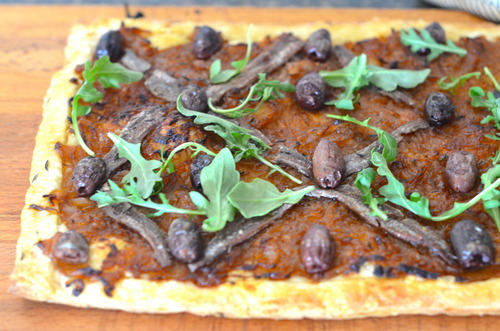
Pissadierre with Arugula Salad

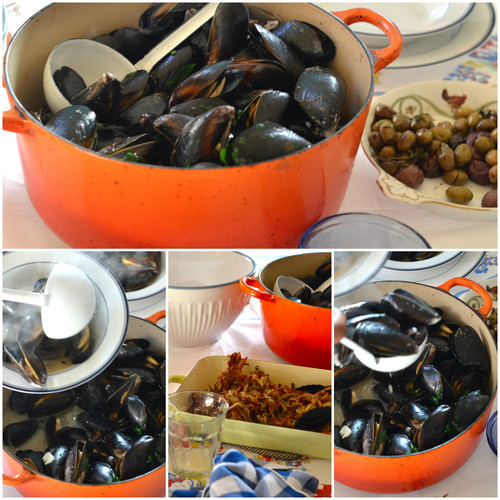
Local Mussels with Bacon, Garlic, and White Wine

Baked Frites with homemade Aoli

Hazelnut and Fig Jewel Cake

To many of you this might seem like the simplest and most basic thing, and it is, but when I’m thinking of a menu I try to stick to one geographical area. No “Around the World” dinners, I keep it simple by staying in one region. For this dinner everything was inspired by the South of France.

I also hate serving food in the kitchen and bringing it to the table. I love family style meals, I don’t want to pretend I’m in a restaurant when I’m at home. Plus, this way you don’t have to ask your host for seconds!

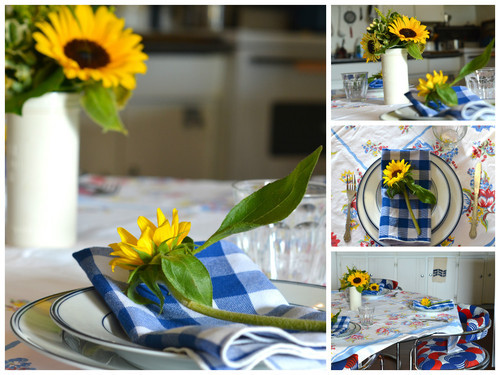
In the theme of the South of France as well I wanted a relaxed table setting, I had a small bouquet of sunflowers in the centre, a floral tablecloth and my blue gingham napkins. I set each setting with appetizer and dinner plates and I marked each spot with an additional sunflower.

I love sunflowers, and while they may not be abundant in Provence, they are aplenty here. And they go beautifully with my “flame” coloured pot that I served the mussels in.
image

To help make sure you know what to do when;

Timeline:

Two Days Before Hand:

  • Get all ingredients

  • Make Puff Pastry

  • Spice Olives

  • Caramelize Onions

The Day Before

  • Clean your house

  • Do small things like iron your tableclothes and make sure you have enough clean napkins. You don’t want to worry about things like that when your guests are arriving.

The Morning Of:

  • Make the puff pastry

  • Make and bake the cake

  • De-beard the mussels

  • Make Aoli

Now go clean yourself up, do another tidy (I sweep my flour about a thousand times before guests arrive, as I am always dropping things!) and pour yourself a glass of wine.

An hour before your guests arrive:

  • Bake your pissaldierre

  • Make your salad dressing

  • Set your table up nicely.

When Guests Arrive

  • Warm up and serve the olives

All the rest can be done as you’re ready- from tossing the salad and serving it up with the tart, to cooking the mussels for the main.

Recipes:

Spiced Olives:

1lb Mixed Olives (I like to get a mix of green and black, but I always try to find nicoise olives, the tiny Italian black olives. Ooh I love nicoise olives!)

1 tsp Edible Lavender Flowers

1 tbsp Fresh Thyme

1 tbsp Olive Oil

1 tsp Fresh Rosemary, finely chopped

Mix all the ingredients together and let sit as long as possible, for at least 1 day.

When you’re ready, warm them in the oven (they are very forgiving, any temperature between 300 and 450) for about 5 minutes.

Serve with an additional bowl for the pits.

Pissaladiere

1 cup Cold Unsalted Butter, cut into cubes

2 cups AP Flour

1/2 tsp Salt

1/2-3/4 cup Ice Water

4 medium Onions

1 tin Good Quality Anchovies in Olive Oil

15 Pitted Nicoise Olives or other good quality black olives.

1 tbsp Olive Oil

Sa;t ad Pepper

(To see my full tutorial for the dough click here.)

On a clean countertop toss the cubes of butter into the flour and salt.

With a rolling pin roll out the butter, flipping it over often with a spatula or pastry scraper.

Continue to do this until all the butter is in long thin strips.

Pour 1/4 cup of the water on top and gently fold the butter mixture on top of it.

Continue doing this, adding more water as needed until a cohesive dough is formed.

Chill the dough for at least an hour, or up to two days.

Slice the onions thinly.

In a medium pot over medium heat warm the olive oil.

Cook the onions, stirring regularly, for about 10 minutes.

Lower the heat and let the onions cook until very soft and a light even brown color. The onions should be soft enough that you squish them in half when you pinch them with your fingers.

These can be kept in the fridge for up to 5 days.

To Assemble:

Preheat the oven to 400F

Roll out the dough on a well floured surface, to a rectancle about 1/4 inch thick (it can be square or circular in a pinch!)

Carefully cut the edges of the dough- you don’t want to drag the knife- that can seal the layers together. Instead cut straight down.

Now do the same thing about 1 inch from the edge of the dough, creating a border. You do not want to cut all the way through.

Put the dough on a parchment lined baking sheet.

Spread the onions on the pastry- keeping clear of the border.

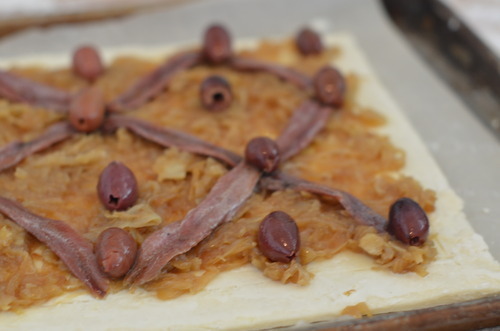
Now put the anchovies in a lattice pattern over the onions, and then place an olive at the point where the anchovies meet.

Bake for about 35 minutes or until the crust is a uniform brown colour.

Allow to cool for at least 30 minutes before serving.
image

Arugula Salad

3 cups Baby Arugula

1 cucumber, thinly sliced.

Juice of 1 Lemon

1 tsp Dijon

3 tbsp Olive Oil

Mic the lemon, dijon, and olive oil. Season to taste with salt and pepper.

Add arugula and cucumber and toss. Serve immediately.

Mussels with Matchstick Frites

8 thick slices of Double Smoked Bacon, cut into 1/2 inch pieces

1 cup White Wine

2 cloves of Garlic, minced.

4 lbs Mussels

1/4 cup Unsalted Butter

Debeard the mussels- each mussel has a hairy bit sticking out of it- this is like it’s arm to attach to rocks etc. Pull it off- this is done easily enough by hand but is extra easy with the help of tweezers.

In a large pot over medium heat cook the bacon until it is very crispy.

Strain off the fat.

Add the garlic and cook until it is fragrant, but not browning.

Add in the mussels and the wine and immediately put a tightly fitting lid on top.

Shake the pot vigorously and cook for about 3 minutes.

Take off the lid. When the mussels are all opened add in the butter and shake again.

When butter is melted you’re ready to serve!

Frites

3 lbs Yukon Gold Potatoes

1/4 cup Olive Oil

1 tbsp Rosemary, finely chopped

1 tbsp Salt

1/2 tsp Pepper

Preheat oven to 450F

With a mandolin (or a lot of patience and practise) cut the potatoes into matchstick sized pieces.

Coat with the olive oil, rosemary, salt, and pepper.

On a parchment lined baking sheet spread out the potatoes

Bake, stirring every 15 minutes or so until the potatoes are evenly cooked, about 45 minutes.

Garlic Aoli

1 Egg Yolk

1/4 Extra Virgin Olive Oil

1/4 Canola Oil

1 tsp Dijon

1 tbsp Lemon Juice

Salt and Pepper

(For my full tutorial click here!)

In a small bowl mix together the yolk and dijon.

Slowly whisk in the olive oil, drip by drip, whisking vigorously to keep it emuslified.

If it starts to get thick add in some lemon juice.

Add in the canola oil the same way.

Season with salt and pepper!

Fig and Hazelnut Jewel Cake

1/2 cup Butter, softened

1/2 cup Brown Sugar

1/2 cup White Sugar

1 tbsp Vanilla Extract

2 Eggs

3/4 cup AP Flour

1/2 cup Ground Hazelnuts

1 tsp Baking Powder

1/2 tsp Salt

about 10 Figs, cut in half

Coarse Sugar for Sprinkling.

Preheat oven to 350F

Butter and flour a 10 inch tart pan, or round cake pan with a removable bottom.

In a large bowl cream together the butter and sugars.

Add in the eggs one at a time. Add the vanilla.

Mix in all the dry ingredients, except the coarse sugar. Stir until just combined.

Spoon the batter into the prepared pan and smooth the top with an offset spatula.

Place the figs in a circular pattern around the pan, like a flower.

Sprinkle with the coarse sugar and bake until an inserted skewer comes out with only a few crumbs, about 35 minutes.

Tomato Tart Tatin

Here’s the thing about tomatoes. They might be my favourite veggie (I know I know, they’re a fruit, but you know what I mean.). They’re sweet, they’re savoury, they’re juicy.

Here’s the other thing about tomatoes. If you put them in the fridge, they suck. They get grainy, they get flavourless, they loose everything special about them.

Here’s the thing about my local green grocer: they put their tomatoes in the fridge at night.

So when I got all excited about fresh tomatoes the other day and they were all warm from sitting in the sun I grabbed myself a big bag full. And then I got home to find grainy sad tomatoes, far from their peak.

image

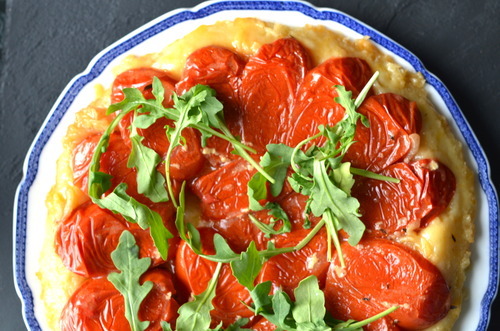
Here’s the thing about sad grainy tomatoes: they’re still pretty good when you cook them. Usually this means tomato sauce, but the other day it meant this fabulous tart tatin that was on Design*Sponge a couple weeks ago. This is a damn good tart, it’s very savoury (a lot of veggie tatins tend to be a bit sweet for my taste) the pastry is flaky and light, but just buttery enough to have enough flavour to hold it’s own with the tomatoes, and the onions and cheese help bring a depth to it that rounds the whole thing out.

I didn’t use the crust from the original recipe, because I tatins should always be made with puff in my books, and after last Tuesday’s Tutorial on quick puff we’re all pros right? Right.

image

Tomato Tart Tatin

(Adapted from Design*Sponge)

Dough:

1 cup Cold Butter, unsalted, cut into cubes

2 cups AP Flour

1/2 tsp Salt

1/2-3/4 cup Ice Water

For a full tutorial on making this dough with lots of pictures, click here!

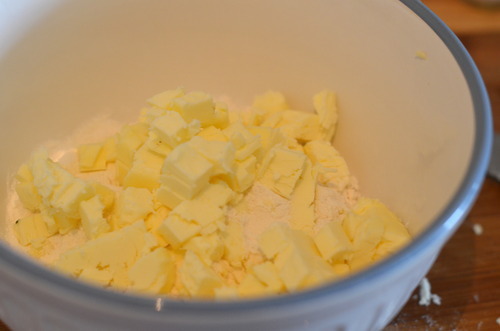
On a clean surface toss the butter cubes with the flour and salt.

With a rolling pin roll out the butter so that all of it forms into long thin strips.

Add the water, a couple tablespoons at a time and fold the dough, push it out, add more water, and fold the dough again.

Continue this until it has come together as a cohesive dough.

Wrap with plastic wrap and put in the fridge for at least an hour, or up to two days.

Tart Tatin:

1 recipe of quick puff pastry dough (aboce)

10 Roma Tomatoes

1/4 cup Grated Parmesan Cheese

1 Onion, thinly sliced

2 tbsp Olive Oil

1 tbsp Fresh Thyme Leaves

Preheat oven to 400F

In a medium pot over medium heat warm up 1 tbsp of the olive oil.

Add in the onion and cook, stirring often, for about 10 minutes, until they are soft and just starting to brown on the edges.

Grease a pie pan with the remaining olive oil. Cut a circular piece of parchment and line the bottom of the pan.

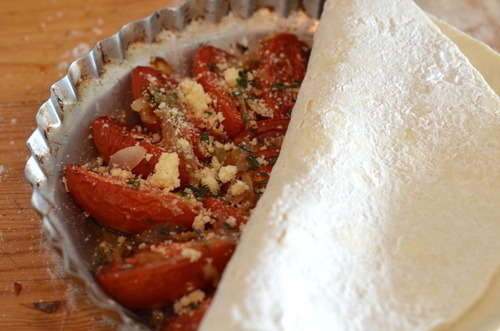
Slice the tomatoes in half and put them skin side down in the pan. They will shrink up as they cook so overlap them a bit so that when they are cooked they will still cover the bottom of the pan.

Top them with salt and pepper, the onions, parm and thyme.

On a lightly floured surface roll our the dough into a circle just larger than pie pan.

Cut the edges to clean them up and put it into the pan.

Bake for about 40 minutes, or until the pastry has turned a nice brown and the juices bubbling up the sides are browned as well.

Allow to cool for about 10 minutes before flipping it onto a plate.

Serve while warm or at room temperature.  

image

Pasta with Wild Leeks, Mushrooms and Arugula

image

A few weeks ago I was back in Toronto visiting my Mom. We visited my best friends cottage, we spent an absorbanant amount of money on Quebec cheese, and we walked around the city. It was a wonderful trip, and a much needed bought of relaxation.

An old friend of mine, Andrew, came over and we made dinner and hung out with my mom and her boyfriend, John. When we left the house to go grab a drink down the street we both turned to each other and said, almost at the exact same time “I hope I’m that when I’m a real grown up”.

Don’t get me wrong, they have their hardships like everyone else, obviously, but there is something wonderful about the way they live. My mom walks to work everyday, John plugs away at his PhD in the study, (as one of her friends put it to me “leave it to your mother to find a 60 year old student!) they live in this beautiful house, and eat gorgeous food. They seem to live really great lives.

My mom is also a fabulous cook, so when I visit most of our time is either spent in her wonderful neighbourhood shopping for ingredients or in the kitchen. We spend a lot of time in the kitchen.

My mom cooks tons of vegetables. Tons. It’s one of the most wonderful things about the way she cooks actually. She is teeny tiny, and eats lots of cheese and pasta and delicious things, but she also eats more veggies that probably anyone else I know. There is always a salad with dinner, but beyond that, she just puts more vegetables in everything. Almost anything cooked gets a bag of arugula, or spinach, or pea shoots wilted into it.

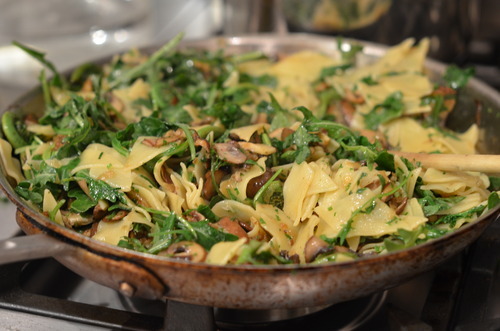
This is a great example of that for me. Just a simple pasta of sauteed ramps, and mushrooms, with a handful of parm and a sprinkling of parsley, thyme and basil. And then a huge bag of arugula wilted into it. Don’t get me wrong, I wilt greens into my pastas all the time, but she just adds so much more than I normally would. And it results in something wonderful, something sharp and bit bitter, but mostly just more flavourful.

image

1 box Pasta

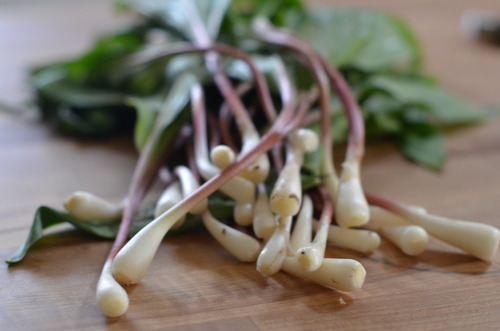
1 bunch Ramps, or Wild Leeks, or Traditional leeks, cleaned and sliced on a bias

2 cloves Garlic, minced

3 cups Cremini Mushrooms, sliced thinly

1/2 cup Freshly Grated Parmesan, or Grano Padano

8 cups Baby Arugula

1/4 cup Parsley, chopped

3 tbsp Basil, chopped

2 tbsp Thyme, chopped.

Olive Oil

Salt and Pepper

Bring a large pot of water to a boil. Salt generously and cook the pasta to the directions on the box. Strain.

Meanwhile, on medium high heat warm up a good glug of olive oil.

Sautee the leaks for about 3 minutes. Add in the mushrooms and cook until starting to caramelize, about another 5 minutes.

Clear a small spot in the middle of the pan and add in another splash of olive oil.

Cook garlic for about a minute until it is fragrant but not browning.

Mix in the leeks and the mushrooms.

Add in the pasta, herbs, and cheese and then toss in the arugula so that it starts to wilt but isn’t soggy. Season liberally with salt and pepper.

Serve immediately.  

Tuesday Tutorials- Better Than a Restaurant Steak with Wild Mushroom Sauce

image

About a year ago I wrote an article for a local online magazine on finding the best steak in the city. I ate some great steaks, and had an extremely happy boyfriend who came along with me. But while I was eating my way through the city, I realized something; there is no reason to order steak at a restaurant.

I’m going to tell you something else; I don’t buy expensive steaks.

I’ve never been a big tenderloin fan, I find sometimes the tenderness verges on mushy and that totally freaks my mouth out. I like something with a bit more chew, although not too much. Mostly though, what I like in the cheaper cuts of meat is the flavour.

The rich beefy flavour comes from muscles that have moved and been worked, which means cuts like the flank, the flatiron, the sirloin are all great cuts of meat, if you give them a little love.

And to back up this argument, I encourage you to think of steak frites in France, where the steak is always a bit tough.

The easy way to get the sinue out is to marinade it. It takes nothing but planning your meal 12 hours in advance, which, well, I know that doesn’t always happen. In that case, buy a ribeye.

But if your feeling prepared, and thought about dinner the night before, marinade your steak.

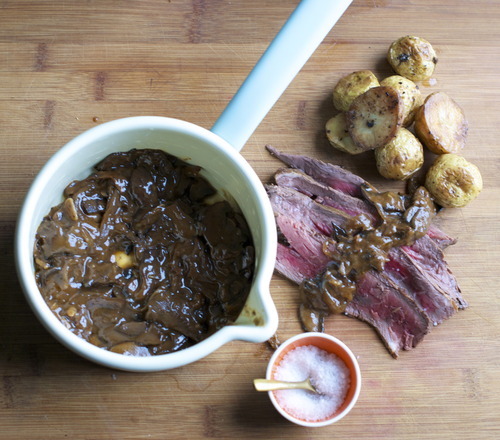
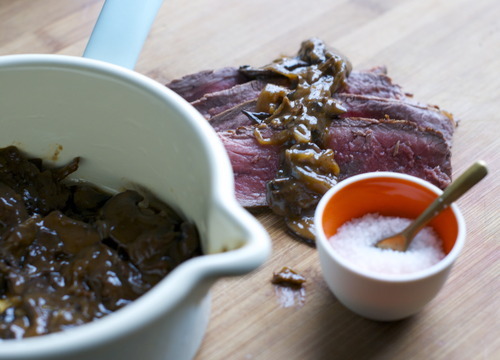
The other thing that is easy to do at home is make a super fantastic sauce. It requires not much money, and about 15 minutes of your time. And the rest, as they say, is gravy. Sorry, I couldn’t help it.

image

Seared Steak with Wild Mushroom Red Wine Sauce

1 Steak, Flat Iron, Flank, or some Sirloin

2 tbsp Balsamic Vinegar

2 tbsp Soy Sauce

1 tbsp Salt

1tsp Black Pepper

Sauce:

1 pckg Dried Wild Mushrooms (I found dried chanterelles!)

1 lb Cremini Mushrooms, thinly sliced

1 Large Onion, thinly sliced

2 cloves Garlic, minced

1c Red Wine

1 tbsp Flour

3 cups Chicken Stock

2 tbsp Tomato Paste

Olive Oil

Salt and Pepper

Mix all the ingredients in a medium sized bowl. Cover with seran wrap and put in the fridge overnight.

Put the dried mushrooms in a small bowl and cover with 1 cup of water.

In a large saucepan over medium high heat, warm a big glug of olive oil and start sauteeing the cremini mushrooms. You want to get them nice and browned.

When they’re brown push them to the edges to the pot and in the middle, put in the onions and brown them. Add the garlic and the tomato paste and and stir them until the middle as well.

Push that to the outside of the pot and put in another glug of olive oil and the flour. Stir that for a minute.

Now mix it all up and add the red wine and stir to make sure there are no lumps.

Add in the chicken stock.

Season with salt and pepper and simmer for 10 minutes.

Once your sauce is simmering, start getting ready to cook your steak.

Bring a large saute pan on a medium-high heat and let it get hot for about 3-4 minutes.

Pour in a glug of canola oil, and tilt the pan to spread the oil all over the whole pan. Carefully put the steaks into the pan, making sure you face it away from you so no oil will splash at you.

Cook until it is deep brown and then flip it and do the same.

Here is a trick for telling how done your meat it: Relax your hand, and then bring your index finger to your thumb. With your other hand press the meaty bit of your hand at the base of your thumb. That is what your steak should feel like when it’s rare.

When you do the same with your middle finger your steak is medium rare.

When you do the same with your ring finger your steak is medium.

When your do the same with your pinky finger your steak is medium-well

Anything past that is well done.

BUT If your not sure pull it off and let it rest for a minute and then cut into a corner of it.

If your steak is cooked let it sit for at least 5 minutes before you cut.

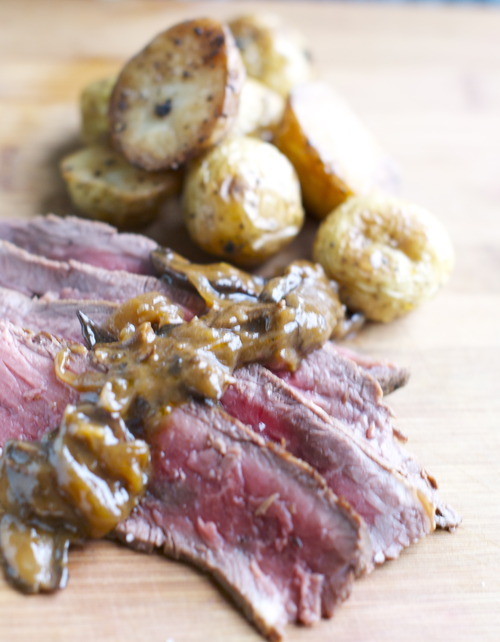
Then, slice it into thin strips, and serve with your perfect sauce!image