Spring Coloured Meringues

image

When I first moved into this little apartment it was all sorts of crazy colours, there was purple, and lots of yellow and the living room was a bright Tiffany’s blue. And I hated all of them, I painted it all white, but the blue. For some reason I just needed the blue. After living here for 5 years, I think I’ve finally figured it out- it reminds me of the sky that we only get a couple months here.

See, Vancouver does this thing, this dreadful thing where it rains all the bloody time. It starts in late September, early October if we’re lucky and it keeps raining until May, or June, or sometimes, even July. I’m not joking, we sometimes only get 3 months of sunshine. Last year was one of those years, and maybe that’s why I feel like I’m struggling so much with it right now.

My saving grace in all this rain is the flower shop I live on top of. It regularly wins best florist in the city and with good reason, it has the most gorgeous blooms in every imaginable colour, all the time. And even when everything is grey and gloomy and damp when I walk out my door I see heaps and heap of fresh flowers. They even take the old roses and sprinkle their petals half way down the block, to bring a bit of colour even further. They really are the best.

So lately I’ve become obsessed with their colours, the soft peachy ranoculous, the bright red of the tulips, and these soft yellow roses, oh those roses. They give me hope that it is sunny somewhere in the world. And so I made these meringues to bring some more of that colour in, because in this dreary grey city, sometimes you just need colour.
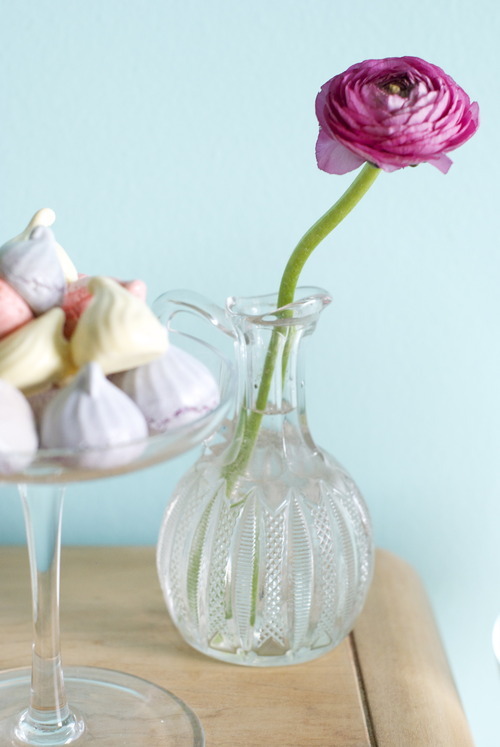
Spring Coloured Meringues

6 Egg Whites

1/4 tsp Salt

2/3 cup Sugar

1 cup Icing Sugar

1 Vanilla Bean, OR 1 tsp Vanilla Extract

Food colouring

Preheat your oven to 200F

In the bowl of a standing mixer fitted with the whisk attachment, whisk the egg whites and the salt until they hold soft peaks. 

Tablespoon by tablespoon add in the granulated sugar, letting the sugar you added before be mixed in completely before adding in the next. 

Now let it keep running until it holds very stiff peaks, if you’re unsure just keep it on for another 20 seconds or so. It’s very important that it is very stiff. 

Add in your vanilla bean or extract. 

Now dump in all the icing sugar and mix that in- bring the speed down to low so the sugar doesn’t fly everywhere. 

Divide the meringue into as many bowls as you want colours- I did 4. 

Add the colouring and mix until they are all combined, or not and let it be swirly- it’s up to you!

You can use any piping tip you want to here, star tips are popular, so are just a plain circle. It’s up to you!

Now just pipe them onto trays lined with parchment or a silpat (don’t grease the trays though!! Your meringues will ruin if you do!) and bake for about an hour and a half until they are completely dried out. Check them every 25 minutes or so to make sure they aren’t getting any colour. If they are browning turn down the heat and rotate the trays. 

Allow to cool completely then eat, decorate, or put in baggies for gifts- these will store for up to a month in an airtight container. 

Tuesday Tutorials- Gnocchi

I wish that I had a cuter story about gnocchi. I wish my Nona had taught me to rice the potatoes, that she had shown me just how much flour you need to bring the dough together. I wish, to be honest, I could even remember her gnocchi, but I don’t. Although I’ve heard my mom and cousin talking about how incredible they were, the only time I remember her serving us gnocchi I also remember her apologizing for not making them from scratch.

But such is memory I guess, flawed.

So instead I learnt how to make gnocchi from reading the French Laundry Cookbook, where Thomas Keller goes to great length to explain how to make them. There are many ways to make gnocchi, and many debates on how to do it best, should you use starchy russets potatoes, or waxier Yukon golds? Should there be cheese added, or just on the top? If you use another starch, a squash, or a sweet potato, is it still gnocchi?

Over the years since I first forayed into the world of homemade pastas I have tried just about every possible method and every possible ingredient, and this is the recipe I always come back to. I use Yukon golds- waxier, so that you get more control over the starch content, no cheese in the gnocchi, it’s an unnescessary flavour, and it detracts from what is darn close to perfection to begin with. And you can call it a squash gnocchi, or a sweet potatoe gnocchi, but again- if it ain’t broke, don’t fix it.

Gnocchi are surprisingly simple to make, you roast the potatoes, push them through a potato ricer or through a seive, to get very fluffy potatoes, and then you add in a few eggs and a touch of flour and knead it together until it barely forms, and then roll it, cut it, and boil it. It’s also wonderful because it freezes brilliantly, so if you make a bigger batch you can keep some for later.

While it is simple, and just about anyone can do it, I should note that it takes a quick hand, and the first time you do it you should stick to a small batch and just practise the technique. Gluten, the protein in wheat, forms at 55C and you want the dough to come together before it cools down past that temperature, so you must work quickly and keep a cloth over your dough as you go. And always have a pot of water boiling so you can test the little pastas, and make sure the consistently is just right.

,

Gnocchi

Adapted from Thomas Kellers The French Laundry Cookbook

2lbs Yukon Gold Potatoes

1- 13/4cups AP Flour plus lots more for rolling 

3 Egg Yolks

2 tbsp Salt

Preheat the oven to 450F

Poke some small holes in the potatoes with a fork on every side, and then lay them on a baking sheet and bake until an inserted knife goes in and out without any resistance, about 45 minutes to an hour.

Bring a small pot of water to a boil.

As soon as the potatoes have cooled just enough to touch, put a towel over the rest of the potatoes, take one and cut it in half. Without peeling it, put it flesh side down in the ricer and press it in until no more potato comes out. Repeat with the rest. If you don’t have a potato ricer you can take a sieve and press it the potatoes through with the back of a large spoon, this is a bit more time consuming, but totally effective- I have done it many times.

When the potatoes are all riced make a well in the middle of the bowl.

Add in the eggs and a bit of the flour, and the salt. Mix until it has barely come together. If the dough is sticking to your hangs you need some more flour.

Again add in a bit more and check again, making sure your hands are clean.

One the dough is supple, but not sticky your in business.

Take about a cup of the dough out. Put a tea towel over the rest.

Flour the surface of your counter generously and roll out the reserved dough. I roll mine with both hands, and when it starts to feel a bit too long, I just cut it in half and do each hald seperately, the dough will break if you are too rough with it.

With a pastry cutter or a knife cut the dough ito small logs. You can at this point roll them to get ridges on a gnocchi board or the back of a fork but I find this to be not too important. Now put them on a ery well floured tray and shake the tray a bit so that each piece is totally covered in flour. They will stick together if you are not diligent about thi.

Now put a couple in your boiling water to test. If you haven’t added enough flour they may break apart. If they do just mix in another small handful. If they don’t keep going!

Repeat with the rest of the dough until you have lots of lovely little gnocchis all ready to go.

If you are planning on freezing some/all your gnocchi put them in the freezer as they are on the tray covered in flour. After a couple hours take them apart and put them in a freezer bag and put them back.

Bring a very large pot of water to a boil. If you are using frozen gnocchi use the biggest pot you have and do it in batches, otherwise they will bring down the water temperature too much and won’t cook properly.

Salt the water generously and put your gnocchi in!

When they rise to the top they are ready to be put in your favourite sauce and eaten with abandon.

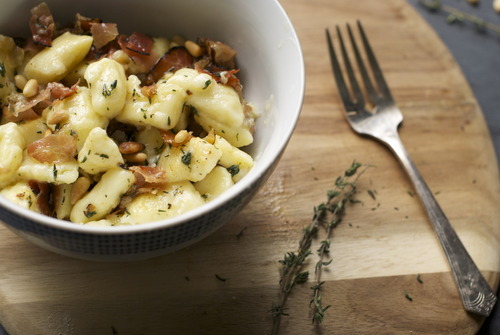
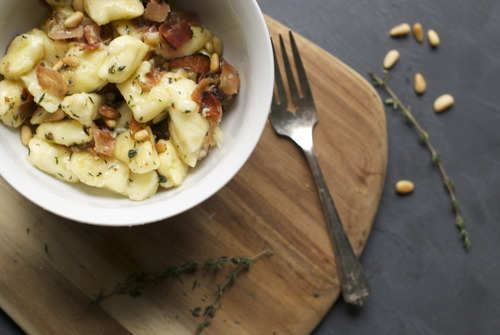
Here I have sauteed some garlic and shallots in some olive oil, added in some pancetta, and topped it off with toasted pine nuts. The simplest and most delicious dinner!

Sunday Salads- Semolina Crusted Cauliflower with Arugula and Capers

image

Phew.

The last month has just about taken it out of me. Valentines was very near the death of me. For serious.

The thing about doing the pastries for 4 different restaurants is that, when one is busy usually all of them are busy. And then it gets crazy.

Post Valentines there will be lots of deep breathing, lots of yoga, and lots of writing. I know I’ve been bad to you you all lately. I just haven’t had a chance to breath lately.

But now is the prime time to start again, to write again, and to eat salads again.

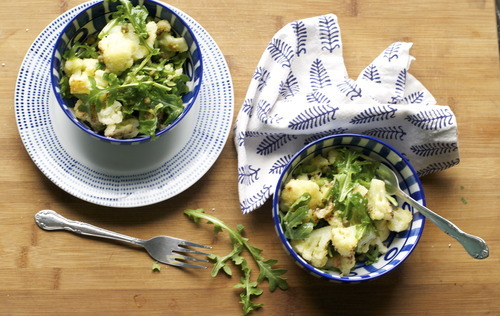
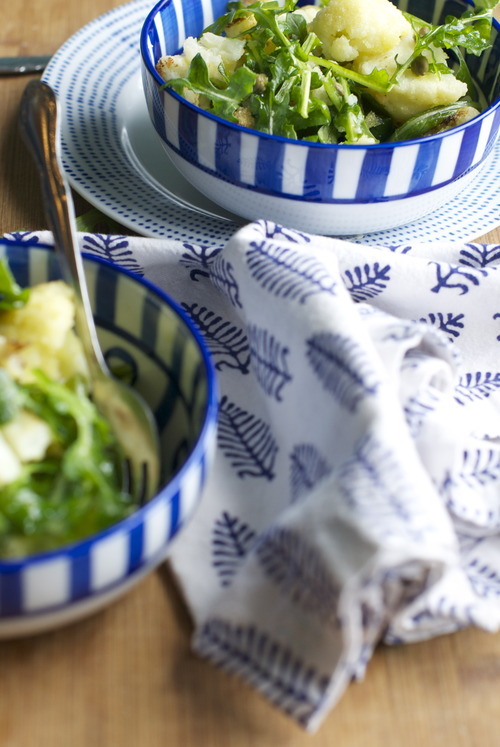
This one is one of my all time favourites, one I make pretty regularly and one that gets lots of praise every time I do. It’s full of super crispy cauliflower, peppery arugula and the sharp acid of capers. It’s admittedly, not one of the healthiest salads I make, I know it, and you could bake the cauliflower if you wanted to, I have and it’s still good, but there is just something about it when it’s pan fried in bubbling olive oil that just makes it better. It might make everything better.

image

Semolina Crusted Cauliflower with Arugula and Capers.

1 head of Cauliflower

1 cup Semolina Flour

1 cup Olive Oil

Half a Lemon

1 tsp Dijon Mustard

1 tbsp Capers- I like the really little ones if you can find them

2 cups Arugula

Bring a large pot of water to a boil

Mix a tsp of salt with the semolina flour in a medium bowl.

In another medium bowl mix together the lemon and mustard and slowly mix in a couple tablespoons of olive oil. Taste and add salt to your liking.

Meanwhile cut the cauliflower into small-ish florets.

Generously salt the water and blanch the cauliflower for about 1 minute.

Drain it well and immediately mix it into the semolina flour and toss to coat.

In a large saucepan over medium- high heat warm about a quarter of a cup of olive oil.

Put in half the cauliflower and fry until it’s nicely browned.

Drain off the oil, and put the cauliflower into the bowl with the dressing.

Repeat this process with the rest of the cauliflower, adding more olive oil as needed.

Mix in the capers and arugula and serve immediately.

Valentines Breakfast for Dinner- Pancakes with Raspberry Rose Syrup

Here’s the thing of it, guys just don’t like Valentines Day. I have never heard a man sound excited about buying flowers that are suddenly double the price two weeks into February. I have never been told that a male friend is really excited to take their girl out for dinner, or to a show, and I think that’s mostly because men really don’t like being told what to do. So they don’t like being told they have to be romantic. They’re stubborn like that.

Here’s the other thing, all girls like Valentines. Even the tomboy-est of ladies wants a day of the year where the door is opened for her, and roses are sitting out on the table when she gets home. It’s a silly day, but it’s also wonderful. It’s a day of romance, and it’s a day for pink. And I will make no claims pretending to be above it.

It’s just fun.

But what isn’t fun is how expensive it is to go out on Valentines, how much more restaurants charge for things, and how busy it is. Which is why, when I’m not working, Jordan and I make dinner in on Valentines. And this year, I’m proposing pancakes.

I love breakfast for dinner. It is my absolute favourite. It is simple, and not fussy, but it feels special. It feels indulgent, and it feels a little bad for you, and if you have pancakes for dinner, you’ve already had your sweets and you don’t need dessert!

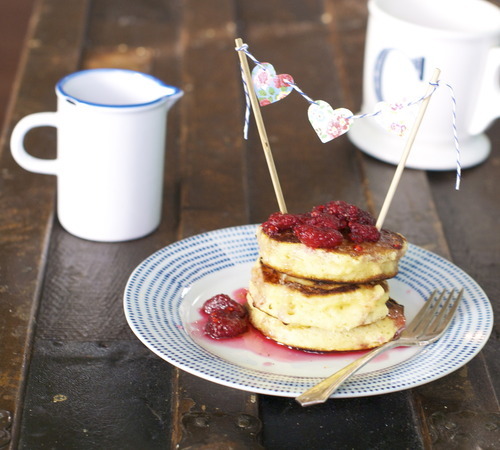
It’s extra festive if you cut out some hearts from pretty paper and sew them onto string, and tie that string onto a couple of skewers so that you have heart bundting on your pancakes. But you don’t have to.

These pancakes are incredibly good, they are the lightest fluffiest pancakes I have ever encountered, and they are best when they are smothered with this raspberry-rose sauce. Just please don’t go and buy the raspberries that are imported from Argentina (unless you live in Argentina, in which I’m super jealous) I used some lovely frozen local ones and they are all kinds of delicious.

Super Fluffy Pancakes with Raspberry Rose Syrup

Syrup:

1 1/2cups Sugar

1/3 cup Water

1cup Raspberries

1 tsp Rosewater- or to taste

Pancakes:

(adapted from Oh So Sinfully Delicious)

2cups AP Flour

1 tbsp Baking Powder

1/2 tsp Salt

1/4 cup Sugar

1 cup Buttermilk, or regular milk with a tsp of lemon juice mixed in.

1/4 cup Melted Butter

2 Eggs

In a small saucepan mix the water and sugar, and over low heat allow all the sugar to dissolve. Add in the raspberries and bring to a boil. Add in the rosewater, adding more depending on your preference and how strong your rosewater is- just don’t add so much it gets perfumey.

In a medium sized bowl mix together all the dry ingredients.

In another bowl mix together the milk, butter and eggs.

Quickly pour the wet ingredients into the dry ingredients and mix until barely combined and still lumpy.

Warm a frying pan to a low heat and add in the oil. Add in big spoonfuls of the batter into the pan. When bubbles start to appear in the top fly the pancakes over.

Cook over low heat- the batter is very thick and they will take a little longer to cook then you may be used to, but don’t rush it by raising the temperature or they will burn.

Just put them on a plate and smother then with syrup and eat up!

Sunday Salad- Raw Winter Veg Salad with Horseradish

Oh man, I just love the winters farmers market. I’m completely surprised every time I go by how much is still available, despite the weather. Now, that’s not to say that I live in a place that gets a proper Canadian winter, it rarely, if ever, snows here, but it gets cold enough that I certainly have no burning desire to go outside. But things are still growing, and the cold is preserving the apples and pears, and and I can still buy slews of kinds of root veggies. 

And there is a certain energy at the farmers market too, and it doesn’t fade away with the sun, there are still kids everywhere, and people laughing, and having samples of the greatest Asian pears, or the new kind of smoked cheddar.  There’s a sense of adventure when you go to the farmers market, but maybe that’s just because it’s nearly always pouring rain. It makes you feel a little hard core. 

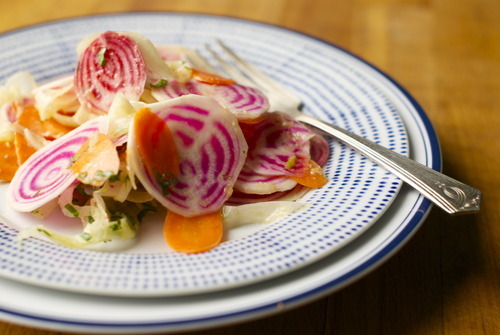
This is a salad made with only very pretty winter veg, and served very simply. The sort of salad that takes 5 minutes to put together, but gives you that crispness that I crave from raw vegetables. The kind I always think I have to forfeight during the cold months, before I remember that with the help from a mandolin to slice them very thin, the texture can take me right back to the days of warmth and sunshine. 

5 small Beets, of any kind

1/2 head Fennel

3 small Carrots, of any kind

3 tbsp Olive Oil

1 tbsp Lemon Juice

1 tbsp Finely chopped Parsley

1 tsp-1 tbsp Horseradish- fresh of from a jar

Salt and Pepper

Peel the carrots, or if they’re very small just wipe them down with a damp cloth. Cut them into thin thin slices, either by hand of with a mandolin. 

Slice the fennel the same way. 

Peel the beets, and then slice very thinly too, this is definitely easier with a mandolin. 

In the bottom of a medium sized bowl mix together the lemon, dijon, olive oil, and the horseradish. Mix in a bit and see how it tastes. If you can find fresh horseradish you won’t need as much, if your  using the jarred kind and it’s a new jar, you won’t need much more. If it’s been sitting in your fridge for a long time you might need quite a bit. 

Add in the vegetables and the parsley and mix it all together. 

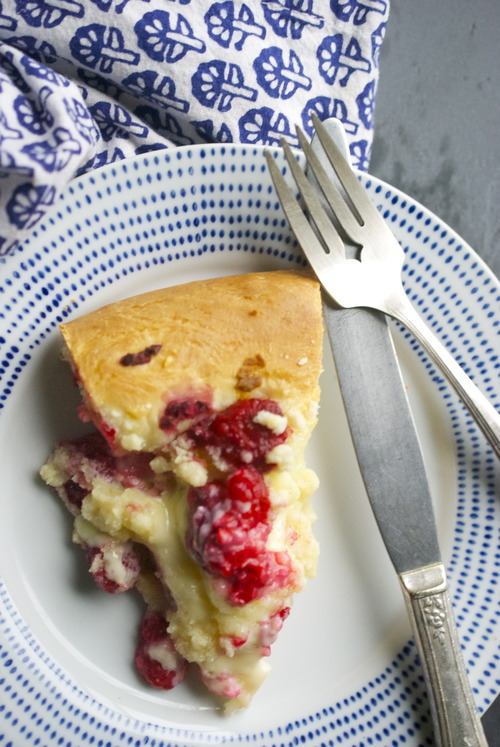
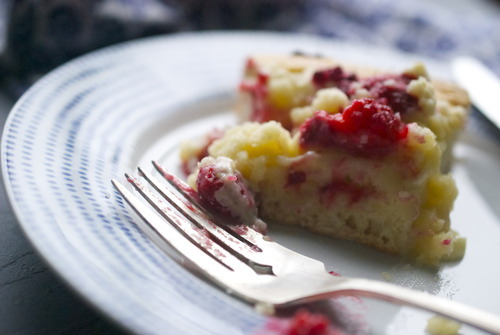
Raspberry and Mascarpone Brioche Galette with Almond Crumble

Now is the time of year I start to miss summer fruit. In the fall there are quinces and apples to get me through, and then the fun of Christmas takes over and I can get excited about mashed potatoes, but by mid January I am sick of it. I want red berries.

It was glee, pure, unadulterated glee that took over me when, at my local market, I noticed some local raspberries in the freezer.

Apparently this dive-y rundown market that I frequent for their unbelievable deals on pecans just froze all of the berries that they didn’t sell this summer. Firstly, this makes perfect sense. Secondly, how did I only just see them?

Oh lord. My week has been made.

We had some friends over recently, and as Jordan and I were flipping through cookbooks deciding what to make, he made several pointed comments about a brioche tart in the Ottolenghi book.. So I, being that lovely charming girlfriend that I am, (self proclaimed at least) decided to make it.

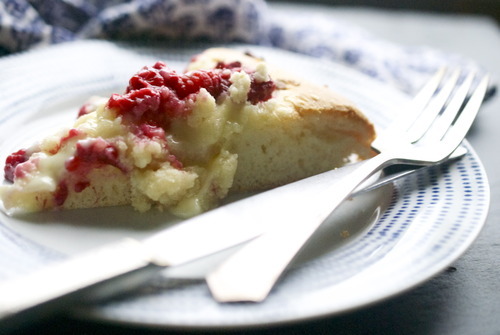
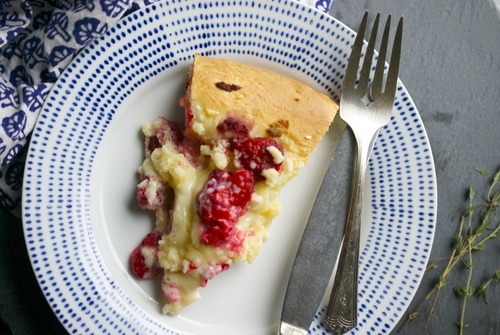
This is the most perfect breakfast. We ate it for dessert, and it was great, but for serious friends, eat this for breakfast. Next time you have people over for brunch, put this out on the table. I promise, they will be friends for life. The whole thing is somewhere between a coffee cake, a tart, and yet so much better. So very much better.

Raspberry, Mascarpone, Brioche Tart

Adapted loosely from Ottolenghi

Brioche:

2tbsp barely warm water

1tsp Dry Active Yeast

1 1/2 cups AP Flour

1/2 tsp Salt

2 tbsp Sugar

2 Eggs

1/2 cup Butter

Filling

3/4 cup Mascarpone

3 tbsp Icing Sugar

1 tsp Vanilla Extract

Zest of 1 Lemon

2-3 tbsp Cream

1 1/2 cup Raspberries, or other red berry

Almond Crumble

1/2 cup Ground Almonds

1/2 cup AP Flour

1/3 cup Brown Sugar

1/3 cup Butter, cut into small cubes

In the bowl of a standing mixer fitting with the dough hook combine all ingredients except butter and mix until it comes together. Continue mixing until you can take a small piece of the dough and, when you stretch it carefully, it will stretch so thin you can see through it. This is called the window test. If the dough rips then keep kneading the dough until you can.

OR You can do this in a food processor fitted with a dough blade, OR by hand. If doing it by hand just mix it all into a bowl until it comes together, then move the dough to a lightly floured surface and push your heels of your hands into the dough. Then fold it onto itself, and repeat this pushing and folding motion until you do the window test.

Put the dough into a clean bowl and let it rise until it has doubled in size, this should take about an hour.

Punch the dough down. You can use the dough right away, but if you’ve planned long enough in advance, the dough will be even better if you put it in the fridge overnight.

If you do put it in the fridge, you will need to take the dough out about an hour before you start to bring the dough back up to room temperature.

When the dough is ready put it onto a lightly floured surface and with your hands stretch the dough out into a large circle. Using a rolling pin will flatten lots of the air bubbles that the dough has been working so hard on producing, so instead use your hands to push from the center out. It does not have to be perfect. This is a free formed galette, and it being a little rough around the edges is totally okay. Pick up the dough carefully and put it on a well floured cookie pan.

Preheat oven to 375F

In a small bowl mix the mascarpone, icing sugar, lemon zest and vanilla together. Add in the cream, tablespoon by tablespoon until you get a texture that is thin enough to spread, but not so thin it will be runny.

Spread this on the brioche dough leaving about an inch around the edges.

Now top with the raspberries.

In another small bowl mix together all the ingredients for the crumble, and with your hands break the butter into the other ingredients. You don’t want to form a cohesive dough, just a crumbly mixture.

Sprinkle this on top of the raspberries. 

Let this sit out for about 20 minutes as a last proof, and then bake until the crust is nicely browned and the center just barely wiggles when you shake it. Take it out of the oven and let it cool for at least 20 minutes before serving.

Tuesday Tutorials- Better Than a Restaurant Steak with Wild Mushroom Sauce

image

About a year ago I wrote an article for a local online magazine on finding the best steak in the city. I ate some great steaks, and had an extremely happy boyfriend who came along with me. But while I was eating my way through the city, I realized something; there is no reason to order steak at a restaurant.

I’m going to tell you something else; I don’t buy expensive steaks.

I’ve never been a big tenderloin fan, I find sometimes the tenderness verges on mushy and that totally freaks my mouth out. I like something with a bit more chew, although not too much. Mostly though, what I like in the cheaper cuts of meat is the flavour.

The rich beefy flavour comes from muscles that have moved and been worked, which means cuts like the flank, the flatiron, the sirloin are all great cuts of meat, if you give them a little love.

And to back up this argument, I encourage you to think of steak frites in France, where the steak is always a bit tough.

The easy way to get the sinue out is to marinade it. It takes nothing but planning your meal 12 hours in advance, which, well, I know that doesn’t always happen. In that case, buy a ribeye.

But if your feeling prepared, and thought about dinner the night before, marinade your steak.

The other thing that is easy to do at home is make a super fantastic sauce. It requires not much money, and about 15 minutes of your time. And the rest, as they say, is gravy. Sorry, I couldn’t help it.

image

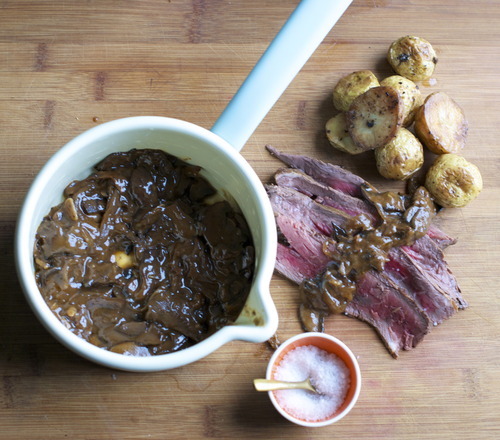
Seared Steak with Wild Mushroom Red Wine Sauce

1 Steak, Flat Iron, Flank, or some Sirloin

2 tbsp Balsamic Vinegar

2 tbsp Soy Sauce

1 tbsp Salt

1tsp Black Pepper

Sauce:

1 pckg Dried Wild Mushrooms (I found dried chanterelles!)

1 lb Cremini Mushrooms, thinly sliced

1 Large Onion, thinly sliced

2 cloves Garlic, minced

1c Red Wine

1 tbsp Flour

3 cups Chicken Stock

2 tbsp Tomato Paste

Olive Oil

Salt and Pepper

Mix all the ingredients in a medium sized bowl. Cover with seran wrap and put in the fridge overnight.

Put the dried mushrooms in a small bowl and cover with 1 cup of water.

In a large saucepan over medium high heat, warm a big glug of olive oil and start sauteeing the cremini mushrooms. You want to get them nice and browned.

When they’re brown push them to the edges to the pot and in the middle, put in the onions and brown them. Add the garlic and the tomato paste and and stir them until the middle as well.

Push that to the outside of the pot and put in another glug of olive oil and the flour. Stir that for a minute.

Now mix it all up and add the red wine and stir to make sure there are no lumps.

Add in the chicken stock.

Season with salt and pepper and simmer for 10 minutes.

Once your sauce is simmering, start getting ready to cook your steak.

Bring a large saute pan on a medium-high heat and let it get hot for about 3-4 minutes.

Pour in a glug of canola oil, and tilt the pan to spread the oil all over the whole pan. Carefully put the steaks into the pan, making sure you face it away from you so no oil will splash at you.

Cook until it is deep brown and then flip it and do the same.

Here is a trick for telling how done your meat it: Relax your hand, and then bring your index finger to your thumb. With your other hand press the meaty bit of your hand at the base of your thumb. That is what your steak should feel like when it’s rare.

When you do the same with your middle finger your steak is medium rare.

When you do the same with your ring finger your steak is medium.

When your do the same with your pinky finger your steak is medium-well

Anything past that is well done.

BUT If your not sure pull it off and let it rest for a minute and then cut into a corner of it.

If your steak is cooked let it sit for at least 5 minutes before you cut.

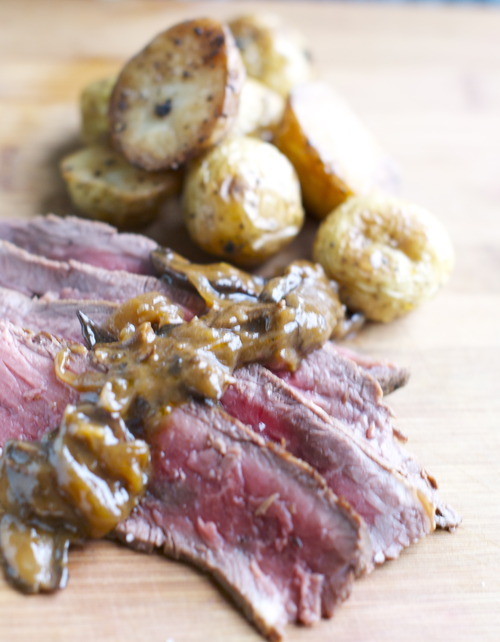
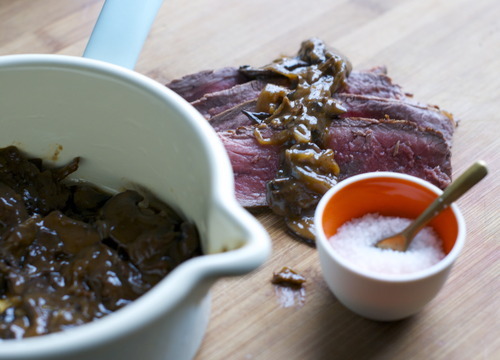
Then, slice it into thin strips, and serve with your perfect sauce!image

Sunday Salad- Radiccio and Blood Orange Salad with Black Olives and Mint Dressing

Summer salads are an easy seduction. The bright colours, the delicate greens, the warmth of fruit warming in the sun, it’s a simple formula, like the blonde with the big laugh on TV, there is something comforting about getting it all upfront. There isn’t much hidden in a summer salad.

Winter salads are the opposite. Either there is nothing at all to love, you know the ones, with the flavourless lettuce, the watery cucumber and the grainy tomato, or you take some time to produce complicated mix of things that use up the limited things that grow in January.

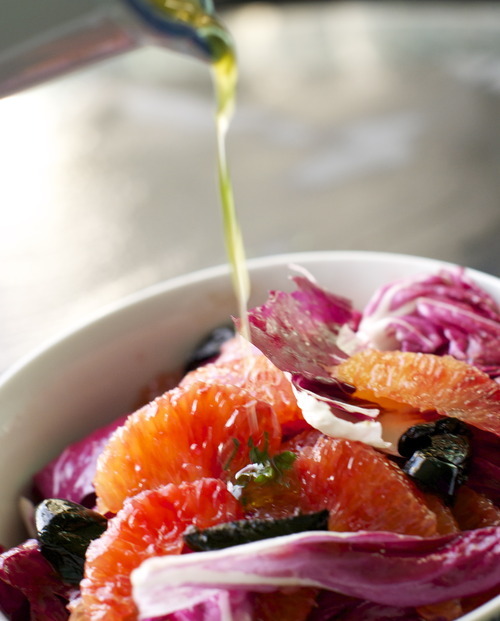
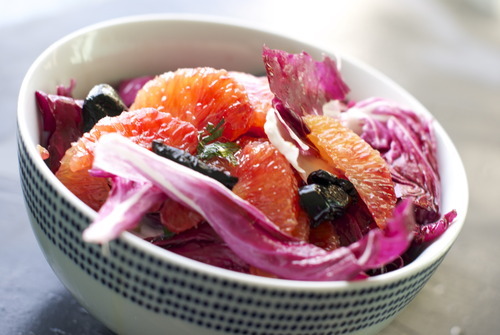
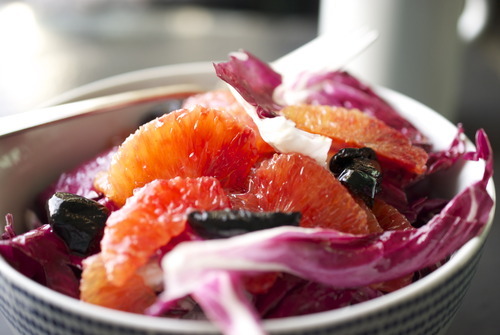
This salad falls firmly into the latter category, it’s a perfect balance of bitter lettuce, salty olives, and tart oranges all tossed in a sweet dressing that is brightened by fresh mint.

I started thinking about radiccio at home, but when I got to my local market and saw the blood oranges I couldn’t resist adding them to the mix. It wasn’t until I saw the mint perched close to the check-out that I realized that this salad was teatering somewhere between Italian and Moroccan. Regardless of it’s origins, this salad and a thick cut of toast is the answer to a cold crisp day.

Blood Orange and Raddicio Salad with Dried Olives and Mint Dressing

1 Head Radiccio

5 Blood Oranges (regular oranges will do if you can’t find their red cousins)

1/3 cup Dried Black Olives

1/2 Lemon

1 tbsp Finely chopped Mint

1tbsp Finely chopped Flat Leaf Parsley

1/3 cup Extra Virgin Olive Oil

Salt

Segment the oranges: Cut off their tops and bottoms. With the orange “standing up” cut off the peel and pith so that no white from the peel remains. Over a medium bowl pick up the orange and using a paring knife cut in between the membranes to release each slice of orange. When your finished removing the slices squeeze all the remaining juice from the core into the bowl. Repeat with the rest of the oranges.

Strain the orange slices into a small pot, and reduce that liquid until it is syrupy, and only about a tablespoon remains.

Mix this mixture with the lemon juice and whisk in the oil. Add a pinch of salt and adjust the seasoning as you wish. Mix in the parsley and mint.

Wash the radiccio and tear into a big pieces. Mix them with the orange segments.

Tear the olives apart by pressing your thumb into the middle until the olive splits in half. Remove the pit and tear them fully in half. Continue with the rest of them and add that to the bowl with the orange and radiccio.

Toss with the dressing and serve immediately!

Chalkboard DIY

image

One of the hardest things I’ve found about working from home, by myself most of the time, is staying motivated. Keeping doing things at the highest level you can, when you’re the only one looking over your shoulder making sure that you’re doing things perfectly every time.

You know you should of course, you know that you ought to, it’s just that sometimes, you don’t quite feel like it.

Sometimes I’m just lazy.

Sometimes I’m tired.

Sometimes I’m bored and feel like no one will notice if I cut a corner here.

The other day I came across this quote by Mother Therese, “Not all of us can do great things, but we can do small things with great love.” and I haven’t been able to stop thinking about it.

I don’t save lives, I’m not likely to change to world, or even the lives of many people. But I can do what I do with great love, and great care. And I owe it to myself to do what I do with every bit of energy and pride as I can. I owe it to myself to do what I do with great love.

At the height of the chalkboard crazy about a year ago I painted a little bit of my wall with chalkboard paint and put a cheap frame around it. And it’s been sitting there ever since without much in it. So this morning I thought I would put write this line in there so every morning it will be one of the first things I see.

A quick google search showed me the cheaters way of emulating all those gorgeous chalkboard artists in Brooklyn. It’s a simple trick, with a homemade stencil, and certainly my abilities are far from perfect, but I think it’s just so sweet.

image

You Need:

A Chalkboard

Paper to cover the Chalkboard

A Pencil

Chalk

Ballpoint Pen

Scotch Tape

There are two ways to do this, namely the easy way, and the easier way. Do note, while your picking out your lettering that the more detailed the lettering the harder it will be to trace with chalk, so if it’s your first go at this don’t push yourself, and try something easy.

If you have a printer this project is so simple. Just pick the fonts you want, type out what you want it to say and print it.

If, like me, you are printer-less it’s not so hard either, but you’ll have to draw out the typography you want, on a big sheet of paper that fills your whole chalkboard.

image

When your happy with your lettering and it’s arranged on a piece of paper that covers your whole board, flip your piece of paper over and cover it with chalk. Just get it everywhere, use as much as you need and make sure the whole thing is covered.

Now flip it back over and give it a little tap to knock off the excess.

Carefully tape the top, bottom and sides to the chalkboard, making it very tight but without running your hands over the paper, you don’t want to smudge the board.

With your ballpoint pen trace the lettering. Push hard and steadily and go through all of it.

Remove the paper.

Now with your chalk go through and trace the lines to make them thicker and add in the details. A paring knife works well for keeping the edges of your chalk sharp, which will help you draw more accurately.

And your done! If you want to keep this forever you can spray it with hairspray and it will never smudge, but if you think you might get bored, like me, just leave it up for as long as you’d like!

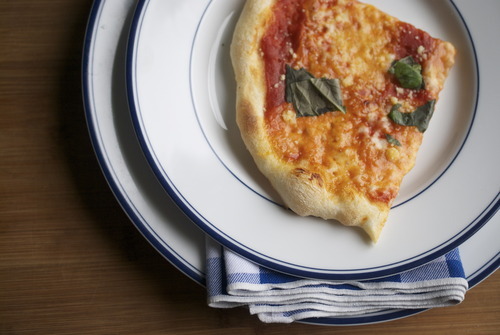
Tuesday Tutorials- No Knead Margherita Pizza

I live in what was traditionally Little Italy, an area called Commercial Drive. There are two big pizza places, a divorced couple who hate each other and own two competing, but equally horrible overpriced restaurants across the street from each other. There were a couple cheap slice joints, you those weird ones that put sesame seeds on the crust? Those kinds of cheap slice joints.

Then a couple years ago there was a bit of an outcry that there was no good proper pizza in Vancouver. And then two years ago was the year pizza came to the city. In droves. There is pizza everywhere.

Here’s the thing of it. I love pizza. Good proper Neopolitan pizza is hard to beat. And I eat it all the time.

The best pizza joint in the city is now 3 blocks away from my house. And a totally reasonably good place is 1 block from my house. And it has this lunch special, and I am there all the time. All the time!

And while pizza isn’t expensive, I have decided that this year is the year to not go out for cheapy lunches and to make dinner at home more.

So I’m going to start making pizza at home. Partly to save money, yes, I’ll admit to that, but largely because I can make proper pizza at home. And it’s unbelievably easy.

Heres the thing of it, you don’t knead the dough. And you don’t cook the sauce.

Are you ready to make wonderful pizza at home without kneading the dough or cooking the sauce?

I thought so.

No Knead Margherita Pizza

Adapted from the Sullivan St. Bakery

Dough

31/2 cups AP Flour

1tsp Dry Active Yeast

2tsp Kosher Salt

1 1/2 cups lukewarm Water

Sauce

1cup Strained Tomatoes

A good glug of Olive Oil

Sea Salt

4 balls of Fresh Mozzarella

A Handful of Fresh Basil

1/4 cup Grated Parmesan or Grana Padano

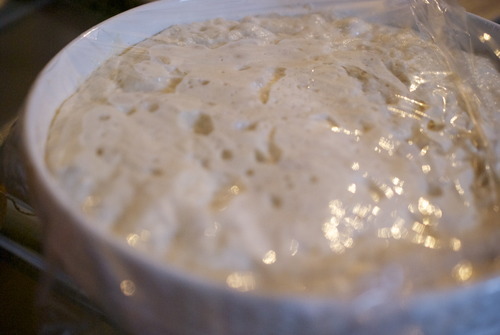
With a wooden spoon mix all the dough ingredients in a large bowl. When it’s all combined cover it with plastic wrap and leave it. Forget about it for 18 hours! This is sort of a loose measure of time, I make mine before I go to bed and it works out beautiful when I make dinner, but I have also been impatient and used the dough and made pizza for lunch and it worked really well too. I’d say 13-20 hours is the range really.

When your ready the dough will make 2 big pizzas.

Preheat your oven as hot as it will go. Mine is 500F. If you have a pizza stone, use it. If not, just take an old baking sheet and put that in your oven and let it get toasty hot. Once the oven is hot enough let it sit at that temperature for at least 15 minutes before you start working on the dough.

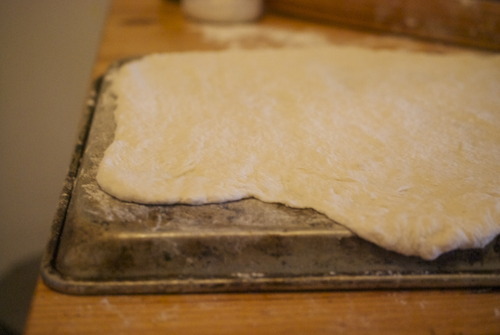
The dough will be very soft and sticky so use lots of flour. The first rule of dough is not to roll it. Carefully with your fingers streth the dough out, I find it easiest to hold the dough in the air put your clenched fists under it and gently pull them apart. The dough will get thin, then put it on a well floured surface and use your fingertips to stretch out the edges.

Generously flour a rimless baking sheet or the bottom of a rimmed baking sheet.

Put the dough on top of that.

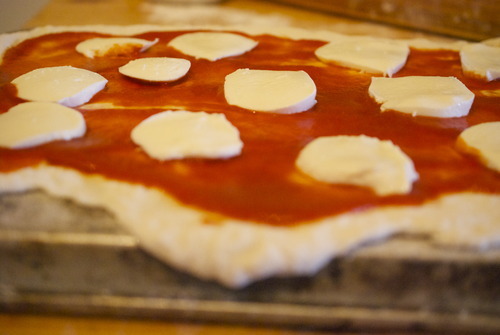
Use half the strained tomatoes and spread over the dough leaving a half inch of space around the edges for the crust.

Drizzle the olive oil on top and sprinkle with salt (you could mix all the these things ahead of time, but then you’d have to clean another bowl, which is something I avoid like the plague.)

Cut the cheese thinly and put 2 balls worth on each pizza.

Take out your pizza stone or baking sheet. With quick jerking motions slide the pizza off your cold tray and onto the hot one. Immediately put it in the oven.

I have what might possibly be the worst oven of all time. If your oven cooks as unevenly as mine you’ll have to rotate your halfway through cooking, although if you can keep the oven shut that’s the best thing.

After 2 minutes of baking turn the broiler on for 2 minutes. This should help the dough get a bit charred. After 4 minutes your pizza should be done.

Get it out of the oven, sprinkle with parm and torn basil and eat while it is still piping hot!

Sunday Salads- Squash, Black Bean and Kale Salad with Cilantro and Lime Dressing

t

I’m not so big on New Years resolutions. I get that they almost never work out, that they make you feel better after a December of spending too much money and eating too much food. But for the most part they are don’t stick. I understand that.

There is something though, about trying to do better. About trying to start off the year fresh, and put your best foot forward. And who am I to say that that’s for naught.

I will say though that the “I’m going to cut out sugar” or “No more gluten” are, for most of us weak willed dieters at least, not so effective. So instead of declaring something I know won’t stick I’m just saying I’m going to eat more veggies. More raw veggies to be exact.

So with that comes a new Sunday column, after all the fun I had with the Stocking Stuffer Sundays in December, that may only last through January, but who knows. Maybe my resolutions will stick this time round and Sunday Salads will stay. I’m just not quite willing to commit yet. Which might just be my problem!

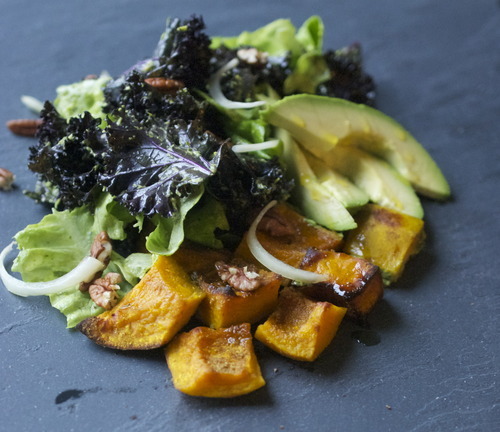
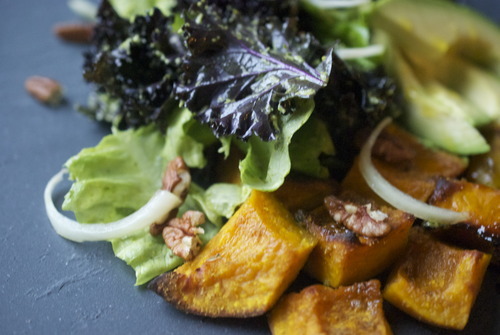
Cumin Roasted Squash, Black Bean, and and Kale Salad with Cilantro Lime Dressing

1 Small firm fleshed Squash, like butternut or acorn.

1 Avacado

1 cup Black Beans, soaked and cooked or canned and drained.

1 Onion

1/3 cup Pecans

1/2 Bunch Kale

1/2 head Butter Lettuce

1 tbsp Ground Cumin

 Dressing

1/2 bunch Cilantro

1/2 bunch Green Onions

1 Lime

1/2 cup Neutral Oil, like Canola or Grapeseed

1 tsp Dijon Mustard

Salt and Pepper

Preheat oven to 425F

Thinly slice the onion and mix it with the vinegar and a healthy pinch of salt. Set aside.

Peel and cut the squash into big chunks.

Toss with the cumin, a good glug of olive oil and some salt. Put on a baking sheet lined with parchment paper and bake until they are completely cooked through, about 45 minutes.

In a food processor, a blender, or a boil with a hand blender mix together the cilantro, onions, lime juice, mustard and oil. It will all blend into a thick and creamy sauce. If you don’t have a food processor don’t worry, you can chop the cilantro and onions and mix in the liquid ingredients. The dressing won’t be creamy but it will still be delicious. I promise! Taste and check the seasoning and add more lime or salt if you’d like.

Gently pull the kale leaves off of the stem, you want the frilly edges without the tough fibrous veins. Wash these lovely leaves with the butter lettuce.

When the squash is finished cooking put it on a large plate. Mix the dressing with the kale, butter lettuce, black beans, and onion.

Slice the avocado and place on the top and sprinkle with the toasted pecans.

Stocking Stuffer- Last Minute Edition- Chai Mix

image

Merry Almost Christmas!

Oh I love Christmas. I really do. The lights, the family, the warmth, the present buying. It’s all wonderful thing.

Christmas is also hectic. It’s running around, it’s trying to see everyone, and in my industry it’s Christmas baking for the masses and making cakes for Christmas parties, and this year there was also a huge winter wedding that required two wedding cakes just a couple days ago. Which has made this holiday season a little more crazy even than the usual.

So this is a bit last minute, which is too bad, not only because it’s acknowledging my total break in organization, but it’s also dissapointing because this is one of my favourite in this line of Stocking Stuffers that my amazing friend Jen and I did together.

I am not a coffee drinker. It kills my stomach and gives me terrible acid reflex, and it’s just generally a terrible idea for me. But when I was waking up at 4am to bake bread a few years ago I needed something that would give me a kick and wake me up that was just a bit more gentle on my belly, and that’s when I became obsessed with Chai.

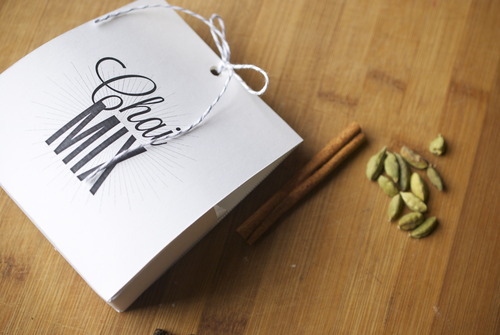
It’s a potent mix of flavours, the cardamon meddling with the cinnamon , balancing off the dark black tea, it’s a truly wonderful thing. Traditionally it’s served very strong and steeped in milk, but I will happily drink it black, and even, often, with soy instead of cows milk- because my sensitive stomach doesn’t like dairy much either. It’s the perfect thing first thing in the morning for someone like me.

Once again Jen Cook has blown the packaging out of the water, these little bags are so charming and so easy I’m just blown away, as I have been every week as we’ve been making these stocking stuffers. So please, even if you’ve made all your Christmas presents already, make this as a gift to yourself, to keep you warm on cold mornings.

image

Chai Tea Mix

4 5” Cinnamon Sticks

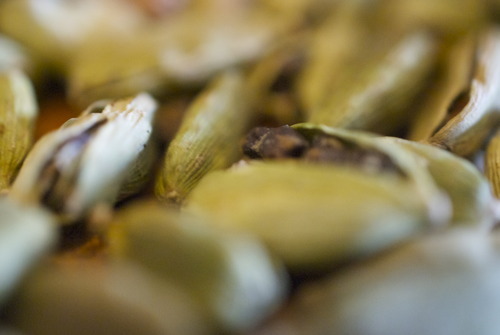
40 Green Cardamon Pods

3tbsp Black Peppercorns

3tbsp Whole Cloves

1 cup Ceylon Tea

In a small pan over low-medium heat toast the spices seperately, until they are fragrant but not smoking. 

Pulse them in a spice grinder until they are just broken up but not ground finely. 

In a bowl mix the spices with the black tea and then evenly put them into four bags. 

Tape the bags shut and put them into the boxes and give them out at will- or keep all the chai for yourself!

image

Stocking Stuffer Sundays- Apple Spiced Bourbon

At the restaurant I work at I recently served a couple who were seeing each other for the first time since they had broken up. It wasn’t going well, and the guy was clearly trying to combat this the way, let’s be honest here, many of us do, by drinking. He wasn’t drunk by any means but he was definitely out pacing the pretty girl across the table, and after one particularly long silence between them he decided he wanted a shot. She said she didn’t want to join him in that, so I did instead, and when he asked what I wanted to drink I said bourbon.

“Oh, uh, okay… bourbon. Man I’m emasculated right now.”

He shuddered but took it down like a champ, albeit an unhappy one.

I love bourbon. Don Draper drinks Old Fashioneds, and you always read about Hemmingway in his pre-Cuban years sitting down with a bottle of the brown stuff. I’ll confess here, I decided I wanted to be the kind of girl that went to a bar and ordered bourbon, so I drank it until I liked it. This stubborn method has also made me like blue cheese and olives, tastes that are a bit harsh to the uninitiated. I now thoroughly enjoy it, it’s what I always order when I go out, and it’s what disappears the fastest from out liquor cabinet.

Good bourbon is very smooth and round and soft , but also very pricey, so here’s the trick to make even Wild Turkey palatable: you spice it. Several years ago this was told to me by a very talented pastry chef, who said if you bought cheap bourbon and stuck a vanilla bean in it for a day, at the end you would get significantly smoother bourbon, and over the years I have learnt that the more you add, the mellower it gets.

Spices cover a magnitude of sins when it comes to bourbon.

It also, with these spices, tastes just like the holidays. The warmth, the cinnamon, the hint of apple, all makes me forget my tiny messy apartment and fills my head with visions of crackling fireplaces, deep voices, and someone else making dinner. Add a little apple cider to the mix, and you’ve just about got Christmas in a glass.

Once again, the amazing Jen Cook has kindly made us some beautiful labels which you can download for free here. She is all kinds of talented, she made my site here, and she sells vintage clothing here

Apple Spiced Bourbon

1x 750mL Bottle of Cheap Bourbon

2 Apples

1 Cinnamon Stick

1 Vanilla Bean 

1 Black Cardamon Pod

1 Clove

Wash the apples thoroughly, I used soap to make sure all the pesticides were off, or you can buy organic. Either way make sure the flavours of the sprays they use aren’t going into your drinks.  

Chop them up and put them in a large jar. Cover with the bourbon, close the jar firmly and let sit for 2 days.

Carefully split the vanilla bean in half, and scrape the seeds out with a small knife. Put the seeds and the pod into the jar with the cinnamon, clove and cardamon. 

Let these meld in there for another 6 hours, and then strain out, pour into jars. Print up the labels, these can be used as stickers, like I did, or you can tie them on with string. 

Tuesday Tutorials (sort of)- Wild Wreath

I lied in this title. Friends, it’s not Tuesday. In fact it’s Thursday. It’s two days past Tuesday, and yet, here is this post. To say I’m busy is a giant under statement, but I’m not going to complain here, I know you all have your stresses, especially this time of year.

Instead I’m going to just show you how to make a wreath.

If you talk to me for about 5 minutes, you probably know that I’m borderline obsessed with Design*Sponge. The wonderful online design magazine that inspires me daily with it’s ideas. One of the editors there is the incredible Amy Merrick, and someone recently pointed out to me the unbelievably gorgeous wreaths that she makes.

I tend not to like things that look too perfect, especially when it comes to things that are made out of nature. I like flower arrangements that look a bit wild, I like furniture that uses the natural shape of the wood, and, apparently, I like wreaths that look like they’re still growing a bit. Like they still have a bit of life left in them.

So here is my super easy DIY for just such a wreath. This requires no fancy equipment, just thin wild branches, some string, some scissors and some holly if you so please. I’m fond of a bit of greenery in a wreath, but I think after Christmas I’ll take that out and let it dry just as the branches. Then maybe in the spring I’ll add in something bright and green, and in the fall maybe some of the gorgeous deep red japanese maple branches that grow all over my neighbourhood.

You Will Need:

5 thin branches

2 meters of light brown string

scissors

3 branches of holly

Prep yourself by taking lots of little

Take your branches and wrap it in a large circle, and tie it to keep it there. This is much easier if someone holds them together for you, but with some McGivering you can do it without. I sat on the floor and held it together with my knees, but do what works for you. If you had clamps that would be great, but I, alas, am rarely in posession of such practical things.

Hold the wreath so that the base of the stem as at 12 o clock.

At 6 o clock tie a second branch. Then wrap that around and tie it to the previous branch. Keep doing this, attaching branches and tying them with string. Play around with where you put each piece to make it as circular as possible, but don’t get to hung up about it being perfect. This is supposed to look rustic and wild, so embrace that!

Once the branches are on and you like it, put the pieces of holly on top and arrange them as you like them, and then tie them in. It sounds like I’m rushing through these instructions but it really was that simple. Just take your time to make sure all the knots are very tight.  

Stocking Stuffer Sundays- Malted Chocolate Marshmallows

I am very very lucky to have such a wide network of incredibly creative people. And I am even more lucky to have a wide network of creative people with whom I barter. I make cakes for my friend who cuts my hair and I baked for a friends gallery opening in exchange for a photo shoot. In high school I traded my (admittedly limited) seamstress-ing skills for clothes at a vintage shop, but recently I’ve noticed that if I just ask, people will just help out.

Which is what I did with my graphic designer when I started thinking about doing “Stocking Stuffer Sundays” and that is what the super talented Jen Cook did. She helped out.

Jen made my beautiful website, and now she’s made some beautiful labels for you.

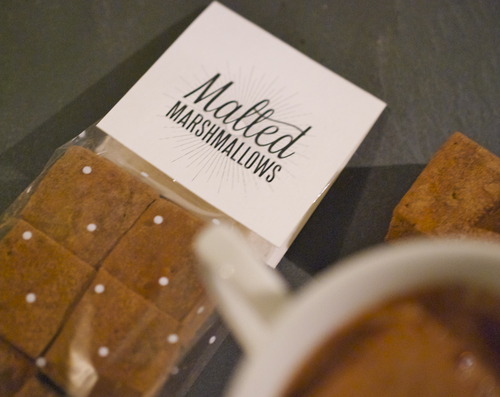
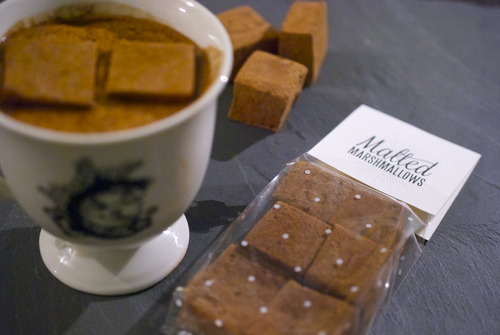
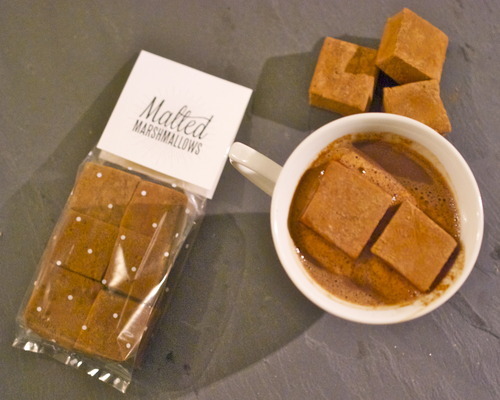
Every year I make marshmallows for stocking stuffers. Every year there a fan favourite. There is something that is all kinds of wonderful about homemade marshmallows. For starters they are completely unlike the store bought variety, they are softer, denser, and you can flavour them with just about anything. Anything, that is, that you want to put in hot chocolate.

I like marshmallows plain, I do, but the real home of a marshmallow is in hot chocolate. Let’s be clear on that.

These are chocolate marshmallows, with lots of cocoa powder in them, but they also have a bit of malt, which for me is very nostalgic. Partly because I drank ovaltine as a kid, and partly because I used to listen to the song “Malted Milk” by Eric Clapton all the time. So it’s twice the memories plopped into a steaming mug of hot chocolate.

So basically what I’m saying here, it tastes like happiness. 

For Labels Click Here

Chocolate Malted Marshmallows

Adapted from Shauna Server

2 tbsp unflavored powdered gelatin
1/3 c cold water
1 cup granulated sugar
1/2 cup corn syrup, divided
Pinch of salt
1/4 c unsweetened cocoa powder
1/2 c malted milk powder
6tbsp boiling water
1tbsp vanilla extract

For Rolling

2/3 c Icing Sugar

1/3 c Cocoa Powder


Mix the gelatin and the cold water in a small bowl. Let sit for at least 5 minutes. 

In the bowl of a standing mixer, fitted with the whisk attachment, dissolve the cocoa and malted powders in the boiling water. Add in the vanilla. Mix in the gelatin mix. 

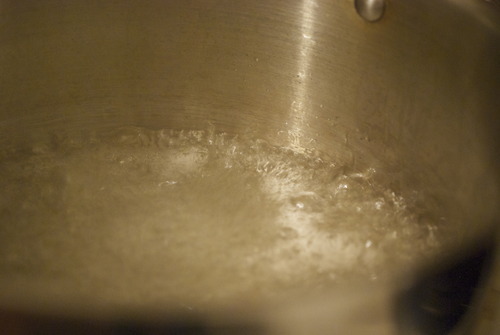
In a small pot mix the corn syrup with the corn syrup, the sugar, and 1/4 cup water. put the lid on it and on medium heat bring to a boil. When all of the sugar has dissolved take off the lid, turn it up to high heat and put in a candy thermometer. Bring the sugar mix to 242F. 

When the sugar is at 253F turn the mixer on medium. When the sugar mixture has come to 242F slowly pour into the mixer, creating a slow and stead stream down the side, being careful not to let it splash around the sides. 

Turn the mixer to high and let it run for 10-15 minutes or until it is thick and pale. 

While this is happening line a 10 inch square baking pan with cling wrap and grease it liberally. You can do with this with Pam or another spray or with some canola oil and a paper towel. 

When the marshmallows are ready pour the mixture into the prepared baking pan and  smooth with an offset spatula. Allow to sit for at least 8 hours. 

Cut up into whatever size you like, squares are most effective but I’ve seen really cute snowflakes and all sorts of shapes. Roll them in the sugar and cocoa mixture and package them up as you please!


Tuesday Tutorials- Gingerbread Caramels

People are intimidated by candy. Which seems odd to me, I mean, everybody I knows has a favourite candy, everyone I know has old memories about candy, and yet people are terrified to make it themselves.

Candy is all about sugar. Sugar does amazing things, keep it in a pan and it turns to caramel. Twist it at the right moment and it becomes toffee. It can be shatteringly crisp, soft and pliable, or melting and sandy, it just depends on how you treat it.

Caramels are one of the easiest pieces of candy to make, and I’m not just saying that because they’re my favourite. I promise.

Here are things to remember:

  • Sugar can crystalize. It can do this in several ways, and once it starts your whole caramel is toast. Sugar wants to crystalize, if there are bits of crystalized sugar on the edges it will spread, and if you can start it crystalizing by stirring it.

  • Preventing crystalization is really very easy. Most people tell you take a damp pastry brush and brush the sides of the pan to make sure that all of the sugar dissolves. This is silly. You can just put a lid on it. (if you like it then you shoulda putta…. sorry. I had too.) The condensation will make sure all the crystals dissolve.

  • Make sure you have everything ready when you start. Once the sugar starts to caramelize it will happen quickly, to be on top of it, be prepared. In a restaurant we call this “mise en place”

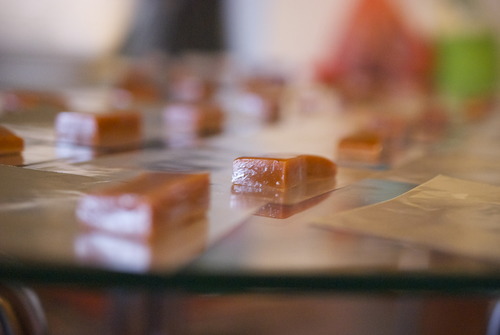
These are the best caramels I know how to make, and they are rivalled only by the ones I ate in Paris that were made with Normandy cultured butter and full of chopped hazelnuts. These ones are very buttery, and have a very strong caramel flavour without ever being bitter. They are all kinds of wonderful. You can make this recipe without the seasonal adjustment, they are fantastic as classic salted caramels, but it is December after all, so these are Gingerbread Caramels, and they are my favourite.

3 1/2 cups Sugar

1/3 cup Corn Syrup

1/4 cup Water

400mL Heavy Cream

2 3/4 cup Unsalted Butter

1tbsp Cinnamon

1tsp Cloves

1tsp Ground Ginger

1/2 tsp Nutmeg

1/4 tsp Ground Fennelseed

1tbsp Fancy Molasses

1tbsp Salt

*if you don’t want to make gingerbread molasses simply don’t add in the cinnamon, cloves, ginger, nutmeg, and fennelseeds, and instead add 2 tablespoons of salt.

In a large pot with deep sides and a secure lid mix together the sugar, corn syrup and water. Put a lid on it at put the pot on medium heat. After 4-5 minutes go and check on it. If it is totally clear and bubbling and there is absolutely no trace of sugar crystals take the lid off. If there are give it a quick stir and put the lid back on. Keep doing this- although don’t stir more then once every 3 minutes) until it is completely clear and there is no trace of a crystal anywhere. Then take off the lid. Once you have given it a last stir put that spatula in the sink. It will have bits of crystalized sugar on it which you don’t want to reintroduce to the mix. SO if your anything like me, you’ll need it out of arms reach or you’ll grab it accidentally.

In a small pot nearby mix the heavy cream with the salt, molasses and all the spices, if using and gently bring to a boil. Once it has come up put a lid on it and keep it on the burner so that it stays warm.

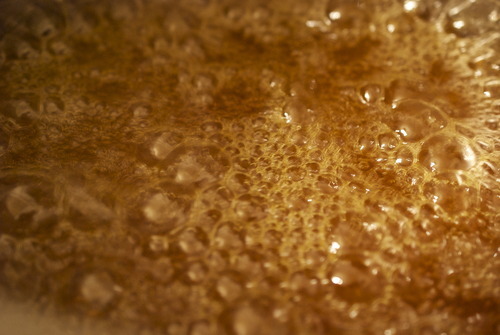
Keep an eye on your sugar. Don’t mix it once you take the lid off it, instead give it a bit of a shake every once in a while. Keep the heat on medium, it will take longer to caramelize but you will get a nicer more even flavour.

After a few minutes the sugar will start to turn brown, slowly. Give it a shake so that it’s not getting darker in one area.

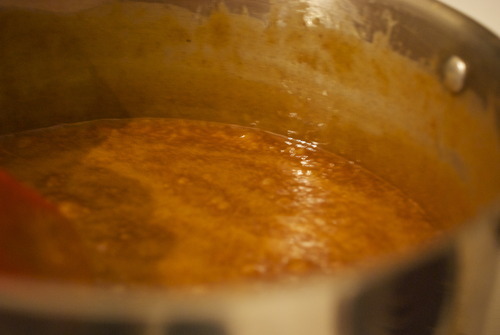
Once the whole thing has come up to a nice deep auburn color turn off the heat and add in the cream.

The cream will hiss and steam and bubble. It will be alarming, but don’t be alarmed. Take a whisk and stir it being careful not to burn yourself from the steam.

Now add in the butter, piece by piece while whisking it like hell. You can use an emersion blender for this if you’d like, many people do, but mine doesn’t work very well so I do it by hand. It’s a bit of a workout.

Now bring the heat back up to medium and start cooking your caramel. You will have to stir it the whole time so use a rubber spatula so that you make sure you get into all the nooks and crannys and slowly, carefully watch the temperature rise with your thermometer.

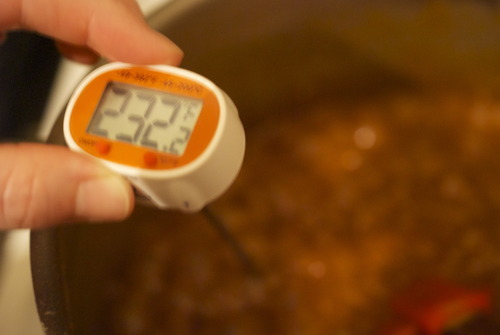
When it comes up to 254F take it off the heat and immediately pour it into your prepared pan. Do not scrape the bottom of the pot, the temperature will have made the remaining bits harden, but do scrape the sides.

Allow the caramels to cool for at least 6 hours before cutting and wrapping them.

Stocking Stuffer Sundays- Mulled Wine Kits with FREE downloadable labels

Jordan introduced me to mulled wine many years ago. The slow cooking of red wine with spices and congac that makes any amount of snow dissapate instantly has been a favourite of mine for some time now, but my love of it really cemented a few years ago when I was in France.

I was just puttering about feeling a bit lonely, it was near the end of my trip, when I stumbled across the most incredible Christmas market. They had closed down about ten blocks of the Champs Elysee and had lined both sides with little white cottages filled with the most wonderful little treats. Candy makers, nut roasters, cutting board sanders, and doll sewers all had stands filled with gorgeous things to eat and buy, but all of it was made better by the vendors who sold “vin chaud”. Hot wine, or as we call it here Mulled Wine is all kinds of wonderful, it’s the most soothing thing I can think of it tastes exactly like Christmas.

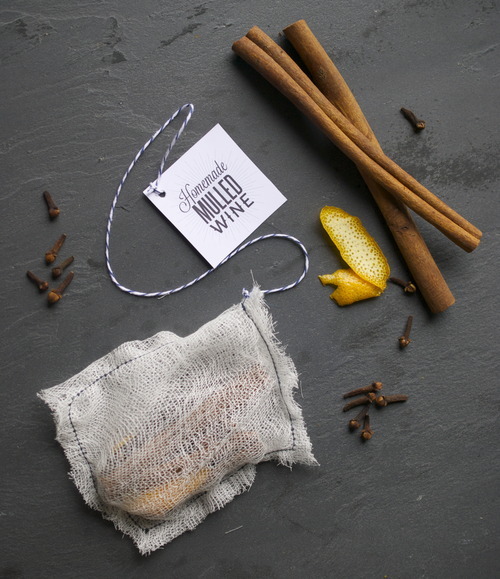
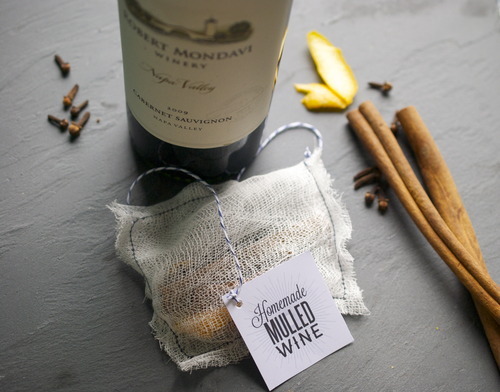
Jordan makes a great mulled wine, so we thought we would make these little packages of all the spices you need and sew them together with these sweet tags and attach them to wine bottles, which makes a lovely stocking stuffer or a slightly more personal hostess gift.

So with this recipe also comes a free download for the labels, which are double sided, because of the wonderful generosity of a very dear and extremely talented friend, one Miss Jen Cook. Jen is the genius behind my entire website and my logo, and shes is just about the most patient person I know to put up with me as a client. And when I casually mentioned this project to her she jumped at the chance to do some labels for me.

So, without further ado, here is the recipe, the methodology and the free printable downloads for Mulled Wine Kits. If you do make it I’d love to hear about it so let me know in the comments!

Mulled Wine Kits

Click here for your FREE downloading label

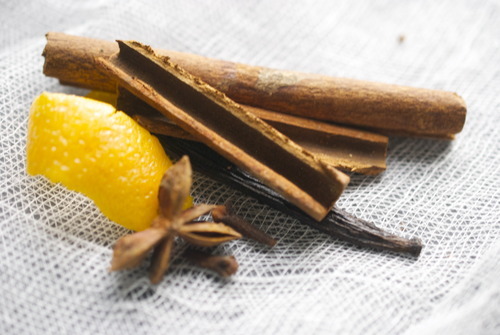
Per Pouch:

1 Long Cinnamon Stick, broken in half

2 Cloves

1/2 Star Anise

1/2 Vanilla bean

1 Long strip of orange zest

Cheesecloth

Fold a long thin rectangle of cheesecloth in half, making a shorter rectangle.

Place all the ingredients on top.

Fold the Cheesecloth over the spices creating a pocket.

Sew carefully around the spices in a square.

Tie a piece of twine onto the pouch and tie the other end to your label.

Tie around a bottle of wine and c’est finis!

Edible Vancouver, with some excited news!

About two years ago I started this blog, after much nagging from my sister, because I was unemployed and terribly bored. About a month into it I knew that this was something I was going to want to do for a long time. Six months later I submitted a story to Edible Vancouver and, without having any experience, and to my great amazement, they published it.

A few months later I started looking at the bios of contributing writers at magazines and publications that I admired, trying to figure out what they did to get where they did, I noticed that there was one publication that came up over and over again; they had written for Edible. Edible Brooklyn, Edible San Fransisco, Edible Chicago, but Edible somewhere.

So I decided I needed to start doing some more writing for them, and along with pitching a few story ideas, I also decided that I would start blogging for them for free. I have done a lot of free work in my life, Jordan jokes that my passion in life if volunteering for corporations, and he might be right, but sometimes it pays off.

I am now feeling very lucky, quite humbled and, admittedly, a little bit pleased with myself, as the new issue has just come out and my name is on the masthead under associate editor.

So here is the new magazine, you can read it online or you can grab a copy if you live in Vancouver, I have two articles, one on onions, the other on a restaurant called Heirloom, and a few recipes as well. This magazine is truly a labour of love from everybody involved, and I hope that shines through to you.

Tuesday Tutorials- The Best Biscuits

The second instalment in my new weekly column, where I talk about food basics, and give you the step by step know-how to do it at home.

The restaurant where I work recently started to do brunch, and before we opened I was chatting with the chef about what kinds of pastries he might want. The original idea was croissants which, despite obviously being delicious, are also so tedious to make, especially in a kitchen with as little counter space as ours, so I threw out the idea of making biscuits.

This did not go over.

Biscuits are dry, biscuits are bland, biscuitsare over done, and never delicious.

So I, being the super competitive person that I am, decided to make him some. I made savoury biscuits, ones with chunks of cheddar and dots of scallions, and let the restaurant fill up with the smell of cooking butter and melting cheese. And then I dared him not to like them.

He is not the first person I have converted to a biscuit lover, but if we’re being real here, most of this credit can go to my Grammy.

Grammy made “Cloud Biscuits”, light, airy, full of layers and always moist. Growing up they were always made with fish chowder, or if we were lucky, for breakfast. Hers was a different recipe than this, because hers was a different time. In the Great Depression butter was a serious luxury, so the cloud biscuits were always made with shortening, and just a tablespoon or so of the good stuff to give it flavour. But it was the texture that got me hooked.

Which is funny, because most people complain about the texture, they think dry, over cooked, bland. So here is THE way to make the perfect biscuit.

Let’s start out with a couple basics first

  • The way you get layers is by using big chunks of really cold butter. When that cold butter goes into the hot oven it produces steam, and if you have the right formations of butter you get perfect light fluffy biscuits.

  • You need to knead, but not too much. Flour has gluten in it, and gluten will make your biscuits tough. But you need to knead your dough in order to get in the layers. This means really feeling the dough, as you knead it when it starts to get tough, it’s time to stop.

  • Use good ingredients. If your going to add cheese to your biscuit, make it good aged cheese. There are only a few things in your biscuits, make sure they’re adding something.

  • Be creative! There are a million things you can do to a biscuit, don’t limit yourself and have fun with the possibilities!

Biscuits

(Adapted from the Tartine Bakery Cookbook)

4 1/2 cups All Purpose Flour

1tbsp Baking Powder

1tsp Baking Soda

11/2 tsp Salt

1/4 cup Sugar

1cup Unsalted Butter, very cold, cut into cubes

1 3/4 cup Buttermilk

Eggwash

1 Egg Yolk

1tbsp Cream, milk, or buttermilk

Option

1 1/2 cup Aged Cheddar, chopped

1 bunch Scallions

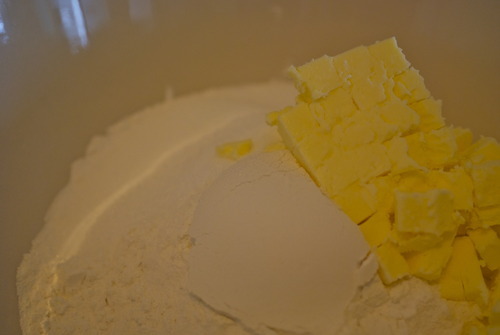
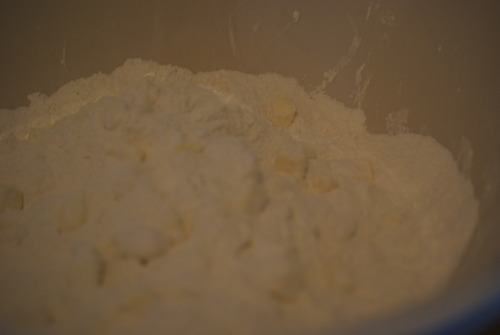
In a large bowl mix together all the dry ingredients.

Add in the butter and with your hands, or a pastry scraper, break the butter up into lima bean sized pieces, or about the size of your pinky finger nail.

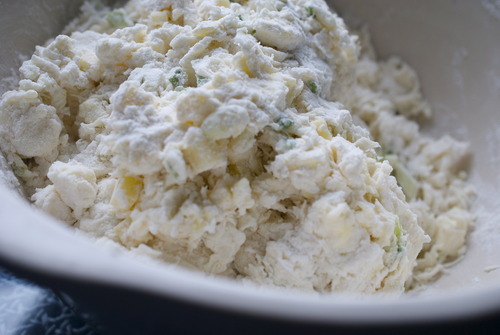
Add in any flavourings, in these ones I used cheddar and scallions, but the world is your oyster on this one.

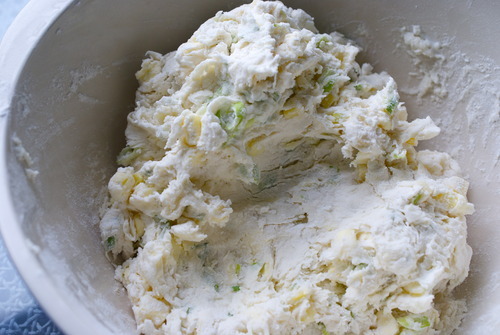
Carefully pour the buttermilk in and mix it with a spatula or spoon until it just begins to come together.

Push the dough down with the palms of your hands and then fold the dough in half. Continue doing this 4-6 times or until you just start to feel resistance.

Put the dough onto a lightly floured surface and roll out to about 3/4 inch thick.

Cut the dough out into whatever shapes you like, traditionally savoury are round and sweet ones are cut into triangles.

Put them on a baking sheet lined with a silpat or parchment paper and put them in the freezer for 15 minutes.

While the biscuits are chilling preheat your oven to 400F

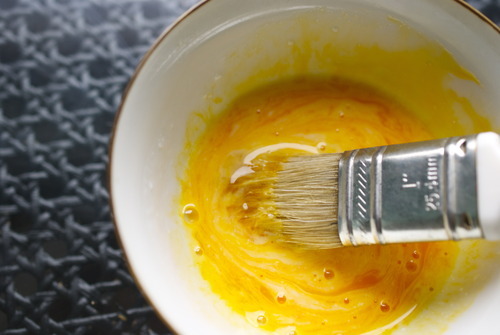
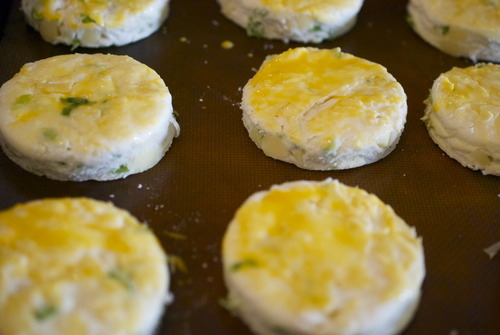
Take the biscuits out of the freezer and brush the tops with your egg wash.

Put them in the oven and immediately turn the temperature down to 350F

Don’t open the door for the first 12 minutes, afterwards you can open it and turn the pan so that it cooks evenly.

After about 20 minutes the tops should be nicely browned and you should be able to see a significant rise. Allow to cool before eating.