Stocking Stuffer Sundays- Citrus Fennel Salt Rub

Christmas, as you well know, gets expensive. Like, super expensive. And I go crazy at Christmas. Like, super crazy.

I come by it honestly, you should see the amount of things my Mom still buys for us at Christmas. We’re all adults, but she can’t help herself, and apparently I’ve got that gene, because I love buying gifts. I will max out my credit cards and spend every last penny buying things for other people. I love it, but it does me any good. No good at all. 

The good news, is that I am one crafty woman, and in the last few years I’ve learnt to use this to make very thoughtful, useful, gifts. And lately, I’ve been focussing on making things that are simple, that people will actually use, and things that definitely don’t require your visa.

And I thought that you might want to make these things too. Because I tend to think we have a lot in common, you and me. 

So for the next month I’ll be putting up a simple stocking stuffer idea every Sunday, prepping you up for Christmas, Hunukkah, or whatever you celebrate. Or, of course, for yourself.

I used to work at a wonderful trendy sandwich shop called Meat and Bread, where, along side their unbelievable porketta sandwich they sold homemade mustard, sambal, and salt rub. I had never used or thought much of salt rubs before then, but now I am hooked. I make them all the time, and I put them on everything. Fish? Chicken? Pork? Beef? Yes, yes, yes, yes. Seriously.

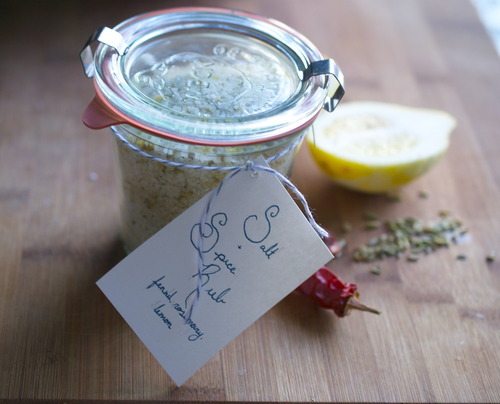
But it’s crazy to me that people buy them, they are so cheap to produce, and so simple to make. This is the salt rub I make most often, its full of rosemary, fennel, lemon, and a bit of chili. It’s good on just about everything, and it costs pennies to make. Win.

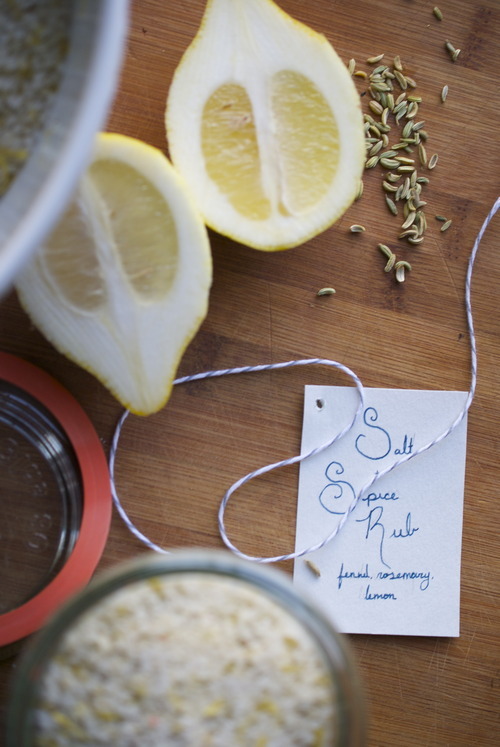
Fennel Citrus Salt Rub.

1L Coarse Salt

Zest of 3 Lemons

1/3 cup Fennel Seeds

1/4 cup Rosemary Seeds

2 Dried Chilis

4 Bay Leaves

Gently toast the fennel seeds in a small frying pan over low heat. Be careful not to burn them, take them out as soon as they get fragrant, not letting them get colour.

Put them in a spice grinder until it’s just cracked but not super fine.

Repeat this process with the rosemary.

Grind the chilies and bay leaves.

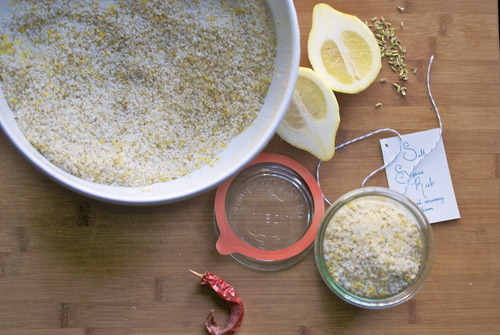
Mix all these tasty things with the salt and the lemon zest.

Put this mix into clean jars and label as you please!

Tuesday Tutorials- Perfect Lattice Top Apple Pie

've been doing a lot of thinking about this little spot in the blogosphere lately. About what makes this little piece of the pie (no pun intended) more special, more worthy of your attention than any other, and the thing that kept coming to mind, is that I am a professional. I have not only gone to school to be a baker but I have worked for countless talented people who have shown me so many tricks along the way. Most people who write on the internet don't have that advantage, and so begins “Tuesday Tutorials” in which I share these tricks of the trade with you, my loyal readers. The idea being that once a week I will write something kind of fundamental, a basic, and show you how I make it, and the way I do that makes it so good.

And to start, pie.
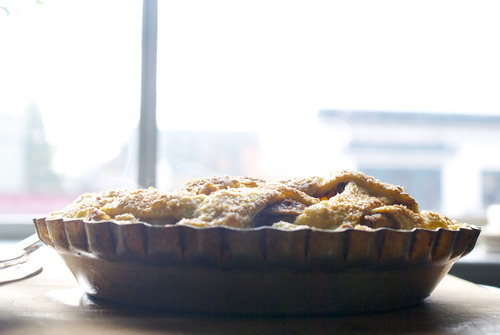
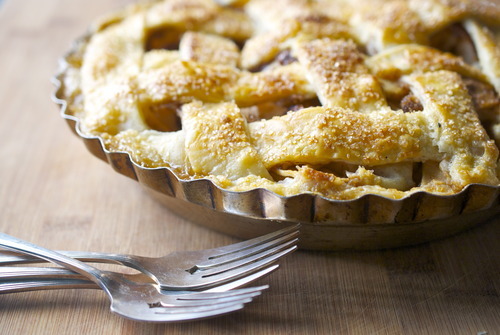
There are few things better than the smell of homemade apple pie. It is so quintessentially North American, so perfectly Fall, so designed for November weather. Apple pie is darn near perfect.

My mother makes a mean apple pie. A mean pie in general really, despite her absolute failings on many a cake, my mom kills pie. Seriously.
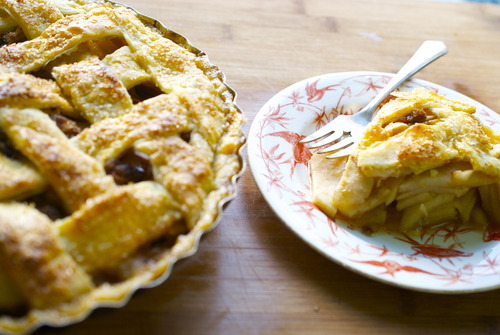
This is a recipe for a pie that is both hers and mine, I make mine with more butter than hers, she adopted her recipe from her mother, and growing up in The Depression, shortening was easier to come by than butter, but in these modern times I have no trouble at all with the subsition.

There are two ways of making pie filling though. You can cook the fruit before hand, add in corn starch or flour and thicken up the juices or you can put it all in raw. You get very different results with these methods, and in bakeries you almost always get the cooked before variety. And while I think this method is great for juicy berry pies, when I make an apple pie I put in the fruit raw, then top it all with brown sugar, cinnamon, and flour to thicken it up. It’s how my mom made it, and so it tastes like home to me. And that, good friends, is what apple pie is all about.

The real tutorial here though is how to make a perfect lattice top to your pie, the kind that friends will ooh and ahh over, and you can revel in self satisfaction when you sit it on the counter to cool. A lattice top pie is not something to brush off, it takes some skill, and it demands it when you put it on the counter. Unless of course, you follow this tip, which just makes it so easy.

The thing to do is freeze it. Make the lattice on a baking sheet and freeze it, it will only take about half an hour, just enough time to cut up all the apples and make yourself a cup of tea. And then slowly put the top of the pie onto the pie crust, you get a perfect crust every time, and you save the stress of making the lines perfect on an imperfect surface like a rounded pie top. And you get to schedule yourself tea making time, and that friends, is always a perk.

Lattice Top Apple Pie

2c AP Flour

1c Cold, salted Butter, cubed

Ice water

Filling:

8 cups of chopped apples, a mix, I used ambrosia, pink lady, granny smith and macintosh.

1c AP Flour

2c Brown Sugar

1tbsp Cinnamon

topping

1 egg yolk mixed with 1 tbsp cream or milk

3 tbsp Coarse Sugar

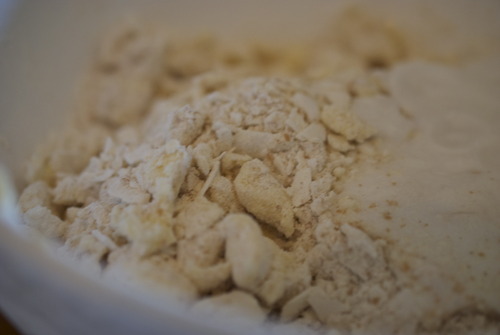
In a large bowl mix together the flour and butter. Using either a pastry cutter or, like I do, your hands, break apart the butter into lima bean sized pieces.

Slowly incorporate the water, stirring with a fork, adding just enough for the dough to follow to fork as you stir.

With your hands bring the dough together and knead it gently- squish it out with your palms and then fold it over. Repeat this 4-5 times or until the dough gets even the slightest bit tough. Wrap with plastic wrap and keep it in the fridge for at least 30 minutes.
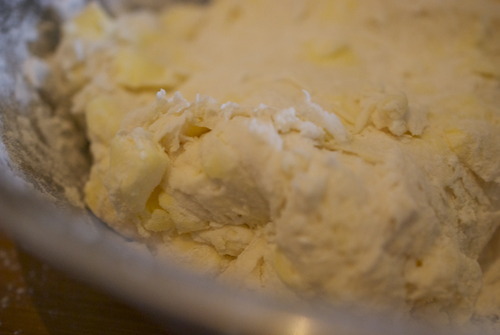
Unwrap the dough and cut in in half.

On a lightly floured surface roll out one half of the dough in a large circle until it will fit your pie dish. Gently place your rolling pin the center of the circle, then drape one side of the dough over top. Pick up the rolling pin and place it on the pie dish and smooth out the dough.

Put this in the fridge.

Put a silpat of a piece of floured parchment paper on a baking sheet.

Roll out the other piece of dough in a long strip, making sure that it is as wide as your pie dish.

Cut this into strips widthwise.

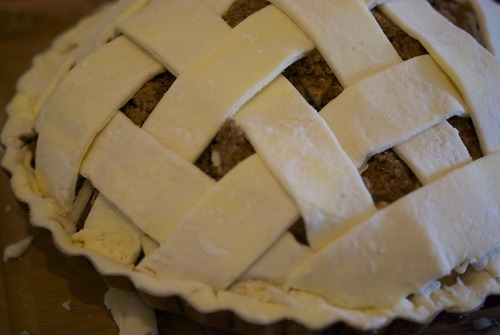
On the silpat arrange the strips as you see in the picture below, and slowly start weaving them together,
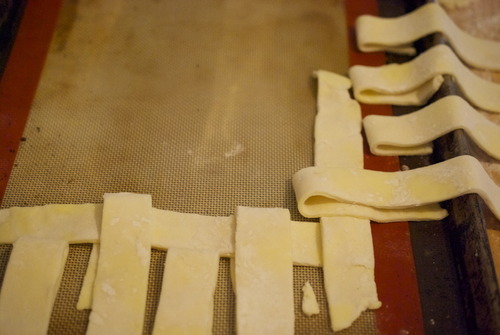
one over one under until you get a nice basket weave.
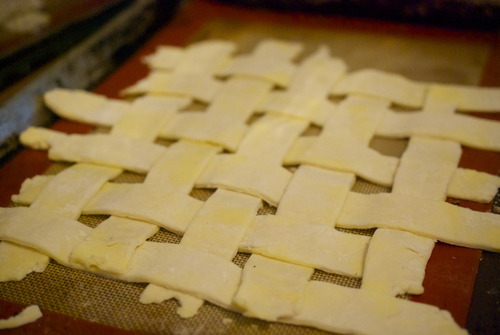
Now put this in the freezer and let it get nice and cold and hard. This is the trick- once the dough is hard you can just slide it on your pie, no finicking the edges or getting filling on the topping.
Preheat the oven to 400F

Pull out the bottom of the pie and shake half the flour onto the bottom of the crust.

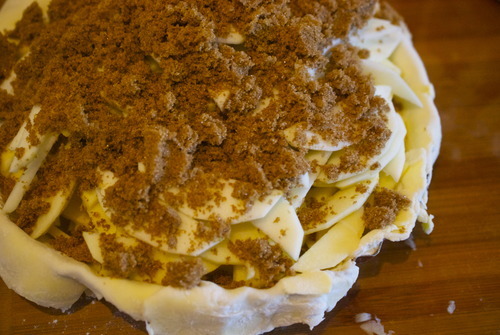
While the top is freezing start chopping your apples. Peel and core then and slice them thinly and put them into the bottom shell, layering different kinds.

Top with the rest of the flour, the brown sugar and the cinnamon.
Take the lattice top out of the oven and gently put your hand underneath it and place it upon your pie.

Push the edges down into the corners and cut off any edges of your pie, or fold them over to create a a scalloped edge.

Wash with the egg wash and sprinkle with the coarse sugar.
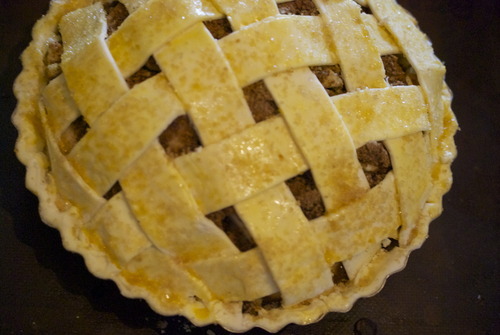
Put in the oven and immediately bring the temperature down to 325F.

Do not open the oven door for at least the first 20 minutes or cooking.

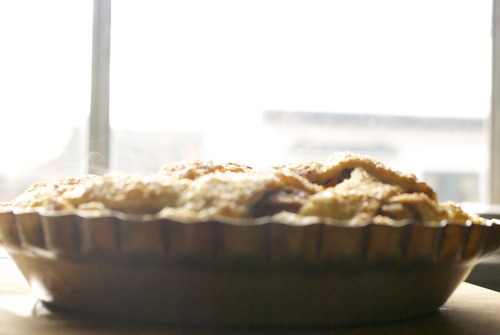
After twenty minutes rotate the pie and cook for another half hour or until the juices start bubbling in the center an an inserted paring knife meets little resistance when pushed into the center of the pie.

And there you have it, the easiest most delicious apple pie.
New York, Birthdays, and Inspiration.

My mom is a pretty extraordinary lady. She is kind beyond words, and strong beyond measure, and I am undeniably a total Mama’s girl. So it wasn’t much of a debate when I learnt she was flying to New York to visit my sister for her 60th, that Jordan and I were going to hop on a plane too.

Oh New York.

I hadn’t been since junior high. Junior high! It was time.
Lately I seem to have many many jobs. I do the pastries at a couple restaurants, I make wedding cakes, I’m an assistant editor at a local magazine, I write this little blog that I love so very much, and to piece it all together I serve a couple nights a week at a restaurant. I love almost everything about this, I love that I never get bored because I’m always doing something different and I love that I mostly work from home. I like working from home, I do. I watched a great tedtalk recently on why introverts are important, and I agreed with it, all of the values that come with working by/for yourself. It’s just that sometimes you need to have people around to bounce ideas off of. Sometimes you need to be submerged in something, that you can’t be if your on your own.

Being in New York is like being inside a bouncy castle, there are so many ideas and inspirations flying around all the time. It is a city that supports an astonishing amount of restaurants, and not just restaurants, but farmers markets, (in the middle of downtown, almost every day there are farmers stands), it supports bakeries, and pickle makers, and bean to bar chocolatiers. There is a reason so many artists live in New York.

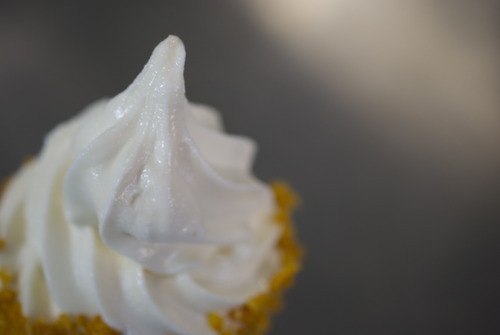
We ate the most unbelievable soft serve ice cream, a swirl of ritz crackers and peanut butter, with a dollop of concord grape jelly at the bottom at Momofuko.

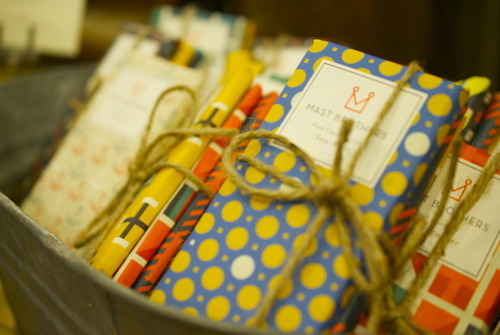
I decided I wanted to live in Brooklyn for many reasons, but mostly so I can be closer to Mast Brothers Chocolates, the most wonderful place I perhaps have ever been. 

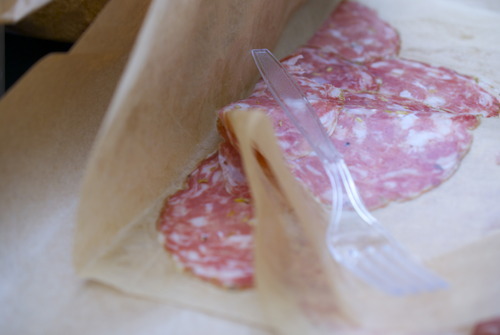
A close second would be eataly where we picked up the most gorgeous salamis and cheeses and we ate it in the park and felt very please with ourselves. 

Which is all a way of saying I’m feeling pretty inspired right now. I’m still floating on a Mast Brothers Chocolates high, I’m still savouring the burrata I had at Arthurs on Smith, I’m still imagining my life in a room full of Bemelman’s drawings. I can still feel the electricity of that city in me, and it’s making me feel wonderful.  

Finnish Cardamon Bread

Sometimes in Vancouver it rains. Some might say that most of the time it rains but I’m feeling optimistic so I’m going to say sometimes.

Sometimes in Canada it gets bloody freezing. That doesn’t happen much in Vancity, but it has this deep humid chill that gets into your bones. It’s a wet cold that creeps into your shoes, and blows down your neck, and sneaks behind your ears.

Sometimes around here you wake up and think “I can’t possibly go outside, it is to cold, what can do to justify just not leaving the house.”

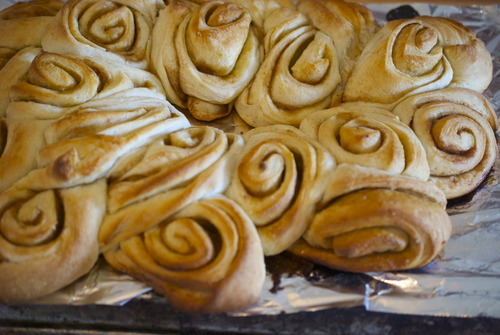
Sometimes, you need to stop feeling guilty and just make Finnish Cardamon Bread.

You need to have your whole house smell like rising bread, and you need to feel that comforting squish of yeasted dough between your fingers, and you need to sprinkle cardamon on it, which seems at first a wee bit crazy, but very quickly becomes the best idea you’ve had all day.

Sometimes you just need to let it rain, you need to make a strong cup of tea, and you need to eat Finnish cardamon bread.

And you need to be happy.

Finnish Cardamon Bread

Adapted from Pure Vegetarian By Lakshmi

2 cups Lukewarm water

1 1/2 tsp Dry Yeast

1 cup Sugar

1 tbsp Cardamon, ground

5-6 cups AP Flour

1 cup Butter

Brown sugar and cinnamon for sprinkling

In a small bowl mix together the water, yeast and a pinch of the sugar.

Let this get foamy on the top- that’s how you know your yeast is still alive. If after about 5 minutes you see no movement start over. Make sure the water is about the temperature of your hand- much hotter and you’ll kill it, much colder, and you’ll make it dormant.

In the bowl of a standing mixer fitted with the dough hook, OR in a food processor with the dough attachment, OR in a bowl with some serious arm muscles, put the remaining sugar, salt, cardamon and flour and mix in the yeast mixture.

Continue kneading the dough until it all comes together, and when you stretch a small piece of it, it gets thin enough to see light through.

Shape it into a ball, put back in the bowl and cover it. Wait until the dough has doubled in size, about an hour- an hour and a half.

Prepare a pan by covering it with parchment paper.

On a lightly floured surface roll out the dough into a large rectangle, about a foot and a half by 3/4 of a foot.

Sprinkle the brown sugar and cinnamon on top- use as much or as little as you want, I used about a cup and a half of sugar and a teaspoon of cinnamon.

Roll the dough a long the long end so that you have a long thin roll.

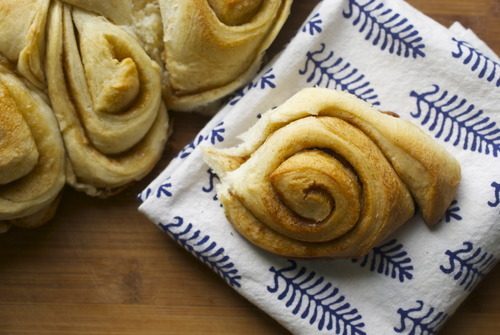
You can either cut them into rounds and place them on a pan, or you can cut slices almost all the way through, on a diagaonal. Then flip every other slice to the other side side so that going left right left right and you can see all the pretty slices.

This is easier to do on the pan then on a board and then have to move it.

Cover the dough with a tea towel and wait until it has doubled in size again, another hour or so.

Preheat the oven to 350F.

Bake your bread until it is golden brown.

Wait at least 15 minutes before getting into them! (Bread that is still hot is hard to digest!)

Roasted Pear and Pepita Salad

I live on the West Coast. I have for almost 6 years now, and I love it. I love the mountains, the ocean, the people, the attitude. I suspect I will stay here for a very long time. My biggest knock on this side of the country, in fact, is the lack of my family. My family has a long tradition of being to the east. While Toronto isn’t really that far east, despite what Vancouverites say, I do have family all the way down the coast, from Nova Scotia to Florida. And I was born over there too in Washington D.C..

It’s been hard today not to spend the whole day looking at pictures of the devestation from Hurricane Sandy. It was hard last night to sleep, knowing my sister was alone in Brooklyn with only broccoli in her fridge. It was tough not to think about my relatives in Boston and my friends in Washington. So I did what I always do when I panic. I cooked.

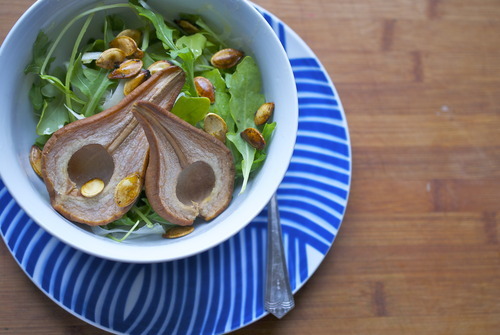
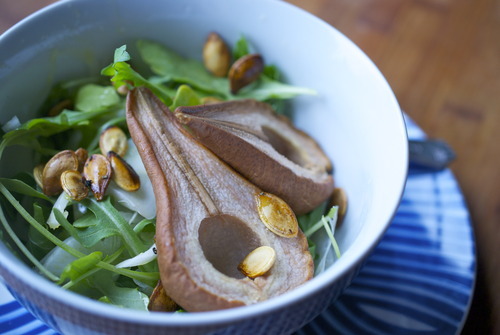
I didn’t make anything fussy, or fancy, or particularly hard. I made a simple salad, with roasted pears and pepitas and I ate it watching the news, convinced the wind was going to knock down my sisters building or that my cousins would be washed away with the tide.

But there was something, something little, but something none the less, about the roasted pears that made me feel better.  

Roasted Pear and Pepita Salad 

Serves 4

4 Bosc Pears

4 cups Baby Arugula or other sharp greens.

1 cup Fresh squash/pumpkin seeds, or dried. 

1/2 head Fennel, thinly sliced. 

1 tsp Fresh Rosemary, minced

1 tbsp Apple Cider Vinegar

1 tsp Dijon Mustard

5 tbsp Extra Virgin Olive Oil

Salt and Pepper

Preheat oven to 400F

Cut pears in half lengthwise. 

Using a melon baller, or a small spoon, cut out the core. 

Put the pears face up on a baking tray, rub with a bit of olive oil and bake until pears are cooked through, about 30 minutes. 

In a small frying pan heat up 1 tbsp of the olive oil. 

Add in the seeds and cook until lightly browned. Salt generously and mix in the rosemary. Remove from heat and allow to cool.

In a large bowl mix together the vinegar and mustard. Slowly add in the remaining oil and mix well. 

Mix together the arugula and fennel and toss with dressing. Top with pepitas and pears. Serve immediately. 

Acorn Garland DIY

 have this friend, her name is Tash, and she is all kinds of wonderful.

We met about 5 years ago when we were both going through devastating breakups, and she ended up moving into my building. There was this 10 month window of time when we did nearly everything together. A window of being single, working in restaurants, going out dancing, and gossiping about it all the next morning. It was a time that, even though I’m not sure either of us have cried more in that short a period of time, I’m not sure we’ve ever laughed that much either. It was a wonderful moment in my life that I will always smile when I think of.

After that 10 months we were both in relationships again (within about a week of each other I think), and we got real jobs, and Tash ended up moving to Kingston for 2 years to get her masters. People would sometimes ask me if we were still close, if we talked reguarly and I would have to stop myself from laughing, with the benefits of a My5 plan, we literally talked at least once a day, and often more. When she moved back a couple years ago she moved in with her man in Port Moody, a small distance away, and we still talk every day. We still hang out all the time. Although our boyfriends have banned the term, we used to call each other our “hetro-sexual lifemates” and that’s still pretty accurate. If you had to make me decide between Jordan and Tash, I would be hard pressed to choose.

What I’m saying here, is that Tash is an incredible friend who I just love.

So when she asked if for her birthday we could have a brunch party at our apartment, the answer was obviously yes.

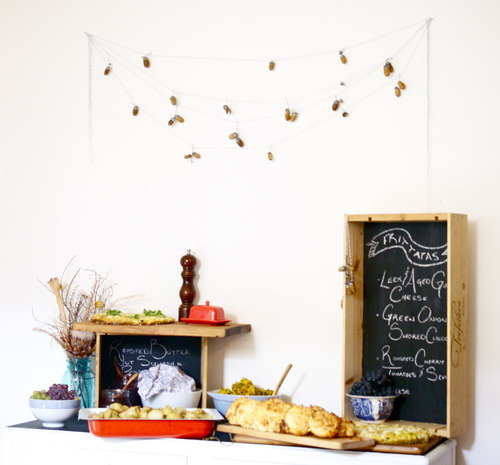
It was a simple breakfast, roasted root veggies, frittatas, cheddar bisquits.

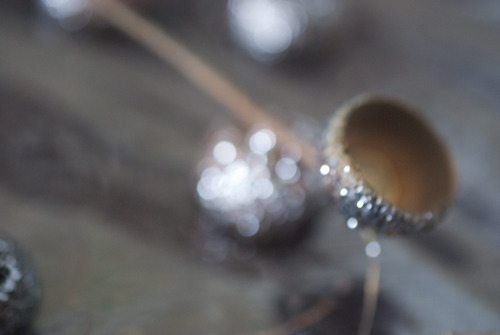
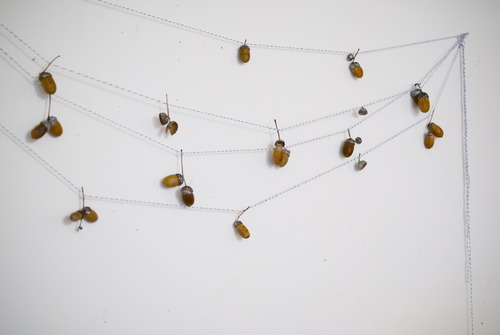
I also made a little garland for the wall, I kept looking online for cute fall set ups, and all I could find was things covered with orange and pumpkins, I wanted something a little less fussy, so instead I went with acorns. I went with wood, I went a little hipster and I threw in some chalkboards.

And it was super cute.

Silver Acorn Garland DIY

20 Acorns

Bakers Twine, or equivalent

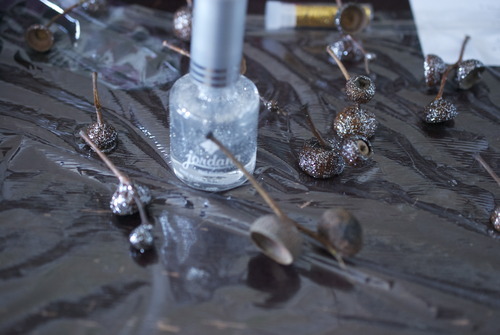
Cheap Sparkly Silver Nail Polish

Glue Gun

I just went down the street and found acorns. Almost all of the tops were seperated from the bottoms so it made painting them super easy. BUT if yours are holding together you will just need to be a bit more careful making sure the paint doesn’t get on the body of the nut.

Lay a sheet of plastic wrap down on your work surface.

Paint the tops of the acorns with the sparkly polish, getting as thick or thin a coat as you like. Place them on the plastic wrap when your done so they don’t stick to anything.

When they are dry use your glue gun to place the bottoms to the tops. Be liberal with the glue, the acorns are a bit heavy.

Tie your bakers twine to each of the twig tops and hang them where ever you like. I am totally saving mine and going to wrap them around my Christmas tree!

Apple Donuts at Edible Vancouver

Last week I threw out my back. I could barely walk, I couldn’t work, and mostly I just moped around, and the handsome man I live with was unbelievably nice to me. Made me dinner every night, helped me in and out of baths, brought me ice packs, and hot packs, and just generally got a lot of bonus boyfriend points. 

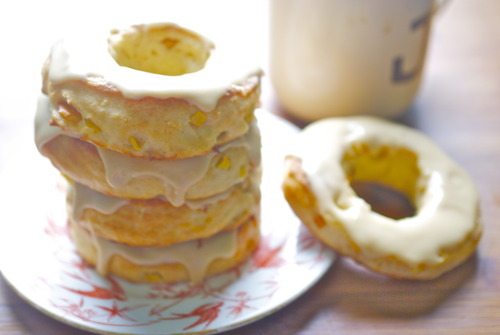
So I thought I should throw some love his way, and when I was feeling a bit better I woke him up with homemade apple donuts. 

To see the recipe, check out a (self proclaimed) charming story about my dad, and see some more pictures you can head over to Edible Vancouver. 

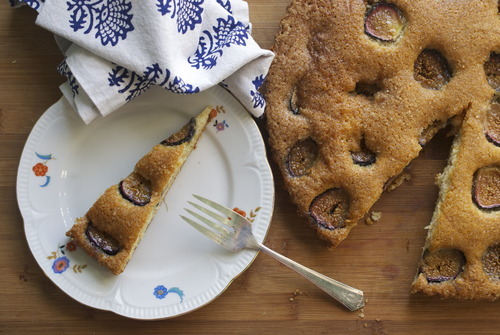
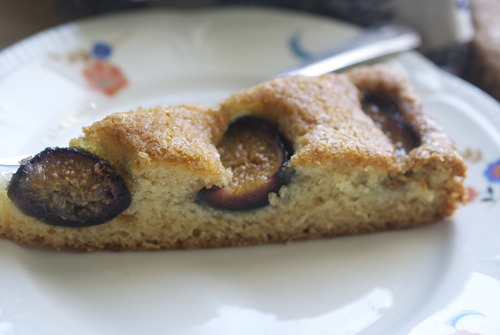
Spiced Honey Cake with Fresh Figs

Oh. Finally.

You know that feeling when everything might just be going a little too well? Something has to mess up and stress you out just to restore the balance of the world?

I have a had a great few weeks. Really, truly, great few weeks. My boss at the restaurant I serve at said he would like me to start doing the pastries at both his restaurants! Yes! My editor at Edible Vancouver promoted me to associate editor! Yes! It was Jordan’s birthday, we had a super fun party! Yes!

So of course my site had to go down. It had to go down when my graphic designer was hiking the volcanos of Iceland, largely out of internet range.

If you could see the emails I was writing to the tech support at all the different places that might be able to help, you would be amazed, and also surprised at how polite I was given how completely pushed around I was. I am Canadian I suppose.

So thanks friends, who came and checked even though there was nothing to look at for weeks, and thanks for your patience. I am so very very grateful for it.

I am also grateful for this fig cake. Because when one is mostly happy, but also deeply frusterated, the only thing I know that works, is cake.

Fresh Fig Honeyed Jewel Cake.

1 3/4 cup AP Flour

3/4 tsp Baking Powder

1/2 tsp Baking Soda

1/2 tsp Ground Cinnamon

1/2 tsp Ground Ginger

2 Eggs

1/2 cup Sugar

1/4 cup Brown Sugar

1/2 cup Honey

1/2 cup Milk

1/2 cup Vegetable Oil

1/4 cup Coarse Sugar, for sprinkling on top.

10-13 Plump Fresh Figs, cut in half

Preheat oven to 350F

Butter and flour a 9 inch Cake or tart pan.

In a standing mixer fitted with the paddle attachment cream together the oil, sugars, and honey

Add in the eggs one at a time beating well between each addition and wiping down the sides of the bowls with a spatula to make sure it is all evenly combined.

In a separate bowl sift together the dry ingredients.

Add in one third of the dry ingredients and mix until barely combined. Add in half the milk. Keep repeating until all the ingredients are incorporated being careful not to mix too much as that will make your cake tough.

Pour cake evenly into pan and smooth out with an inverted spatula.

Place figs in a concentric circle starting from the outside and moving in.

Sprinkle with coarse sugar and bake until an inserted skewer comes out with only a few moist crumbs, about 25-30 minutes.  

Technical Difficulties

Hi Friends, 

I’m not sure whats happening with my site right now, I just wanted to apologize, and tell you that I’m doing my best to have it fixed right away. I also wanted to let you know that tumblr, the hosting site here is planning on being down on Saturday (this Saturday! October 6th!) so if there is a message saying the site is completely down, it’s only temporary. Thanks for your patience with this, I hope to have it all sorted out in the very near future. 

xo, Claire

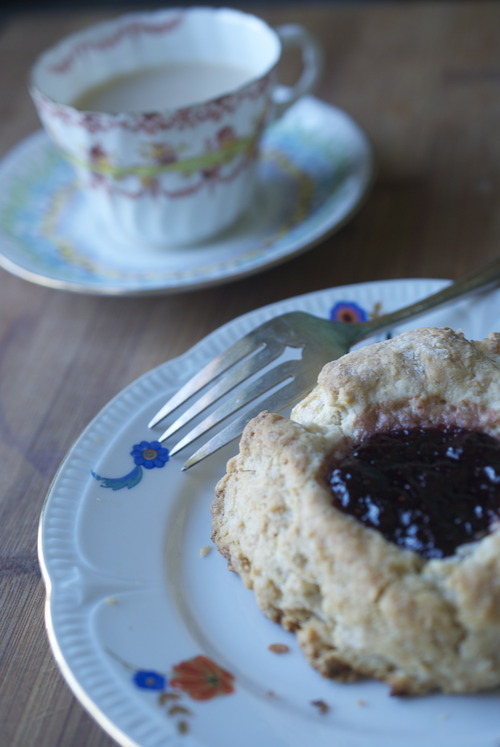
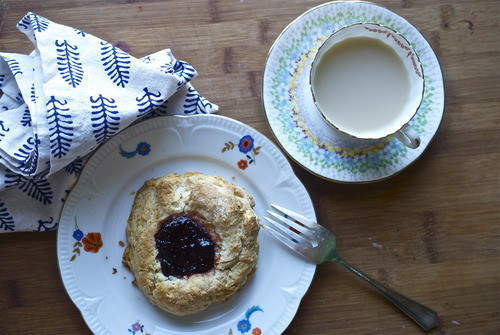
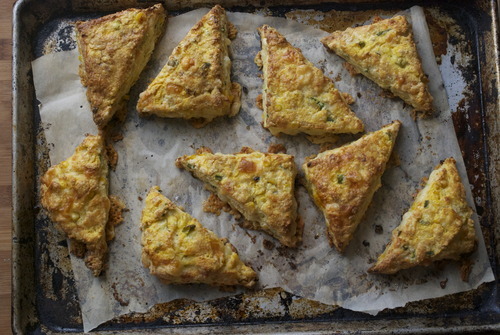
Birds Nest Scones- AKA Coconut and Jam Scones

It’s the time of year where my apartment starts filling up with canned goods. I swear it’s by osmosis, I couldn’t possibly spend this many hours, this often, making preserves and yet there they are, slowly taking over cupboards and shelves, the pickles(!), the peppers(!), the peaches(!). It gets out of control.

This is the sort of thing that drives someone a bit batty at times, but in the winter when all is dark, this is a glorious glorious thing, one that should not to be scoffed at.

However, it is also the time of year where scrap bits of jams begin to accumulate. The parts that don’t quite fill a jar, so get pushed into old jars and thrown in the fridge where I begin to forget about them. I do, I’ll confess to that.

So lately I’ve been trying to use up these scrappy bits, sandwich them with cookies, spread them on the morning toast, or today, bake them into scones.

My favourite way is to put them into birds nest cookies, you know, the coconut ones with the raspberry jelly in the middle. But today I didn’t feel like cookies, I felt like breakfast, and while there is definitely overlap there, birds nest cookies lie firmly on the side of unhealthy inappropriate breakfast choices. So instead, I made coconut scones and put a big blob of jam in there. It’s like having someone put jam on your scone for you, and it’s also like eating a cookie for breakfast. By which I mean, it’s the best thing ever. And you should probably make these. Stat.

1 cup AP Flour

1/2 cup Spelt flour/whole wheat flour/AP flour, whatever you prefer

2 tbsp Baking Powder

1 cup Unsweetened Shredded Coconut

1/4 tsp Salt

1/2 cup Butter, very cold, chopped into cubes

2/3 cup Coconut Milk

1/2 cup Jam (any flavour you like)

Preheat oven to 400F

In a medium sized bowl mix together all the dry ingredients.

Add in the butter and mix with your hands until the pieces of butter are the sizes of large peas.

Add in the coconut milk and mix until just combined.

Carefully mix in any bits of flour that are on the bottom of the bowl by folding the dough a few times, in half pressing it down, then folding it in half again. You’ll want to do this at least 5 or 6 times. If the dough gets wet add a speck more coconut milk.

Chill dough for at least 20 minutes.

Remove from freezer and divide into 6 pieces.

Without squishing or removing the layers you’ve just folded in shape them into circles and then press deep imprints in the middle. I don’t think I added enough, so if your judging by the pictures above, I’d use a bit more.

Divide the jam in the middle of the scones and chill for another 10 minutes.

Bake for 20 minutes or so, until the tops are getting golden brown and the jam has set a bit in the middle.

Allow to cool slightly before serving!

Hot Pepper Strands

This is the part of the year where I turn into a crazy person and start thinking about Christmas. Not, you know, where I’m going to put my Christmas tree or what kind of lights I’m going to buy. I’m not that nuts.

But this is the time of year when I start canning and preserving so that stocking stuffers are cheaper and half of it’s done by the time Christmas rolls around. And you get to give the gift of fresh produce in December.

When my sister called the other day and I told her I was drying peppers for stockings for Jordans family she simply said 

"Oh, your one of those people now" 

That scares me a bit. 

So this isn’t a recipe so much as a technique. Traditionally when making pepper strands you tie them with string, but I have found this to be very laborious and not very effective (read: after an hour of tying them last year I picked up the whole strand and every single pepper fell off in a splash of red). So I learnt that cheaters have tools- needles and thread.

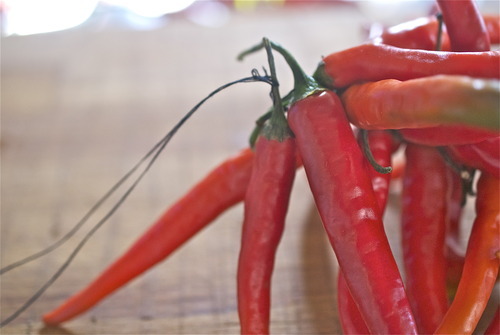
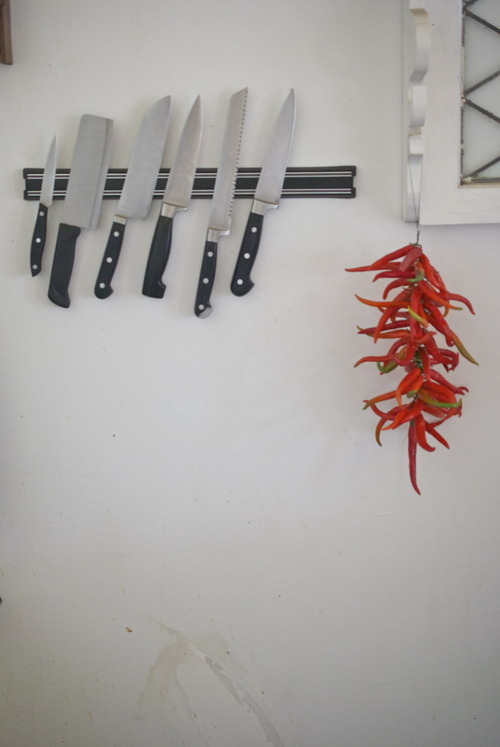
With this method this couldn’t really be easier. You simply thread a needle, tie one side up and thread the peppers through. The only thing that can get finicky is that the peppers have a tendancy to not go all the way down, so make sure as you thread them they push down all the way or you’ll have a long and sparse looking pepper strand. But that’s it!

Pepper Strands

Needle

Thread

1lb peppers, I used ring of fire peppers, but birds eye chilis would also be a good substitute

thread the needle with at least 1/2 meter of thread

tie a knot at one end

Thread the peppers through the stem, one at a time being careful to push them all the way through so they are stacked tight.

When your finished tie a loop at the top with the extra thread and hang to dry.

They will last at least a year.

S'mores Cupcakes- the redo!

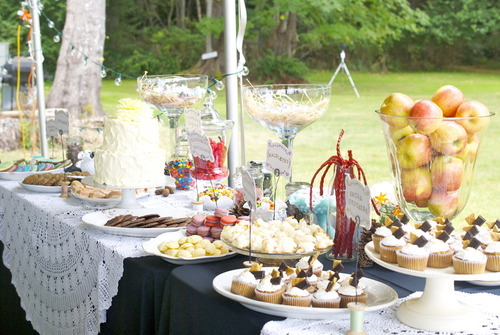
My summer of weddings is officially over. The chaos, the running around, the making cakes in hotel rooms is done. But I can’t say that I didn’t go out with a bang because 2 weeks ago I made an entire dessert buffet in a tiny hotel room with an even small kitchen- although, thankfully, a full oven. There were tears, there were mere hours of sleep, there were sunrises being watched, but it all worked out in the end, out of some miracle.

This last wedding was that of my beautiful friends Jordan and Lonny (who we affectionately call girl-Jordan in my house to distinguish from my boyfriend Jordan). It was a wedding full of breathtaking scenery, beautiful handmade details, and lots of love. And lots of dancing. Of course.

I didn’t bring my camera to the actual wedding, so I have seldom few pictures of that, but I did get some nice ones of the dessert buffet, and along with it, I am going to post my recipe for S’mores Cupcakes again, because it remains on of the most looked at pages on this site, and has some of the worst pictures! So I thought that should be remedied.

Recipe Adapted from Bon Appetit

Graham Cracker Cupcakes:

1 1/2 cups graham cracker crumbs (about 15 crackers)

1/2 cup all purpose flour

1 tbsp Baking Powder

3/4 cup Brown Sugar

2 Large Eggs

1/2 cup Butter, softened

3/4 cup Milk or Buttermilk

Ganache:

3/4 cup Dark Chocolate

2/3 cup Heavy Cream

Marshmallow Topping:

3 Large Egg Whites

2 tbsp Sugar

1/2 cup Water

3/4 cup Sugar

1 tsp Vanilla Extract

Decorate with

Broken pieces ofGraham crackers

2 Bars of Hersheys Chocolate

To make Ganache

Bring the cream to a boil

Pour on top of chocolate

Stir until smooth 

To Bake Cupcakes

Preheat oven to 350F

Line with cupcake liners or butter and flour 1 dozen cupcake tins, or 3 dozen mini cupcake tins.

Whisk together your dry ingredients

Cream together butter and sugar until light and fluffy. Add in the eggs one at a time beating well between each addition.

Alternate in the dry ingredients and wet ingredients beginning and ending with the dry.

Spoon the batter 3/4 of the way up the cupcake liners.

And bake them until they’re beautiful and slighly browned and an inserted skewer comes out with only a few moist crumbs, about 20 minutes for full sized cupcakes

To Make Marshmallo Topping

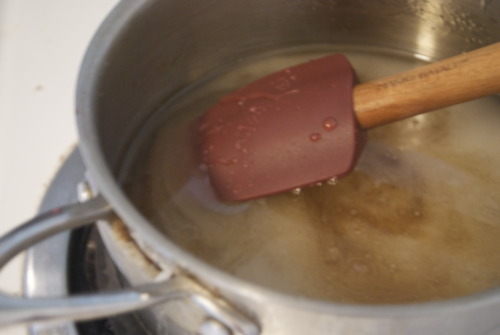
Put 3/4 cup sugar and water in a pot over medium heat and stir until the sugar is dissolved. Remove spoon and bring to a boil and with a candy thermometer let it comet ot he firm ball stage, 246Degrees F.

While it’s boiling put the egg whites and the vanilla in the bowl of a standing mixer with the whisk attachment. Whisk on high speed until soft peaks form. Add in the 2 tablespoons of sugar slowly until stiff peaks form.

When the sugar is up to temperature slowly pour it into the whites while whisking on high speed. Keep whisking until the bowl is cool and the meringue looks very marshmallowy, this will take about 8-10 minutes and the meringue should be mostly wrapped around the beater in a ball, and little should be on the sides of the bowl.

Put into a piping bag right away.

To Assemble:

Turn on the Broiler.

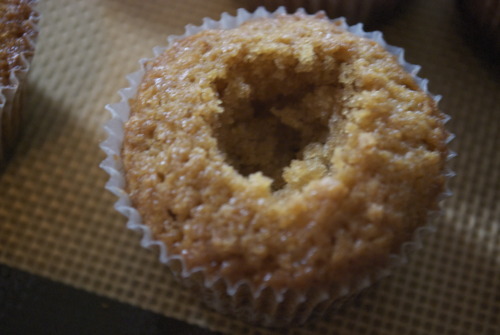
With a pairing knife cut a little hole out of the middle of the cupcakes.

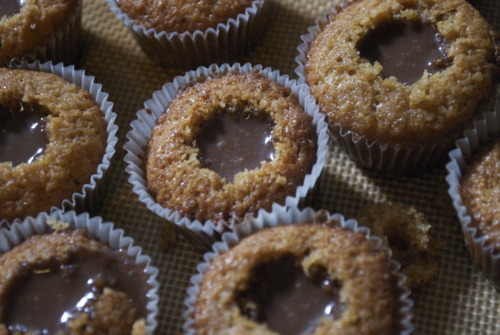
Put the ganache into a piping bag and pipe it into the holes in the cupcakes (the consensus was that there wasn’t enough chocolate in the ones I made so don’t hesitate to load em up!)

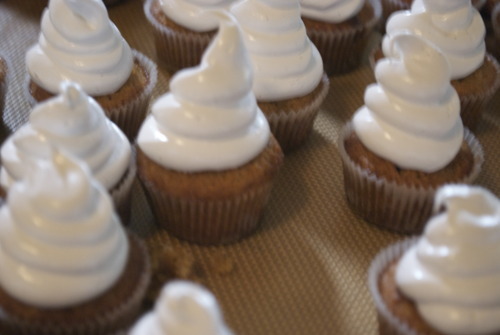
Pipe the marshmallow topping on top of the whole thing!

Now throw the whole things under the broiler for a couple minutes until the tops just get golden.

July 24, 2011
0 comments

BLT Salad

This summer, as anyone who has spent 10 minutes talking to me in the last year knows, is the year everyone I know got married out of town. We were invited to weddings from Brazil, to Rhode Island, to Vancouver island and seemingly everywhere in between. It’s been an extremely fun, love filled summer.

With great disappointment I had to turn down the invitation to Brazil, but I did head out to the other side of the country to go to my cousins immaculate wedding in Goat Island, RI. I will post pictures of that event soon, (and some of the cake I made in the hotel room- holy stress batman) but I made the trip a proper vacation and spend the week beforehand in Toronto hanging out with my mom.

Something you may not know about me; I am a huge Mama’s girl. Huge.

My Mom is woman of extraordinary strength and will, in the most understated way. She is tenacious, she is dedicated and she is almost unbearably kind. I could not adore her more if I tried.

My mom lives in this amazing old house in Kensington Market, a funky old neighbourhood right downtown in Toronto, surrounded on one side by Little Italy, on another by Little Portugal, and on the other by Chinatown. There are the most wonderful produce shops, my new favourite butcher, and my Mom knows everyone by name.

Which is to say we ate in and made dinner nearly every night. Which was perfect.

My mom let’s me lead in the kitchen, which is cute because she easily knows as much about food as I do. This is one of her favourite summer dinners, and now it’s mine. It’s the perfect way to use up the last of summers tomatoes, and it takes only a few minutes of cooking, which means more time sitting in the backyard, having a glass of rose, and talking to your mom.

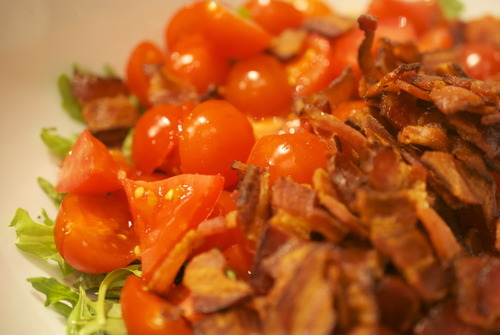
BLT Salad

*we had burrata, the most glorious of cheeses, in the fridge so we used that, but goats cheese, or shavings of parm, or no cheese at all will be fine here.

2 cups cubed bread

2 cups cherry tomatoes

150g thick cut bacon, cut into lardons

1 cup arugula

1 cup fresh basil

100g cheese (see note)

1/2 lemon

Olive Oil

Salt and Pepper

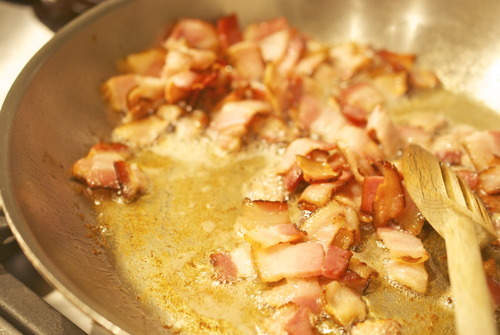
In a frying pan on medium heat fry up the bacon until crispy. Drain.

Clean the frying pan, then put back over medium-low heat.

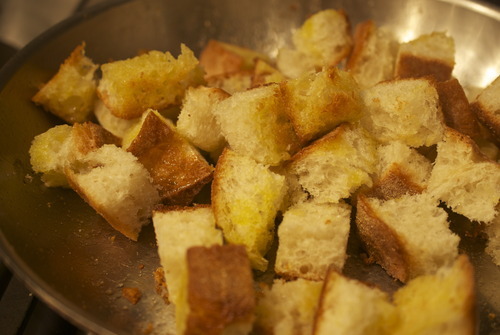
Pour in a large glug of oil and fry the bread until nice and crispy, season with salt and pepper. Put into a large bowl.

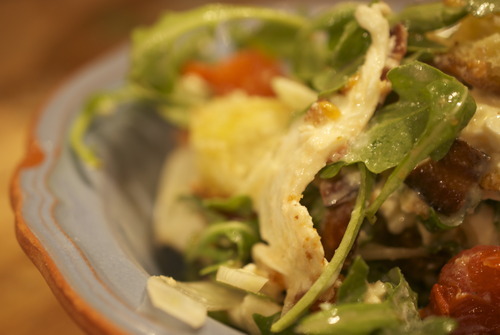
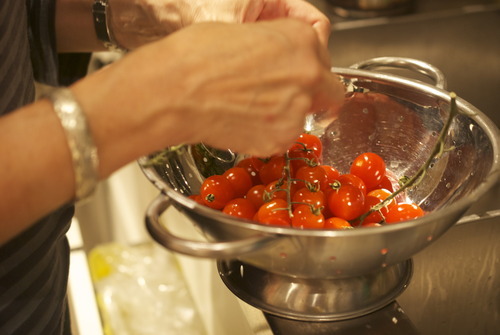
Half cherry tomatoes, tear the basil, wash the arugula and mix it all in with the bread and the bacon. Add the juice of the lemon and a bit more olive oil and season with salt and pepper.

Sprinkle the cheese on top if using.   

Fig and Prosciutto Toasts with Minted Ricotta

Anyone who knows me knows that I love meat. I have worked at butcher shops, I have an inordinate love of game meats, and God knows I love bacon. But a lesser known fact is that I was a vegetarian for 8 years growing up. I gave up a proscuitto-free life a long long time ago, with some serious pushing and prodding by a chef I worked for, but on the condition that I would only eat meat I could feel ethical about. Free-range, organic whenever possible, and way less meat then the American dream.

The lovely man that I live with is a very accomodating sort, he puts up with me, which does say quite a bit, but he puts his foot down on a few matters, that the floor gets swept every night, that windows should be open while we sleep, and there should always be meat with dinner. Now, I’m all for keeping the floor clean, and I have an extra quilt at the foot of my bed to stay warm but we definitely disagree on the meat issue.

So we’ve started compromising by using a little bit of meat. It’s unusual for us to eat a whole chicken breast, or 8oz of steak each, but it’s common to find some bacon in a pasta, or some local prawns in curries, or in this case, a few slices of proscuitto.

It’s not much, it isn’t. But it is enough to make him feel like he’s getting some meat in a meal, and it’s small enough to make me feel ethical about the whole thing.

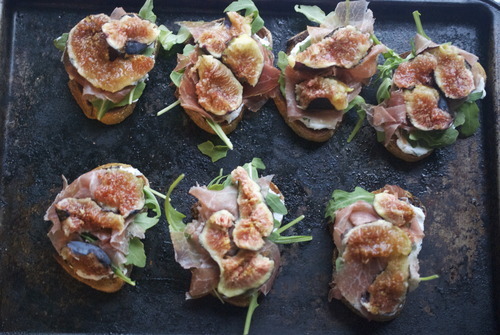
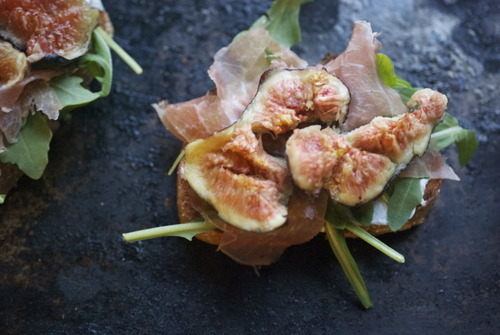
And that doesn’t touch on taste, which is big and important here. There are few things better in life than figs and prosciutto. But on top of crispy bread with ricotta? We is very close to perfection.

4 slices of good crusty bread

1/2 cup Ricotta Cheese

6 slices of Prosciutto, very thinly sliced.

8 large Mint Leaves, finely sliced

Zest of 1 lemon

6 Figs

Handful of Arugula

Olive Oil

Salt and Pepper

In a small bowl mix the ricotta with the mint, lemon zest, salt and pepper.

Cut the bread in half and toast until just getting warm.

Spread the ricotta mixture on the toasts.

Put a few leaves of arugula on top.

Tear apart the prosciutto and figs and layer them atop of the arugula.

Drizzle with olive oil and eat eat eat!

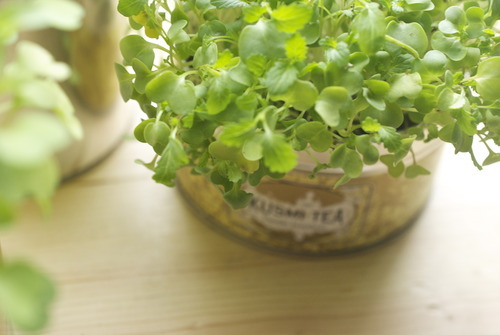
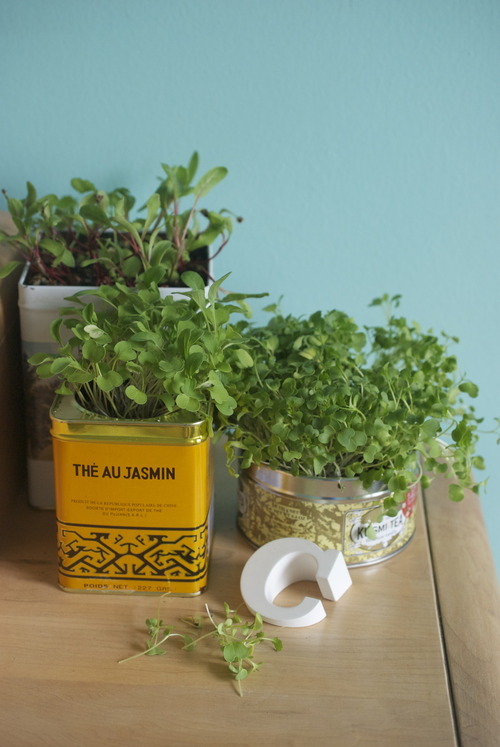
DIY- Grow your own micro greens in vintage tins!

Here’s the thing, at the end of the day, all I really want to do with my life is have a garden and make jam. That is my ambition. I would like to write about having a garden and making jam, and if people read what I wrote I would be on cloud 9. But that would be icing on the cake, and in a pinch I could live without it. What I long for and crave and yearn for, is a garden and a kitchen big enough to make jam.

Currently, I live in a 600 square foot apartment with a teeny tiny kitchen and no outdoor space.

I’m not trying to get your sympathy, honestly, I’m way to young to have my lifes ambitions fufilled yet. I know this. I mean, anyone who has it all figured out at my age must get so bored.

So I plug along in my little space, and I make jam for my friends and I plant herbs in tins and place them on my window sills and I’m pretty happy. Which is all one can ask for I suppose.

DIY Micro Greens in Vintage Tins

Heres a quick way to get those expensive microgreens from the farmers market at home for only a couple dollars! And they last longer.

Supplies

Potting Soil

Tins- vintage tins, tea tins, whatever you so wish.

Ziploc sandwhich bags

double sided tape

Seeds, arugula, mustard, swiss chard, sunflower, and romano beans are all good options,

Paper Towel

Pebbles.

Get 2 squares of paper towel damp and place them on a plate.

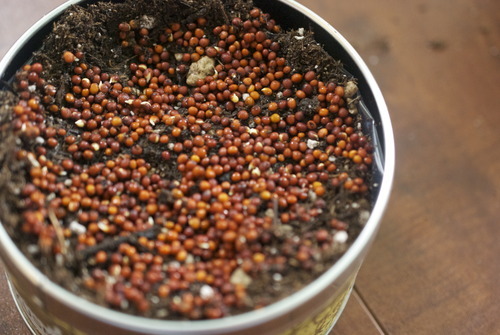
Sprinkle a tablespoon or so of seeds on it, and then cover with another damp piece of paper towel.

Keep this damp for a day or so until the seeds start to sprout.

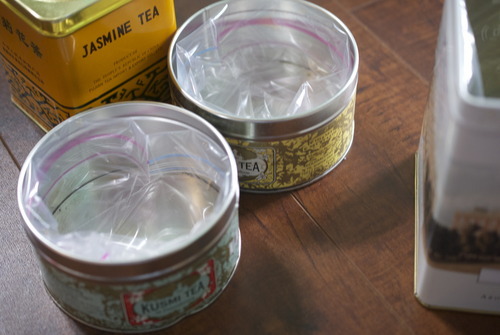
Take your double sided tape and put a few pieces on the inside of your tin around the opening.

Place your ziploc bag inside the tin and press the edges into the double sided take getting it as close to the opening as you can without having the plastic come over the edge.

Place a small handful of pebbles at the bottom- this will allow for better drainage.

Put the potting soil on top and press it in so it is pretty well packed but not hard.

Sprinkle the sprouted seeds on top and water.

Keep the sprouts well watered and watch them rise up, once there a couple inches tall cut them and put them in salads, sandwiches, on top of fish or anywhere else you might like!

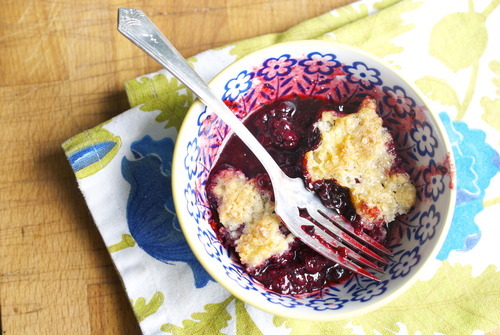
Blackberry Slump

There is something deeply nostalgic about blackberries for me. As a kid we never bought the berries they were always picked. They were grabbed along the sides of trails by my grandparents house in Nova Scotia and beside the dirt road that led to the cottage. We found them on hiking trips and they covered the sides of rivers we canoed down in Maine. Blackberries taste like summer vacation and freedom, and they taste a little bit like the fear of bears.

Blackberries might be my favourite berry but I feel pretty strongly that they shouldn’t be turned into anything fussy, blackberries should be rustic and simple and mostly just show off how perfect they are just on their own.

For me this blackberry slump is just the ticket. The berries are cooked until they just start to get soft and the pastry on the top both gets crisp and soaks up the juice and turns into something that tastes like home.

4 cups Blackberries

1 cup Sugar

2 tbsp Corn Starch

3/4 cup AP Flour

1/2 tsp Baking Powder

1/2 tsp Baking Soda

1/4 tsp Salt

4 tbsp Chilled Butter

3-4 tbsp Buttermilk

3 tbsp Coarse Sugar

Preheat the oven to 375F

In a 8 inch casserole dish mix the blackberries, sugar and corn starch.

In a separate bowl mix the remaining dry ingredients except the coarse sugar. Add in the butter and break it into pea sized pieces.

Carefully mix in the buttermilk adding more if necessary until the dough is quite soft. Do not over mix.

Place the dough on a lightly floured surface and with your fingers press the dough into the shape of the casserole dish.

Place the dough on top of the fruit and sprinkle the sugar on top.

Bake the slump for 45 minutes or until the sugar on top has started to caramelize, and the blackberries have started bubbling up around the edges.