Spaghetti Carbonara with Poached Eggs

breakfast-carbonara-4.jpg

I mentioned this in my last post, and I feel a bit weird about announcing it over the internet, but here goes: Over the holidays Jordan proposed, and I said yes. It has been a magnificent couple of weeks, full of celebrating with friends and family. Jordan told me that the wedding is off if I go on a “wedding diet” and I assured him that it wouldn’t happen, because it can’t happen. Because everywhere I turn these days someone is pouring me a glass of bubbly, and then refilling it, and then refilling it again. Let me tell you friends, it is hard to stay sober when you’re recently engaged.

So this post is against all the new years resolutions, and against the very principle of a wedding diet, because it is hang-over food.

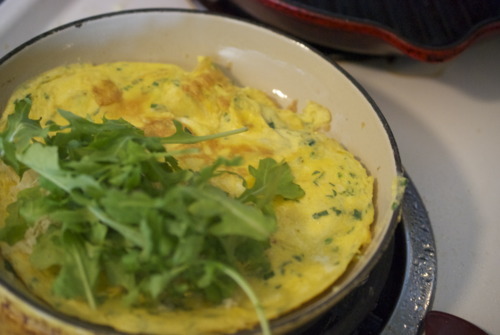
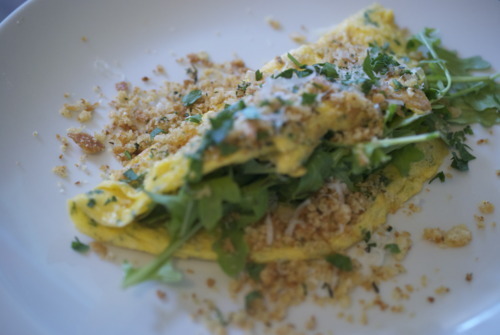
Spaghetti Carbonara, or “bacon and egg bascetti” as I used to call it when I was wee, it basically just that- bacon, eggs, parmesan, and loads of black pepper. You don’t need to cook the sauce, it cooks as the it’s tossed with the hot pasta. You can easily make this without the poached egg of course, but there is something about adding that makes the pasta feel like breakfast. Which is sometimes just the ticket.

breakfast-carbonara-2


Spaghetti Carbonara with Poached Eggs


1 lb Spaghetti

7 Eggs (use good quality free range organic ones, it really will make a difference)

400g Bacon (good smoky stuff please!)

200g Parmesano Reggiano, or Grana Padano

Salt and Pepper


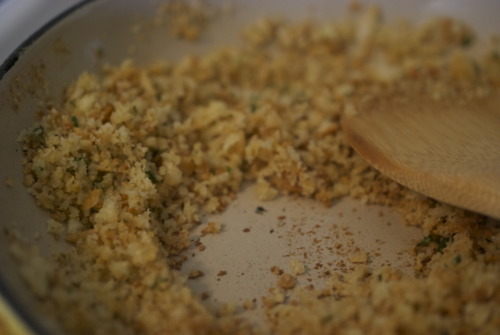
Cut the bacon into ½ inch pieces and cook them in a small frying pan over medium heat for about 15 minutes, or until they are crunchy, but not burning.

Strain the fat off into a jar of can. Put the bacon aside.

Fill a large and a medium sized pot with water and bring to a boil.

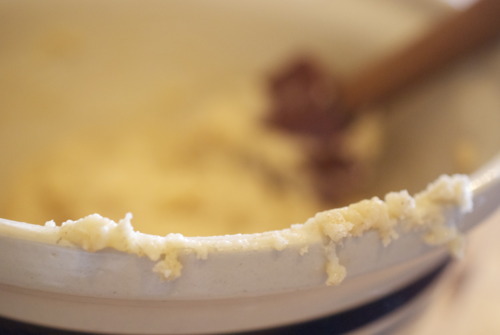
Meanwhile grate the parmesan and mix it in a large bowl with 3 of the eggs and healthy cracking of black pepper.

When the large pot of water comes to a boil, season it liberally with salt and cook the pasta to the directions on the package.

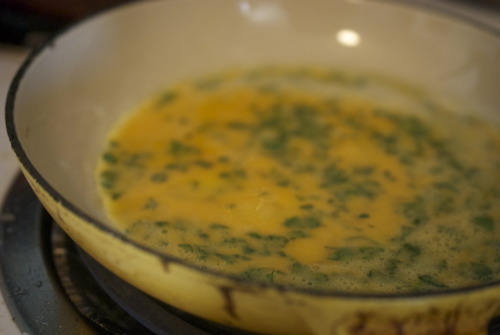
Just as the pasta is done and you’re about to strain it, crack the eggs into the remaining medium sized pot.

Strain the pasta and add it, and the bacon to the egg and parm mixture. Stir vigorously until it has completely combined, making sure it doesn’t curdle.

Divide among 4 bowls.

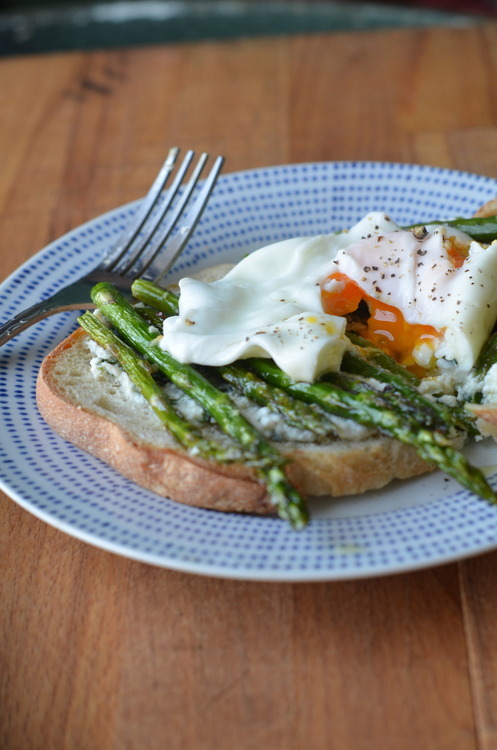
Using a slotted spoon remove the eggs from the water- testing to make sure they are done by gently poking at the yolk and white with your finger, ensuring that the white is hard but the yolk is soft.

Put the eggs on top of the pasta and enjoy immediately!

breakast-carbonara-1

Poached Eggs with Seared Trout and Minty Pesto

tumblr_inline_n2szi49T9a1qfrmur.jpg

My Mom grew up with what she calls “Depression Era” food. The sort of get-as-much-fat-in-you-while-you-can-because-you-don’t-know-when-food-will-be-around-next. The sort of food inspired by the hardships her parents faced when they were young. She had never had a green bean not cooked in cream sauce until her twenties. It wasn’t food that was based around quality ingredients, or fresh ingredients, or local produce, except incidentally. In fact I’ve only really heard her talk about a handful of things she ate as a kid. Mostly we talk about her moms “cloud” biscuits, which are legendary in my family. They are outrageously good. As are Grammy’s gingerbread cookies and her pies. The other food-things that my mom talks about from when she was wee, is corn and trout, which are things her dad made.

For corn, my Grampy would have a pot of water boiling on the stove, and then, and only then, would he go outside and cut the corn, shuck it, and bring it inside to boil. The pot had to be boiling. It’s the only way to eat corn.

The other thing my Grampy did was go trout fishing. He’d wake up at the crack of dawn and escape the kids and watch the sunrise. And then he’d fry up trout for breakfast for the family. My mom starts smiling when she talks about those trout.

I’ve been thinking an awful lot about Grampy lately. I cleaned out my desk the other day and found a slew of cards I’ve written him and never sent. Which is ridiculous. I’ve got stamps, I’ve got envelopes. I’ve got cute little cards. They have thoughtful notes written out. Why haven’t I sent them? They do no good here.

The other thing I found was all these letters that he’s sent me. His is so witty, and smart, and funny and charming. There is so much of his personality in those letters, a personality I don’t know very well because we live so far apart.

So the other day I was thinking about him, still kicking it at 94, when I walked by my local fishmonger and there were the most beautiful little trout in the window. And I knew I had to get some for breakfast.

I’m sure this is not how my Grampy made trout. I can’t imagine him making a pesto or poaching an egg, although it’s possible that those are two skills he has that I don’t know about. But it’s a very me breakfast, poached eggs and beans and pesto, with a bit of him thrown in, in the form of little river fish.

And it was wonderful.

Poached Eggs with Seared Trout and Minto Pesto and Green Beans

Serves 2

  • 1/2lb Green Beans, cleaned with the woody ends picked off
  • 2 small Trout, or one larger one. Gutted and filleted.
  • 2 good quality Free Range Eggs
  • 1 small Handful of Mint
  • 1 large Handful of Parsley
  • 1 small clove of Garlic, peeled and coarsely chopped.
  • 1 Lemon
  • 1/3 cup Olive Oil
  • Salt and Pepper

In a food processor blitz together the parlsey, mint, garlic and ¼ cup of the olive oil. Zest half of the lemon in and add in a healthy pinch of salt. Pulse a couple times. Check for seasoning. Put aside.

Fill a medium pot with water and bring to a boil. Add a pinch of salt.

Meanwhile bring a small frying full of water to a boil. Add the beans and cook for 2 minutes. Strain and set aside.

Rinse out the frying pan and put it back on the stove over medium heat.

Let it warm up and then add the remaining olive oil.

Season the trout liberally with salt.

When the pan is quite hot (but not smoking) put the fish fillets in skin side down. Immediately shake the pan a bit to move the fish around. That will make sure they don’t stick.

Cook the trout on the skin side until it’s about ½ way cooked. Flip them over, and cook for 30 more seconds.

Put the fish on a plate.

Once you’ve flipped the fish crack your eggs into your boiling water. Turn the water down to a simmer. And cook for about 3 mintues for nice runny eggs.

Put them on top of the fish with the beans and spoon the sauce on top. Serve Immediately.

Maple Peach Dutch Baby Pancake

image

It has been a whirlwind. There have been parties and weddings and wedding cakes. There have been new jobs, and exciting starts and, of all things, boxing matches. There have been hiking trips and visits from friends, and long summer days.

It has been fun. It has been stressful and crazy and overwhelming but it has been fun.
I am feeling pretty lucky these days.

But it’s time to put my nose to the grindstone. It’s time to start writing here more, in this wonderful little piece of the internet that I love so much. It’s time to start really pushing myself again, and it’s something I’m surprisingly looking forward to.

It’s time.

None of that has anything to do with dutch baby pancakes. Nothing at all really.

But everything I’ve said thus far has been very honest, and I’m going to stick with that theme and tell you this; this dutch baby pancake is all kinds of wonderful. It’s soft and eggy and filled with peaches, which, and I’m going to make a bold statement right now, are my favourite fruit.

You should probably make it right now. It’s happy as a dessert, but it’s equally as at home as a sweet breakfast, although I’l admit, I ate a whole lot more then I should have for lunch! 

image

Maple Peach Dutch Baby Pancakes

Adapted from a recipe from Bon Apettit

4 medium super ripe peaches

1/4 cup Maple Syrup

4 tbsp Butter

1tbsp Sugar

3/4 cup Flour

3/4 cup Milk

1 tsp Salt

1 tbsp Vanilla Extract

Preheat the oven to 400F

Bring a medium pot of water to a boil.

With a pairing knife cut an X shape into the bottom of the peaches.

Put the peaches in the water for about 15 seconds.

Immediately strain and rinse with cold water until they have cooled.

Again with the pairing knife, gently peel back the skin of the peaches. It should be very easy and have no resistance.

Cut them into 1/4 inch slices.

Melt 2 tbsp of the butter.

Scrape the butter into a blender and add the sugar, flour, vanilla extract, salt, and milk. Blend until smooth.

In a 12 inch cast iron pan over medium heat, melt the remaining butter. Add in the maple syrup stir to combine, then add in the peaches.

Cook, stirring often, for about 7 minutes, or until the peaches are cooked through.

Pour in the batter and move the pan to the oven and bake for about 17 minutes until puffed and brown.

Serve immediately- but don’t worry as the pancake sinks a bit, it will happen no matter what you do!

image

Poached Eggs Toast with Roasted Asparagus and Herbed Ricotta

Unless you’re a cook, I’m not sure if you will appreciate what I’m about to tell you. I’m not sure if you’ll understand that gravity of my next statement, unless you have spend countless years working every evening and weekend of my entire adult life, but I, Claire Lassam, don’t work on weekends any more.

To non cooks let me tell you this- for the first time in our 6 year relationship, my boyfriend and I have the same days off.

It is amazing.

I am not exaggerating when I tell you it’s a small miracle.

I am so very very happy about it.

Jordan on the other hand, is working all the blooming time these days, and about once a week he’s taking the ferry over to Victoria. So I thought I should meet him on the island and we should escape for a couple days. Actually I’m thinking we should do this all the time.

Oh man I love Vancouver Island. I really really really do.

The people are so nice, the weather is so much better, the scenery is totally comparable to where I currently live.

I just love it.

While we were away I made this little breakfast. Nothing fussy- just some toast and asparagus and ricotta with an egg on top, but it’s rich and comforting and so simple to make. And it was just about the perfect thing to eat while sipping hot tea, reading a book, and just generally being very calm, very relaxed, and very happy.

Poached Eggs with Roasted Asaparagus, Ricotta, and Sourdough Toast

4 Eggs

4 pieces Sourdough Bread

1 cup Ricotta

zest of 1 Lemon

2 tbsp Parsley, chopped finely

1 bunch Asparagus

Olive Oil

Salt and Pepper

Preheat oven to 400F

Break the bottoms of the asparagus- don’t cut them, they will break where the woody part ends.

On a lined baking tray spread out the asparagus, and mix with a good glug of olive oil, some and pepper.

Bake for about 15 minutes, or until the tips are crispy, but they aren’t soggy.

Bring a large pot of water to a boil.

Meanwhile mix the ricotta with the zest, parsley, salt and pepper.

Poach the eggs- break them into the large pot of water and turn the water down to a low boil. Cook for about 3 minutes for soft poached eggs.

Toast the bread.

Spread the ricotta mixture on the toast, put a handful of asparagus on top of that, and top each piece with an egg.

Sprinkle some more salt on top and enjoy!

Cinnamon Roll Biscuits

image

People always ask me what my favourite thing is to bake. I tell them I’m a baker and it’s the first question. And here’s the thing of it; I never know what to say.

There are things that I don’t love baking- macarons for instance, which are delicious and wonderful, are also the bane of my existance. Puff pastry, with it’s tedious rolling and folding would fall into that category, but favourites? They’re harder to come by.

But recently I’ve decided. They’re something friends always ask me to make, and then continue to talk about long after the last one has been scarfed up, and they’re something I genuinely really enjoy making.

Biscuits.

Guys, I’m willing to put it down into the internet, a place where things are never deleted. I make great biscuits, and I love making them.

The simple act of cutting in the butter, folding in the buttermilk, pressing out the dough with my finger tips. They are my favourite. I love them.

Which is a good thing, because man oh man, have I made a lot of biscuits lately. I’d say about 300 last week alone.

Oy.

See I work for a Southern restaurant which opened up last week as a pop up fried chicken shack. And what is fried chicken without biscuits? Not much apparently, because those things were flying out of the kitchen. It was all biscuits all the time.

So with the scrappy bits that were left over and a bit to tough to serve, I rolled them out , sprinkled them with cinnamon and brown sugar and rolled them up. They’re like the cookies my mom used to make with left over pie dough, except much, much, bigger and fluffier.

And seriously, those things were delicious. Like, proper, all kinds of wonderful, I will sell these one day when I open a bakery, delicious.

They were one part biscuit, one part cinnamon bun, and all parts fantastic. So there you go.

Biscuits, they are my favourite, whether for dinner, or for breakfast, or for shoving in your face when they’re covered in cinnamon and sugar and still hot from the oven.

image

Cinnamon Roll Biscuits

Adapted from the Tartine Bakery Cookbook

3 3/4 cup AP Flour

1 tbsp Baking Powder

3/4 tsp Baking Soda

1 tsp Salt

1/4 cup Sugar

1 1/2 cups Buttermilk

1 cup Butter, very cold, cut into small cubes

Filling:

1 cup Brown Sugar

2 tbsp Cinnamon

Egg Wash:

1 egg yolk

1tbsp Cream/milk

Preheat your oven to 375F

In a large bowl mix together the flour, baking soda, baking powder, salt, and white sugar.

Put in the cold butter and with your hands break the butter into pieces. You want the butter to be in big pieces and very cold- it’s this cold big butter that goes into the hot oven and causes steam which makes the biscuits rise. The pieces of butter should be somewhere between a pea and a fava bean.

Slowly add in the buttermilk and fold it in gently, adding more if you need it, to make the dough just come together. Make sure your scooping all the dry bits from the bottom of the bowl.

On a well floured surface fold the dough, flatten it out, and fold it again, about 5 times until the dough has come together nicely but isn’t getting firm.

With a rolling pin roll out the dough to about 3/4 inch thick, being liberal with the flour so it doesn’t stick.

Sprinkle the brown sugar and cinnamon on top and roll up the dough into a log.

Cut the dough into 2 inch pieces.

Put on a baking tray and refridgerate for 20 minutes.

In a small bowl mix together the egg yolk and the milk/cream.

With a pastry brush, brush the tops of the scones with the egg wash and put into the oven right away.

Bake for about 20 minutes or until the tops are starting to brown and your whole house smells incredible.

Let cool for at least 10 minutes before digging in!

Valentines Breakfast for Dinner- Pancakes with Raspberry Rose Syrup

Here’s the thing of it, guys just don’t like Valentines Day. I have never heard a man sound excited about buying flowers that are suddenly double the price two weeks into February. I have never been told that a male friend is really excited to take their girl out for dinner, or to a show, and I think that’s mostly because men really don’t like being told what to do. So they don’t like being told they have to be romantic. They’re stubborn like that.

Here’s the other thing, all girls like Valentines. Even the tomboy-est of ladies wants a day of the year where the door is opened for her, and roses are sitting out on the table when she gets home. It’s a silly day, but it’s also wonderful. It’s a day of romance, and it’s a day for pink. And I will make no claims pretending to be above it.

It’s just fun.

But what isn’t fun is how expensive it is to go out on Valentines, how much more restaurants charge for things, and how busy it is. Which is why, when I’m not working, Jordan and I make dinner in on Valentines. And this year, I’m proposing pancakes.

I love breakfast for dinner. It is my absolute favourite. It is simple, and not fussy, but it feels special. It feels indulgent, and it feels a little bad for you, and if you have pancakes for dinner, you’ve already had your sweets and you don’t need dessert!

It’s extra festive if you cut out some hearts from pretty paper and sew them onto string, and tie that string onto a couple of skewers so that you have heart bundting on your pancakes. But you don’t have to.

These pancakes are incredibly good, they are the lightest fluffiest pancakes I have ever encountered, and they are best when they are smothered with this raspberry-rose sauce. Just please don’t go and buy the raspberries that are imported from Argentina (unless you live in Argentina, in which I’m super jealous) I used some lovely frozen local ones and they are all kinds of delicious.

Super Fluffy Pancakes with Raspberry Rose Syrup

Syrup:

1 1/2cups Sugar

1/3 cup Water

1cup Raspberries

1 tsp Rosewater- or to taste

Pancakes:

(adapted from Oh So Sinfully Delicious)

2cups AP Flour

1 tbsp Baking Powder

1/2 tsp Salt

1/4 cup Sugar

1 cup Buttermilk, or regular milk with a tsp of lemon juice mixed in.

1/4 cup Melted Butter

2 Eggs

In a small saucepan mix the water and sugar, and over low heat allow all the sugar to dissolve. Add in the raspberries and bring to a boil. Add in the rosewater, adding more depending on your preference and how strong your rosewater is- just don’t add so much it gets perfumey.

In a medium sized bowl mix together all the dry ingredients.

In another bowl mix together the milk, butter and eggs.

Quickly pour the wet ingredients into the dry ingredients and mix until barely combined and still lumpy.

Warm a frying pan to a low heat and add in the oil. Add in big spoonfuls of the batter into the pan. When bubbles start to appear in the top fly the pancakes over.

Cook over low heat- the batter is very thick and they will take a little longer to cook then you may be used to, but don’t rush it by raising the temperature or they will burn.

Just put them on a plate and smother then with syrup and eat up!

Raspberry and Mascarpone Brioche Galette with Almond Crumble

Now is the time of year I start to miss summer fruit. In the fall there are quinces and apples to get me through, and then the fun of Christmas takes over and I can get excited about mashed potatoes, but by mid January I am sick of it. I want red berries.

It was glee, pure, unadulterated glee that took over me when, at my local market, I noticed some local raspberries in the freezer.

Apparently this dive-y rundown market that I frequent for their unbelievable deals on pecans just froze all of the berries that they didn’t sell this summer. Firstly, this makes perfect sense. Secondly, how did I only just see them?

Oh lord. My week has been made.

We had some friends over recently, and as Jordan and I were flipping through cookbooks deciding what to make, he made several pointed comments about a brioche tart in the Ottolenghi book.. So I, being that lovely charming girlfriend that I am, (self proclaimed at least) decided to make it.

This is the most perfect breakfast. We ate it for dessert, and it was great, but for serious friends, eat this for breakfast. Next time you have people over for brunch, put this out on the table. I promise, they will be friends for life. The whole thing is somewhere between a coffee cake, a tart, and yet so much better. So very much better.

Raspberry, Mascarpone, Brioche Tart

Adapted loosely from Ottolenghi

Brioche:

2tbsp barely warm water

1tsp Dry Active Yeast

1 1/2 cups AP Flour

1/2 tsp Salt

2 tbsp Sugar

2 Eggs

1/2 cup Butter

Filling

3/4 cup Mascarpone

3 tbsp Icing Sugar

1 tsp Vanilla Extract

Zest of 1 Lemon

2-3 tbsp Cream

1 1/2 cup Raspberries, or other red berry

Almond Crumble

1/2 cup Ground Almonds

1/2 cup AP Flour

1/3 cup Brown Sugar

1/3 cup Butter, cut into small cubes

In the bowl of a standing mixer fitting with the dough hook combine all ingredients except butter and mix until it comes together. Continue mixing until you can take a small piece of the dough and, when you stretch it carefully, it will stretch so thin you can see through it. This is called the window test. If the dough rips then keep kneading the dough until you can.

OR You can do this in a food processor fitted with a dough blade, OR by hand. If doing it by hand just mix it all into a bowl until it comes together, then move the dough to a lightly floured surface and push your heels of your hands into the dough. Then fold it onto itself, and repeat this pushing and folding motion until you do the window test.

Put the dough into a clean bowl and let it rise until it has doubled in size, this should take about an hour.

Punch the dough down. You can use the dough right away, but if you’ve planned long enough in advance, the dough will be even better if you put it in the fridge overnight.

If you do put it in the fridge, you will need to take the dough out about an hour before you start to bring the dough back up to room temperature.

When the dough is ready put it onto a lightly floured surface and with your hands stretch the dough out into a large circle. Using a rolling pin will flatten lots of the air bubbles that the dough has been working so hard on producing, so instead use your hands to push from the center out. It does not have to be perfect. This is a free formed galette, and it being a little rough around the edges is totally okay. Pick up the dough carefully and put it on a well floured cookie pan.

Preheat oven to 375F

In a small bowl mix the mascarpone, icing sugar, lemon zest and vanilla together. Add in the cream, tablespoon by tablespoon until you get a texture that is thin enough to spread, but not so thin it will be runny.

Spread this on the brioche dough leaving about an inch around the edges.

Now top with the raspberries.

In another small bowl mix together all the ingredients for the crumble, and with your hands break the butter into the other ingredients. You don’t want to form a cohesive dough, just a crumbly mixture.

Sprinkle this on top of the raspberries. 

Let this sit out for about 20 minutes as a last proof, and then bake until the crust is nicely browned and the center just barely wiggles when you shake it. Take it out of the oven and let it cool for at least 20 minutes before serving.

Finnish Cardamon Bread

Sometimes in Vancouver it rains. Some might say that most of the time it rains but I’m feeling optimistic so I’m going to say sometimes.

Sometimes in Canada it gets bloody freezing. That doesn’t happen much in Vancity, but it has this deep humid chill that gets into your bones. It’s a wet cold that creeps into your shoes, and blows down your neck, and sneaks behind your ears.

Sometimes around here you wake up and think “I can’t possibly go outside, it is to cold, what can do to justify just not leaving the house.”

Sometimes, you need to stop feeling guilty and just make Finnish Cardamon Bread.

You need to have your whole house smell like rising bread, and you need to feel that comforting squish of yeasted dough between your fingers, and you need to sprinkle cardamon on it, which seems at first a wee bit crazy, but very quickly becomes the best idea you’ve had all day.

Sometimes you just need to let it rain, you need to make a strong cup of tea, and you need to eat Finnish cardamon bread.

And you need to be happy.

Finnish Cardamon Bread

Adapted from Pure Vegetarian By Lakshmi

2 cups Lukewarm water

1 1/2 tsp Dry Yeast

1 cup Sugar

1 tbsp Cardamon, ground

5-6 cups AP Flour

1 cup Butter

Brown sugar and cinnamon for sprinkling

In a small bowl mix together the water, yeast and a pinch of the sugar.

Let this get foamy on the top- that’s how you know your yeast is still alive. If after about 5 minutes you see no movement start over. Make sure the water is about the temperature of your hand- much hotter and you’ll kill it, much colder, and you’ll make it dormant.

In the bowl of a standing mixer fitted with the dough hook, OR in a food processor with the dough attachment, OR in a bowl with some serious arm muscles, put the remaining sugar, salt, cardamon and flour and mix in the yeast mixture.

Continue kneading the dough until it all comes together, and when you stretch a small piece of it, it gets thin enough to see light through.

Shape it into a ball, put back in the bowl and cover it. Wait until the dough has doubled in size, about an hour- an hour and a half.

Prepare a pan by covering it with parchment paper.

On a lightly floured surface roll out the dough into a large rectangle, about a foot and a half by 3/4 of a foot.

Sprinkle the brown sugar and cinnamon on top- use as much or as little as you want, I used about a cup and a half of sugar and a teaspoon of cinnamon.

Roll the dough a long the long end so that you have a long thin roll.

You can either cut them into rounds and place them on a pan, or you can cut slices almost all the way through, on a diagaonal. Then flip every other slice to the other side side so that going left right left right and you can see all the pretty slices.

This is easier to do on the pan then on a board and then have to move it.

Cover the dough with a tea towel and wait until it has doubled in size again, another hour or so.

Preheat the oven to 350F.

Bake your bread until it is golden brown.

Wait at least 15 minutes before getting into them! (Bread that is still hot is hard to digest!)

Birds Nest Scones- AKA Coconut and Jam Scones

It’s the time of year where my apartment starts filling up with canned goods. I swear it’s by osmosis, I couldn’t possibly spend this many hours, this often, making preserves and yet there they are, slowly taking over cupboards and shelves, the pickles(!), the peppers(!), the peaches(!). It gets out of control.

This is the sort of thing that drives someone a bit batty at times, but in the winter when all is dark, this is a glorious glorious thing, one that should not to be scoffed at.

However, it is also the time of year where scrap bits of jams begin to accumulate. The parts that don’t quite fill a jar, so get pushed into old jars and thrown in the fridge where I begin to forget about them. I do, I’ll confess to that.

So lately I’ve been trying to use up these scrappy bits, sandwich them with cookies, spread them on the morning toast, or today, bake them into scones.

My favourite way is to put them into birds nest cookies, you know, the coconut ones with the raspberry jelly in the middle. But today I didn’t feel like cookies, I felt like breakfast, and while there is definitely overlap there, birds nest cookies lie firmly on the side of unhealthy inappropriate breakfast choices. So instead, I made coconut scones and put a big blob of jam in there. It’s like having someone put jam on your scone for you, and it’s also like eating a cookie for breakfast. By which I mean, it’s the best thing ever. And you should probably make these. Stat.

1 cup AP Flour

1/2 cup Spelt flour/whole wheat flour/AP flour, whatever you prefer

2 tbsp Baking Powder

1 cup Unsweetened Shredded Coconut

1/4 tsp Salt

1/2 cup Butter, very cold, chopped into cubes

2/3 cup Coconut Milk

1/2 cup Jam (any flavour you like)

Preheat oven to 400F

In a medium sized bowl mix together all the dry ingredients.

Add in the butter and mix with your hands until the pieces of butter are the sizes of large peas.

Add in the coconut milk and mix until just combined.

Carefully mix in any bits of flour that are on the bottom of the bowl by folding the dough a few times, in half pressing it down, then folding it in half again. You’ll want to do this at least 5 or 6 times. If the dough gets wet add a speck more coconut milk.

Chill dough for at least 20 minutes.

Remove from freezer and divide into 6 pieces.

Without squishing or removing the layers you’ve just folded in shape them into circles and then press deep imprints in the middle. I don’t think I added enough, so if your judging by the pictures above, I’d use a bit more.

Divide the jam in the middle of the scones and chill for another 10 minutes.

Bake for 20 minutes or so, until the tops are getting golden brown and the jam has set a bit in the middle.

Allow to cool slightly before serving!

Fig and Prosciutto Toasts with Minted Ricotta

Anyone who knows me knows that I love meat. I have worked at butcher shops, I have an inordinate love of game meats, and God knows I love bacon. But a lesser known fact is that I was a vegetarian for 8 years growing up. I gave up a proscuitto-free life a long long time ago, with some serious pushing and prodding by a chef I worked for, but on the condition that I would only eat meat I could feel ethical about. Free-range, organic whenever possible, and way less meat then the American dream.

The lovely man that I live with is a very accomodating sort, he puts up with me, which does say quite a bit, but he puts his foot down on a few matters, that the floor gets swept every night, that windows should be open while we sleep, and there should always be meat with dinner. Now, I’m all for keeping the floor clean, and I have an extra quilt at the foot of my bed to stay warm but we definitely disagree on the meat issue.

So we’ve started compromising by using a little bit of meat. It’s unusual for us to eat a whole chicken breast, or 8oz of steak each, but it’s common to find some bacon in a pasta, or some local prawns in curries, or in this case, a few slices of proscuitto.

It’s not much, it isn’t. But it is enough to make him feel like he’s getting some meat in a meal, and it’s small enough to make me feel ethical about the whole thing.

And that doesn’t touch on taste, which is big and important here. There are few things better in life than figs and prosciutto. But on top of crispy bread with ricotta? We is very close to perfection.

4 slices of good crusty bread

1/2 cup Ricotta Cheese

6 slices of Prosciutto, very thinly sliced.

8 large Mint Leaves, finely sliced

Zest of 1 lemon

6 Figs

Handful of Arugula

Olive Oil

Salt and Pepper

In a small bowl mix the ricotta with the mint, lemon zest, salt and pepper.

Cut the bread in half and toast until just getting warm.

Spread the ricotta mixture on the toasts.

Put a few leaves of arugula on top.

Tear apart the prosciutto and figs and layer them atop of the arugula.

Drizzle with olive oil and eat eat eat!

Pancetta and Leek Quiche

It was Jazz Festival in Vancouver last week, a weekend where every venue puts on shows ranging from Mexican folk music to old proper quartets and everyone in between shows up, and while admittedly most of the more senior people in this play at expensive sold out shows, slews of people play at the outdoor stages. Every year a couple friends of ours who live near one of these outdoor venues throw a big party and we eat too much breakfast and then spend the day in the beer garden and listen to great music. It is one of my favourite days of the year.

And this year was no exception, the only difference was that after several drinks I decided that everyone should come over to brunch the next day which was, shall we say, a questionable decision.

I love having people over for brunch, as one friend put it “it’s breakfast you don’t have to wake up early for” and I would like to add it’s breakfast you can drink champagne with and not feel guilty. So I hauled my butt out of bed and made quiche.

I think people get scared of quiche, the pastry the baking, but really, you eat it at room temperature, so while you have to get up a little earlier to put it together, it means you don’t have to cook at all when people arrive, which is a trade off I’m more than happy to give. This is also a very special quiche recipe, one that is smoother than smooth and not overwhelmingly eggy.

I served this with heaps of roasted potatoes and a big salad, and I think everyone was very happy, even me, once I had a glass of bubbly in my hands!

Leek and Pancetta Quiche.

This recipe is adapted from the Tartine Bakery cookbook, and is special for 2 reasons- it has a tiny amount of flour in it which helps it from cracking, and it uses creme fraiche, which gives it a bit of a tang. Because I made several of these this weekend and my grocery store only had one small container of it, I substituted half yoghurt in, and this worked beautifully)

Pastry

This pastry works very simply. You keep big pieces of butter in the dough and chill it. When the cold butter goes into the hot oven it produces steam, and thats what gives you the flakey layers. So, it’s very important not to cut the butter too small or to overwork the dough.

2 cups AP Flour

1 cup Butter, very cold, cubed

1 tsp Salt

A small cup of ice water

Filling

5 Eggs

3 tbsp Flour

1 cup Creme Fraiche

1 cup Whole Milk

1 tbsp finely chopped thyme

1 tsp Salt

3 Large Leeks, sliced

200g Pancetta

Put the butter into a bowl with the flour and the salt, and with your hands break apart the butter into lima bean sized pieces.

Add the a couple tablespoons of butter and stir, then add a couple more until it just follows a fork around the bowl as you stir.

Now push it flat and fold it in half, and repeat until the dough starts to come together but it is still soft. If it starts to feel firm stop right away. Wrap it up and put in the freezer for 15 minutes.

Preheat the oven to 375F

Roll out the dough and fit it into a 12 inch tart pan, a 10 inch pie pan, or even a 10 inch cake pan.

Take a piece of parchment paper and cut it into a circle an inch wider than your tart. Press it into the top of your pastry and pour some beans or rice into it. This will prevent your beautiful pastry from rising too much.

Bake it for about 20 minutes, and then take out the beans and parchment paper and bake it for another 10, until the whole thing is a nice light brown color.

Turn the oven down to 325F

Filling.

While all this is going on slice up your leeks and pancetta and start cooking them over medium low heat. They will get soft, loose their liquid and then start to caramelize. This will take about 20 minutes.

In a large bowl mix together one of the eggs with the flour. Stir until there are no bumps, a couple of minutes. Add in the other eggs one by one, scraping the sides to make sure no flour is sticking.

Mix the milk and the creme fraiche together with a whisk until smooth and add that to the egg mix. Season with the salt, pepper and thyme.

Once the tart shell is out, fill it with the leeks and pancetta mixture. Pour the egg mix on top until the tart is very full.

Bake until the center has just firmed up, about 30 minutes.

Allow to cool before eating.

Carrot Pancakes with Cream Cheese Icing

A few years back when I was running the kitchen of a small brunch restaurant my sister sent me a recipe for carrot pancakes. Basically you add grated carrots, cinnamon and walnuts to your basic buttermilk pancake recipe and dollop cream cheese icing on top. I am a big fan of nearly anything with cream cheese icing on top, and I am wild about most things that teeter the line between dessert and breakfast. But the restaurant had 6 burners and a flat-top griddle that could barely support making french toast, much less adding pancakes to the mix, so I put the idea into the massive index of things I plan on making one day but mostly I forgot about it.

But this weekend I made a carrot cake and much to much cream cheese icing. I did however, have plans for a girlfriend to come by for brunch, and carrots in hand we made carrot cake pancakes.

Now I feel the need to explain this to you; it isn’t actually just fried carrot cake. I promise. It walks the line sure, but with 2 tablespoons of added sugar and spelt flour it’s hardly worse than the average pancake. It has 3/4 pound of carrots in it! And yes, the icing might not be the best but it’s no worse than maple syrup. Honest.

So without further ado, here are carrot pancakes, I reccomend eating them often.

Carrot Cake Pancakes

(Adapted from Joy the Baker)

1 cup AP Flour or Spelt Flour

1 tsp Baking Powder

1/2 tsp Baking Soda

1/2 tsp Salt

1/2 tsp Cinnamon

1/4 tsp Ginger

1/2 tsp Nutmeg

1 Egg

2 tbsp Brown Sugar

1 Cup Buttermilk

2 cups finely grated Carrots

Canola oil for frying.

Icing

1/2 cup Cream Cheese, room temperature

3 tbsp Soft butter

1/4 cup Icing Sugar

1-3 tbsp Milk

Mix together the cream cheese and the butter, add in the icing sugar and stir to combine. Add the milk to thin it out.

Pancakes

Put the oven on the lowest temperature it goes on.

Mix together the dry ingredients in a medium sized bowl and make a well in the center.

Stir the egg into the buttermilk and pour into the dry ingredients. Mix a couple of times and than add in the carrots- Stir just until combined.

In a large pan over medium-low heat warm a tablespoon of oil. Pour 1/4 of the batter and cook until bubbles appear all over the top of the pancake. Flip and cook until it’s firm to the touch. Keep warm in an oven.

Put on a plate and eat lots!

Rhubarb Strudel

If you don’t live in Vancouver you probably can’t get rhubarb any more. That first stalk that sprouts in the Spring and paves the way for the strawberries and raspberries that you’re probably eating now. The sign of Summer that hasn’t had time to ripen in the sun so it’s so tart you can’t even imagine eating without heaps of sugar?

But us Vancouverites can. Heck, the way this weather is going we’re going to be eating rhubarb in August. 

It’s the coldest June on record here. I can’t keep the windows open in my apartment and I start to shiver without my slippers on. I have yet to go outside without a sweater on this year. 

So I’ve retired to the kitchen, where the oven is nearly always on and that keeps the water in the kettle warm for when I need a cuppa. And I bake. I bake with rhubarb. 

Rhubarb Strudel

Adapted from this recipe

Dough

1 1/3 cups unbleached flour
1/8 teaspoon salt
7 tablespoons water, plus more if needed
2 tablespoons vegetable oil, plus additional for coating the dough
1/2 teaspoon cider vinegar

Filling

5-6 Stalks of Rhubarb, cut into 2 inch pieces.

3 cups of Sugar

1 cup Breadcrumbs

2 tbsp Butter, melted

In the bowl of a standing mixer fitted with a dough hook- or in a regular bowl if you want to knead by hand) mix all the ingredients together and knead until the dough is smooth and elastic. When in doubt keep kneading. You can’t really over knead this dough, 

Wrap with cling film and let it sit for about 30- 60 minutes. 

Preheat your oven to 400F and line a cookie tray with parchment or a silpat. 

Once the dough has rested take a linen dish cloth and sprinkle it with flour. Get some flour on your rolling pin as well. Cut the dough in half, put one half on the cloth and start rolling. You want the dough to be as thin as you can possible get it. It should be see through, if it tears a bit don’t worry.  I didn’t roll my dough out enough so don’t look at mine as an example. It was delicious but it wasn’t quite as light as it should have been. 

Carefully move the dough onto the pan (folding it over your rolling pin helps for this) and in a thin line spread half of the rhubarb, sugar, and breadcrumbs out.

Carefull bring the dough up on 1 side and then roll it gently so that the rhubarb mixture has been wrapped several times with the dough. 

Repeat with the other half of the dough. Brush with the melted butter.

Bake until the rhubarb is cooked, about 45 minutes. 

Let it cook for at least 10 minutes before slicing into it, dust with icing sugar and serve!

Survivor Cake

I have alway thought, and some people are going to hate me for this, but that the best thing about Vancouver is getting out of it. Thats not to say that I don’t love my neighbourhood, or that I haven’t had many a great night at great restaurants and bars downtown, but it is to say that when you look around Vancouver the most amazing things aren’t the buildings or the culture, but the mountains and ocean that surround it. And the best part of the mountains and the ocean is just how easy it is to get there.

And while lots of people make the most of the mountains in the winter time, skiing and snowboarding, I hate the cold and tend to shine in the summer. Which is how I found myself on Savary Island last weekend.

I have never seen so many eagles, or starfish, and I’ve never seen such long strips of white sand beaches in Canada. It was exactly what I needed. A quick refresh before all the excitement of my new website took over. Life is feeling pretty good right now friends.

On this getaway I took a brought a cake. Something I found in a Maida Heatter book called the Survivor Cake, it’s not too sweet, very dense and moise and this weekend help up to 2 ferry rides and a water taxi each way, and paired beautifully with both coffee in the morning and a glass of red mid afternoon.

Survivor Cake

(Very loosely adapted from Maida Heatter)

1/2 cup Butter

1/3 cup Brown Sugar

1/2 cup Fancy Molasses

1/2 cup Coffee or water

2 Bananas, mashed

3 Eggs

1 cup Raisins

1/2 cup dried Cranberries

1/2 cup Walnuts

1/2 cup Shredded Coconut

1/2 cup Dark Chocolate Chips

2 cups AP Flour

1 tsp Baking Soda

1 tsp Baking Powder

1/2 tsp Salt

2 tsp Cinnamon

1/2 tsp Nutmeg

In a small pot over medium heat bring the sugar, molasses, bananas, coffee (or water) raisins, cranberries and butter to a boil. Making sure the bottom doesn’t melt keep it on the heat until the butter is completely melted.

Take it off the heat, pour it into a bowl and let it cool to room temperature.

Preheat the oven to 350F

Line a 9 inch square pan with parchment paper.

Into the bowl with the butter mixture add in the eggs mixing with a wooden spoon. Slowly sift in the dry ingredients and stir until almost combined.

Add in the coconut, chocolate and the walnuts. Mix until their are no more streaks of flour but not any more and pour into the prepared pan.

Bake until an inserted skewer comes out with only a few moist crumbs, about 45 minutes.

Allow to cool and then wrap tightly, it will keep moist for nearly a week!

Lemon Glazed Baked Mini Donuts

One of the best parts about being a baker is that at Christmas time instead of getting socks, or bottles of wine that only last an evening, people buy you kitchen stuff. Stuff that most people would never use, and stuff that you might not be able to justify buying yourself. Things like vintage bundt pans and ice cream scoops, or teflon scoops that are only to be used for scooping out dry ingredients. And the pans. The one use kind of pans that are hard to spend money on because you know you’ll only use them a couple times a year. I have lots of those.

I have a mini baked donut pan that I got last year. I mean the name says it all doesn’t it? You can only make it if you want baked donuts and you want them mini. I don’t think I have that urge all that often, but yesterday morning I was very happy to have such a pan because it made these little numbers.

Here’s the thing about baked donuts. People always say at the top of recipes that it’s just like the fried ones and you can’t tell the difference. And I am going to tell you these are not just like the fried ones. The fried ones are yeasted and take ages and then you have to heat up a gallon of oil on your stove top. And you can produce incredible donuts like that, but you also have to be very aware and awake at a very early time if you want donuts on Saturday morning.

I do not like frying things on my stove top that early. I just don’t.

One of these days I will do this for you, but in the meantime you can have these. These aren’t crispy and light the way a fried donut is, because it’s not fried. But it is bright and citrus-y and the hint of cinnamon makes them taste a tiny bit like the cinnamon sugar donuts you get at a fair. They are not fried but that does not stop them being delicious. Which is why you’ll notice that because their so tiny you haven’t noticed how just how many you’ve shoved in your mouth!

Lemon Glazed Baked Mini Donuts

Donuts

1 cup AP Flour

1/2 cup Sugar

1 tsp Baking Powder

1/2 tsp Baking Soda

1/2 tsp Cinnamon

3 tbsp Yoghurt or Buttermilk

3 tbsp Melted Butter, plus more for pans

2 Eggs

Glaze


1 cup Icing sugar

1-2 tbsp Lemon Juice

Zest of 1 lemon

Preheat the oven to 400F

Grease pans very well- there isn’t much fat in this recipe and they will stick.  Even if it’s a non stick pan. 

Mix the wet ingredients in a bowl and whisk until they get a bit frothy and are pretty well emulsified. Mix the dry ingredients in a larger bowl.

Add the wet ingredients to the dry ingredients and mix until barely combined. 

Put the batter in a piping bag or a ziploc bag with the end cut off and pipe the batter about half way up the pans.

Bake for 7-10 minutes until the outsides are starting to get brown and when you push the top it springs right back at you.

Let them sit in the pan for another couple minutes before carefully easing them out of the pans. Hopefully you greased yours more than me, because mine took some serious work to get them out. 

Let them cool. 

Meanwhile make the glaze:

Mix all the ingredients together. Yup, that’s it.

Once the donuts are cooled drizzle the glaze on top and dig in!


Arugula Omelette with Bread Crumbs

Heres the thing of it; I only buy really good bread. Out of principle. Heres the other thing of it; good bread is only good for a day. Heres the other thing of it; there are only 2 people in my household so it’s hard to go through a whole baguette, or a full of sourdough loaf. (note, if Nutella is involved it is not hard to go through a whole baguette.)

So I’m always looking for excuses to use stale bread. Someone told me recently that in Italy breadcrumbs are poor mans cheese, which got me thinking. The friend who told me this had just made braised leeks and sprinkled breadcrumbs that she had sauteed in olive oil with garlic and rosemary and it was a killer dish. The sort of elegant dish Italian peasants have made for the last 300 years. So when I got home that night I busted out my food processor and made great use of the day old bread that always seems to be sitting in my bread box. And then I went to bed because it was late and I had already eaten dinner.

The next morning though I woke Jordan up with omelettes, just simple ham and arugula omelettes but I sprinkled breadcrumbs on the top and they were suddenly these elevated into something much more interesting. The crispness, the toasted flavour, the spike of rosemary, it was a glorious combination that, because I had already made the breadcrumbs, it was a no brainer painfully easy addition. Which is exactly what I want in my breakfasts.

Breadcrumbs

At least 2 cups of stale bread diced into cubes

1 tsp chopped Rosemary

1 tbsp chopped Parsley

2 clove Garlic

Zest of 1 lemon

A glug of Olive Oil

Salt and Pepper

Omelettes

4 Eggs

1 tbsp chopped Parsley

a Handful of Arugula

50g Ham or Porketta, thinly sliced.

2 tbsp Grated Parm, Romano, or Fruitlano.

2 tsp Butter

Salt and Pepper

In a food processor pulse breadcrumbs until they are crushed but not powdery. You want to be able to bite into them still.

In a frying pan over medium-low heat warm up the olive oil.

Add in the breadcrumbs and stir until they start to get toasty.

Add in the garlic and rosemary and keep stirring until the garlic gets fragrant and the breadcrumbs have become a nice toasty brown.

Add in the salt the zest and the parsley and set aside.

Mix 2 eggs in a bowl until thoroughly combined. Add the salt, pepper and parsley and mix again.

In a small frying pan over medium heat (your life will be easier if this is a non stick pan. If you don’t use non stick- I don’t- just make sure the pan is sparkling clean) warm up a teaspoon of the butter.

Pour the eggs in and using a wooden spoon or a spatula mix the eggs as the cook until there are some scrambled pieces but they are all connected by the uncooked eggs.

Using your spatula spread the eggs out into a thin layer and let them firm up.

Once the top is beginning to set flip the omelette- use a rubber spatula to lift the edges and then with a quick flick of the wrist flip it.*

Let it cook for another 30 seconds. Sprinkle with the grated cheese, and then layer on the ham and arugula. Fold the omelette onto itself and slide it onto a plate.

Dust the top generously with the bread crumbs.

*If your not comfortable flipping the omelette you can just let it cook all the way on the one side and then fold the whole thing in half at the end. ALTHOUGH Julia Child recommends practising the flipping motion with a pan with a handful of dried beans, and who am I to argue with Julia Child.

Rhubarb Breakfast Cake with White Chocolate Yoghurt Ganache

I am about to write the most pretentious thing I can think of. Are you ready? Are you sure? I just happened to have some white chocolate yoghurt ganache in my fridge. I know. Who am I?

In my defence it was there because I had failed miserably at making some macarons that I had been planning on filling with said ganache, but none the less. I happened to have some white chocolate yoghurt ganache in my fridge. Oy.
I have never been a huge white chocolate fan, unless your buying the really pricey stuff that is way out of my league, it’s just very sweet. Too sweet I think, but the yoghurt really mellows it out and brings in enough acid that makes you want to lick the spoon. It’s sort of like grown-up cream cheese icing.

So with this glorious stuff in my fridge, I made a very simple rhubarb cake, a buttermilk breakfast cake not to sweet with a wonderful crumb and slathered this ganache on top. Just enough to make you want to eat the top first and be a little spiteful of the bites that didn’t get any.

Rhubarb Breakfast Cake with White Chocolate Yoghurt Ganache

1/2 cup Butter

11/2 cup Sugar

1 egg

1 tbsp Vanilla Extract

Zest of 1 lemon

2 cup AP Flour

2 tsp Baking Soda

1 tsp Salt

1/2 cup Buttermilk

3 cup Rhubarb cut into 1 inch pieces

1/2 cup Yoghurt

4 oz White Chocolate

Preheat oven to 350F

Butter and flour a bundt pan or a 9 inch square pan.

Put the rhubarb half a cup of sugar and 1 cup of water into a small pot and simmer it until it is soft, about 10 minutes. Strain out rhubarb. The syrup will make fabulous drinks if you wish.

Meanwhile in a standing mixer fitted with the paddle attachment cream butter and sugar until light and fluffy.

Add in the egg slowly and mix until totally combined. Scrape down the edges of the bowl.

Sift the dry ingredients into a bowl.

Alternate adding the dry and wet ingredients starting and finishing with the dry. When the last batch of dry ingredients has almost been combined add in the rhubarb and gently mix by hand. Do not overmix it or it will get tough.

Pour the batter into prepared pan and bake until an inserted skewer comes out clean, about 30 minutes.

While the cake is in the oven you can make the ganache:

Place the chocolate in a heatproof bowl. Place the bowl over a pot filled with about an inch of simmering water. Melt the chocolate, stir it regularly because white chocolate has a tendancy of burning.

Once the chocolate is fully incorporated add in the yoghurt and stir to combine.

Once the cake is cooled you can pour the ganache on top or spread it on with a spatula. And c’est finis.

Oat Soda Bread with Herbed Ricotta and Scrambled Eggs

We might be moving to the country. It’s not for sure yet, but there is a real chance we might pick ourselves out of the most expensive city to live in in North America and curl up on Vancouver Island. This appeals of me on many levels, mostly because when I think of living in the country and I don’t think of isolation or hard winters. Instead I day dream about long summer days in the garden. I fantasize about growing my own veggies and taking long walks in the fields at sunset. I get a glazed over look when I think about hanging my sheets out to dry or having a fire place or having enough room to build the bed I’ve always wanted to make. And when the logical man I would be moving with tells me I’m absolutely ridiculous and there are other things to consider when making a move like this I simply make this wonderful rustic bread, and strain some ricotta cheese and imagine that my eggs came from my yard, and I slip back into my imaginary world. Because fresh eggs and oat stuffed soda bread arecompletely at home there.

Oat Soda Bread with Herbed Ricotta and Soft Scrambled Eggs

(The bread recipe is adapted from 101cookbooks)

For the Bread

2 1/4 cups AP Flour

2 cups Rolled Oats

1 3/4 tsp Baking Soda

1 1/4 tsp Salt

1 3/4 cup Butter milk, more if needed

Herbed Ricotta

2/3 cup Ricotta cheese

1/4 cup chopped herbs, I used parsley, thyme, and rosemary, although tarragon or mint would be right at home there too)

Zest of 1 lemon

Salt and Pepper

1 tbsp Olive Oil

Soft Scrambled Eggs

4 Good Quality free range eggs, splurge and get the good ones if you can. It really does make a difference.

1 tbsp Butter

1 tbsp Heavy cream (Optional)

To start preheat the oven to 425F

In a food processor blitz 1 cup of the oats to a fine powder. If you don’t have a food processor don’t worry. Your bread will be delicious anyways, I promise.

Mix it in a bowl with everything else except 2 tbsp of the whole oats. Mix it all together until just combined.

Gently knead it a few times and then form it into a ball.

Put it on a baking tray lined with parchment and sprinkle the remaining oats on top. ( I ran out of oats so I missed this step!)

Cut a deep X on the top with a sharp knife and put it in the oven! Bake until it is cooked all the way through, about 45 minutes. It will have a thick crust and sound hollow when you knock on it.

Meanwhile mix together your herbed ricotta. Just mix it all up in a bowl and check the seasoning.

When the bread is out of the oven, let it cool for a few minutes. Slice it up and slather it with the ricotta.

Now, seconds before your ready to eat your ready to cook your eggs. Here is how I cook mine, and how I like my eggs best.

Crack your eggs into a bowl and whisk them very well. How fluffy they are is a direct correlation to much you beat them. Whisk in the cream if using.

Get a small frying pan hot.

Add in the butter and swirl it around for a second then, before it has fully melted add in the eggs. Now stir them slowly. I like my eggs with big pieces of scramble, and to do that you need to work the eggs slowly but throughally. When they are still a little shiny take them off the heat give them one last stir and quickly scrape them onto the ricotta slathered slices of bread.

And then eat it quickly and happily, and imagine your sitting on a farm in the country!

Waffle Party

It is no secret that I love planning parties. I love baking with a color theme, I love being able to actually use all the little pitchers and cake stands that I collect, and I love all the little crafty details. So I can’t tell you how pleased I was when my dear friend Beth called me up and said “I’ve decided I want to get all the girls together for mimosas and waffles for my birthday, and I’ve decided this should be at your house”.

I really do love making brunch (I ran a brunch restaurant for a couple years) and I also really love my friend Beth. It was great fun, and a total perk was that a few of the guests were photographers.

I’ll put up some of the recipes soon, I promise, but in the short term, here’s a glimpse at the day. Most of the photos are from my fabulously talented friend Shannyn , a couple are mine!

The spread:

For sauces I made coconut milk chocolate ganache, salted caramel sauce and maple syrup, and I served pots of preserves I made last summer, like vanilla soaked mandarins, earl grey canned peaches, and blackberry compote.

(c.o Shannyn Higgins Photography)

(c/o Shannyn Higgins Photography)

Coffee and a cookie:

(c.o Shannyn Higgins Photography)

The birthday girl:

(c.o Shannyn Higgins Photography)

More bubbly?

(c.o Shannyn Higgins Photography)

(c.o Shannyn Higgins Photography)

(c.o Shannyn Higgins Photography)