DIY- Cheaters Bunting

I would say I’m a pretty crafty person. I see things on Etsy and in fancy shops and think to myself “I could make that!” and I often do. I also often go and buy the stuff get half way through and then get excited about another project and leave the remnants on my desk for months. This happens all the time actually.

Anyways.

My hatred of buying things I know I can make is why I’ve been avoiding buying bunting, even though I think it’s the cutest thing ever. It just seems so easy, you cut out triangles sew them together, turn em inside out and sew them onto ribbon.

So I thought this would be a perfect crafty decoration for a baby shower I’m throwing next weekend. Until my sewing machine broke.

So I made things even easier. I cut out triangles and glued them onto ribbon. In fact it was so easy that it took my less then an hour to make 10 meters which I think is kind of amazing. I had loads of pretty fabric in my scrap bin so I just mix and matched it all but you could of course use any material and colour scheme you like.

Just cut out your trianges. I’d be lying if I said I measured any of them.

Lay out the ribbon and glue each triangle in place with the “right” side of the fabric face down.

And continue until you have all your desired length! As you can see, I made tons!

Let the glue dry and then hang it up or store until your ready to use it! It is actually that simple.

Spring Pea Frittata with Roasted New Potatoes

I don`t know how my parents pulled this off, but from the age of about 4 (so my sister was around 8) we fended for ourselves for breakfast. On weekends they slept in, and and we cooked for ourselves. When we were really young this meant cereal, but as we got older it included pancakes, and sometimes bagels and cream cheese and lox. Either way it was a minute in time when I got to hang out with my sister and feel a little bit grown up. At least until I spilt the milk on the floor and started crying. I always cried over spilt milk.

I think because of this I love to make breakfast. I love the quiet of being up first and stretching out across the kitchen. I love the just drinking my tea and making what I want to make.

On the odd occasion that Jordan and I have a morning off together, (or more likely when I work in the morning and speed home and he`s still curled up in bed sleeping when I return at 9am) I make breakfast. I like to make it especially if he`s still sleeping and I feel like I have full control over the kitchen. I like the silence of it.

So this weekend as I was coming home from work I picked up a few things, made myself some tea , and a frittata and enjoyed the peace and quiet. And then of course I woke up Jordan and we had a perfect lazy Sunday morning.

Spring Pea Frittata with Roasted New Potatoes.

Serves 2

1 cup Shelled Peas

2 Shallots

1 tbsp Butter

1 small Clove of Garlic

4 Eggs, the better quality the better

3 tbsp Goats Cheese

A few leaves of mint, or basil or parsley if you have them!

1lb New Potatoes

a good glug of olive oil

Cut the potatoes into wedges and put in a medium sized pot. Cover with cold water and bring them to a boil.

Cook for 2 more minutes and then strain them.

Then in a medium sized frying pan warm the pan on medium heat and pour in your olive oil. When it’s warm add in your par cooked potatoes and let them get nice and brown in there.

Meanwhile

On medium heat melt the butter in a small frying pan. Slice the shallots into thin strips and add them in with a little salt.

Once they are nice and translucent add in your garlic and simmer until it just starts to become fragrant. Then add in the peas with a 1/4 cup of water. Let the water reduce and the peas get perfectly cooked.

While that’s reducing crack your eggs into a bowl and give them a bit of a whisk. Add in a pinch of salt and a crack of pepper too. Now pour them into the pan. The key to a light and fluffy frittata is that you stir it, scrape up the pieces from the bottom. When you have some big pieces and it almost looks like it might be scrambled eggs take it off the heat,  smooth out the top with your spatula and crumble your goats cheese on top. Now get it into the oven!

In about 5 minutes the top will be set and it will feel firm if you touch the middle. There shouldn’t be any browning on it though. Take it out of the oven,

Now using a rubber spatula scrape the outsides of the pan and carefully life the frittata out of the pan.

Sprinkle the frittata with any herbs you have around and slide it onto a plate or wooden cutting board along with the potatos.

S'Mores Cupcakes

A few years ago, after working at a very good restaurant for an extremely talented chef who made me cry every day for 8 months, I took a hiatus from cooking. To pay the bills I took a job as a hostess for a summer. The catch was that they promised me full time work and only gave me two shifts a week, which would have been way more manageable except that then I got dumped. And that would have been easier if I had lived in the city for longer and had more friends but I didn`t. And so I spent my days applying for jobs and not getting the jobs I`d applied for and crying, and feeling rejected and just generally having a really rough go. And so everyday I woke up and made cupcakes. Everyday. Compusively. I made blueberry cupcakes, raspberry caramel cupcakes, dolce de leche cupcakes, maple pecan cupcakes. I made an insane amount of cupcakes. I gave them to people at work (which might be why they ended up giving me more shifts) and I gave them to my one good friend (who obliging took them everyday, even though shes very food concious) occasionally I gave them to boys I went on dates on, but they were rarely worth it. Fortunately that phase is through and my life has sorted itself out and I have since decided I am over cupcakes. I am cupcaked out. But today I had to go to a beach party and bring dessert, and I realized why people started making cupcakes in the first place. It`s cake, that doesn`t involve cutlery, or plates. And then I realized there was one kind of cupcake I`d never made before. S`mores cupcakes. I`m telling you, you really ought to make these. Yes there are multiple steps and yes it`s a little time consuming, but really. It`s S`mores cupcakes. You know you`re going to.

Graham Cracker Cupcakes:

1 1/2 cups graham cracker crumbs (about 15 crackers)

1/2 cup all purpose flour

1 tbsp Baking Powder

3/4 cup Brown Sugar

2 Large Eggs

1/2 cup Butter, softened

3/4 cup Milk or Buttermilk

Ganache:

3/4 cup Milk Chocolate

2/3 cup Heavy Cream

Marshmallow Topping:

3 Large Egg Whites

2 tbsp Sugar

1/2 cup Water

1/2 cup Corn Syrup

3/4 cup Sugar

1 tsp Vanilla Extract

To make Ganache

Bring the cream to a boil

Pour on top of chocolate

Stir until smooth (sorry! i forgot to take a picture of this step!)

To Bake Cupcakes

Preheat oven to 350F

Line with cupcake liners or butter and flour 1 dozen cupcake tins, or 3 dozen mini cupcake tins.

Whisk together your dry ingredients

Cream together butter and sugar until light and fluffy. Add in the eggs one at a time beating well between each addition.

Alternate in the dry ingredients and wet ingredients beginning and ending with the dry.

Spoon the batter 3/4 of the way up the cupcake liners.

And bake them until they’re beautiful and slighly browned and an inserted skewer comes out with only a few moist crumbs, about 15 minutes for mini cupcakes.

To Make Marshmallo Topping

Put 3/4 cup sugar, corn syrup, and water in a pot over medium heat and stir until the sugar is dissolved. Remove spoon and bring to a boil and with a candy thermometer let it comet ot he firm ball stage, 246Degrees F.

While it’s boiling put the egg whites and the vanilla in the bowl of a standing mixer with the whisk attachment. Whisk on high speed until soft peaks form. Add in the 2 tablespoons of sugar slowly until stiff peaks form.

When the sugar is up to temperature slowly pour it into the whites while whisking on high speed. Keep whisking until the bowl is cool and the meringue looks very marshmallowy! Put into a piping bag right away.

To Assemble:

Crank up the oven to 425F

With a pairing knife cut a little hole out of the middle of the cupcakes.

Put the ganache into a piping bag and pipe it into the holes in the cupcakes (the consensus was that there wasn’t enough chocolate in the ones I made so don’t hesitate to load em up!)

Pipe the marshmallow topping on top of the whole thing!

Now throw the whole things in the oven for a couple minutes until the tops just get golden. If you leave them to long they will not only burn but shrivel up a bit as the night goes on, so don’t worry about leaving them fair.

Cherry Jewel Cake

Cherries are the only reason I know that is is summer. Truly.

The rain and the 15 degree weather are not convincing me that it is July. I am hesitant to believe it, but cherries do not lie.

They are only here for a few short months, and they are here now.

So, because it`s normally too hot to bake in my tiny apartment in July, I am experimenting baking with cherries this year. I am doing this because it`s very cold in Vancouver right now, and it`s actually nice to turn on my oven and have it heat the place up.

And it`s nice to have a warm piece of cake on a cold rainy day. And this cake is especially nice. I made it last night and brought it to a girls night potluck, and I was running terribly behind schedule so as soon as it was out of the oven I put it on a cloth bag and ran out the door, so it was still warm when we ate it. And we were fighting over the last piece, literally. It`s not to sweet, and has the perfect crumb, and of course, the most wonderful sweet cherries just bursting inside. It`s almost good enough to make me want to clouds to stay, so I can make it again today. Almost.

Cherry Jewel Cake

1/2 cup Butter, soft

1/2 cup Brown Sugar

1/2 cup White Sugar

2 Large Eggs

1 tbsp Vanilla, or seeds from 1 vanilla bean

Zest of 1 lemon

1 cup All Purpose Flour

1 tsp Baking Powder

2 tbsp Raw Course Sugar, or brown sugar

2lbs Cherries, pitted (you can either use an olive pitter for this, if you have one, or cut them in half and push out the pit!

Preheat your oven to 325F

Line an 8 inch pan, preferably with a removable bottom with parchment paper, or butter and flour it.

Cream the butter and the sugar together until light and fluffy.

Add in the eggs one at a time beating well between each addition. Scrape down the sides and beat on medium high speed for about a minute.

Fold in your dry ingredients, it’s quite a dry dough but don’t worry.

Spoon the batter into your prepared pan and smooth it out, then carefully layer in your cherries in a circle pattern.

Bake for about an hour, or until an inserted skewer comes out with only a few moist crumbs,

How to Bake and Ice a Cake in Under an Hour.

x

Scenario Number One:

You got stuck working late/in traffic and now you need to leave the house in 2 hours to get to a birthday celebration and you promised to bring a cake, you should bring a present, and you deffinately should shower, straighten your hair and look nicer.

Scenario Number Two:

You forgot it’s your friends birthday and only remembered after you’d phoned her to bitch about your day. You told her your running a little behind but of course you didn’t forget, you have a cake waiting for her in your fridge! Only to realize that the bakery across the street is closed for renovations.

Scenario Number Three:

Your dog has an alliance with your cats, who pushed the cake off the counter so he could eat it. I actually watched my pets do this once, so I know it happens. Now you’ve got one hour to reproduce a cake nice enough to serve for the birthday your throwing your friend, who used to date your husband and you want to show up, just a little bit.

I have an answer to all your problems! Well, not world peace, or a million dollars, but cake problems I have you sorted on.

The answer is, cake mix.

No no, not Betty Crocker just add water cake mix. Home made cake mix. Mix that you just throw together in a bowl with things you already have in your pantry. Your going to use half of it in the cake that your going to produce in seconds flat and the other half you’ll put in that mason jar that you got pickles or over priced jam in, tie a ribbon around it and then you have a present too.

Preheat your oven to 350F

flour and butter 3 8 inch cake pans.

Make this lovely cake mix,

Cake Mix:

5 cups sugar

7 cups Flour

3 tbsp Baking Powder

*optional, you can add in 1 cup of cocoa powder to make it a chocolate cake mix.

Save out 3 1/2 cups of the mix and package the rest up however you like.

Add to the reserved mix

4 eggs

1 cup milk

1 cup veg oil

*if you’ve added the cocoa powder to the mix make it 1 1/2 cups milk.

Mix that together and there’s your batter.

Pour it into the pans and bake for about 25 minutes or until an inserted skewer comes out with only a few moist crumbs.

While your cake is in the oven your going to take a quick shower, wash your face, and moisturize. Then, you take the cake out of the oven and while its cooling you’ll pick and outfit, dry your hair, and whip together this until it holds stiff peaks:

2 cups of whipping cream

2 tbsp Icing sugar

1 tsp Vanilla extract

*optional, if you have a cup of creme fraiche, mascarpone, cream cheese or even sour cream you can add that in too. Lemon zest is also a nice addition if you have a lemon kicking around.

Now you’ll slice up

2 cups of fruit,

maybe it’s berries, maybe it’s pears, maybe it’s grapefuit segments. Canned peaches would be excellent. What ever you have on hand will be delicious.

Now for the cake.

Unmold it and put the bottom layer on the plate or cake stand.

Then you can blob some of the cream on it and push it to the edges without having it drip over.

Now add some fruit placing it in a single layer. Put the next layer of cake on top and repeat. Don’t fuss to much, this is a rustic cake, don’t break hairs over it.

Instead, pop it in the fridge and go make your hair look nice, throw some make up on, and then take your cake in one hand, and use your other to wave down a cab while all the cute guys within a ten block radius come to check out the cute girl with the awesome looking cake who looks so effortless about it all.

Strawberry Buttermilk Tart

I have a very vivid picture in my head of going strawberry picking with my Dad and my sister when I was, oh maybe 6 or 7. My dad, the doctor, decided to go a scientific experiment of what size and shape of strawberry tasted the best.

He conducted this experiment scupulously and with the utmost precision, by moving lying down in the middle of 2 rows of strawberries and eating and eating and eating, moving about a foot every 20 minutes or so.

The verdict of his research was that the small to medium ones that were sort of bell shaped, were the best. Sweet, but not sugary, soft, but not mushy, and also, pleasing to the eye.

So the other day, when Jordan and I were driving past a strawberry farm we pulled in, sadly without enough time to pick them, but I knew we had to buy lots when I went over to the plants and they were nearly all that perfect medium sized bell shape.

We’ve been back to that farm a few times now, for berries for jam, and for shortcakes, but the other day, when my apartment heated up to some where high in the thirties, I used some for a tart that hardly takes any cooking, but tastes wonderful.

I made a graham cracker crust because I didn’t want it in the oven on for long but I think the crumbly texture works nicely against the smoothness of the buttermilk mousse. And the strawberries that were so ripe and juicy were completely perfect and not to sweet. This tart looks like a bit of work, but it is really easy, and a perfect ending to a summer meal, light and fresh, but still with a bit of substance.

Graham Cracker Crust

1 3/4 cup Graham Crackers

3/4 cup Butter, Melted

Buttermilk Mousse Filling

1 cup Buttermilk

1 cup Whipping Cream

Zest of 2 Lemons

Juice of 1 Lemon

Half a Vanilla Bean, or 1 tbsp Vanilla Extract

1 tsp Gelatin

3 tbsp Sugar

Strawberry Topping

3 cups really good Strawberries, cut in half, or quarters depending on the size.

1/4 cup Really good Strawberry Jam.

Preheat oven to 350F

Mix the graham cracker crumbs and the butter until totally combined.

Press it down into a 9 inch round tart shell or pie pan.

Bake about 15 minutes or until the crush has begun to set, but not so that it’s coloring.

Pull out your tart shell and allow to cool. Your done with the oven now to so you can turn it off! Yes!

While it’s cooling whip up 3/4 cup of heavy cream until its at stiff peaks. Put it back in the fridge to keep it cool.

In the meantime sprinkle the gelatin over the lemon juice in a little bowl. Let if soften ther for 15 minutes

While thats sitting Mix 1/4 cup of the cream with the sugar  and the vanilla bean in a small pot and put it over medium heat and stir it until it’s dissolved.

Stir in the gelatin mixture and stir until that’s dissolved too.

Pour the cream and gelatin mixture into a bowl and stir in the buttermilk and the lemon zest. Put this in the fridge for about ten minutes, until it’s just about cool. The gelatin will start to set up and you don’t want it too firm, you still need to add in the whipping cream, BUT if you add the whipping cream in while it’s still warm the bubbles you’ve whipped into the cream will collapse. So just open the fridge door every couple of minutes and give it a stir. Once you notice it sticking to the sides a bit, you can carefully fold in your whipping cream.

And now pour it into your tart shell!

Now put it in the fridge for about 20 minutes until it is set up nicely.

In the meantime mix your berries and your jam. You might find it easier to warm the jam up in the microwave for a few seconds.

Now gently spoon all the strawberries onto the tart. And there you have a ridiculously good summer dessert! 

Strawberry Jam

I think it’s fair to say that my friends consider me pretty domestic. I think maybe it’s fair to say that I am pretty domestic, except in the world of cleaning, although I swear I am getting way better. Honest.

Anyways.

My girlfriends rarely complain when I show up at there houses with pies, or send them off to their boyfriends with scone dough to bake up in the mornings, but rarely do they come into the kitchen and help me out. So last week Jordan came home with 2 big flats of local strawberries and a few of my favourite girls came over to cook them down, sweeten them like crazy and put it all in jars to open in December when we’re jonesing for good fresh fruit. Some people know this process as jam.

So the urban planner, the song writer and the jewelry maker came over and we listened to Lionel Ritchie, hulls strawberries, ate amazing take out Indian food (man oh man do I love Tandoori Palace) and we all walked away with a lot of jars.

I don’t have a set recipe for jam, because every strawberry is different, and while jam has to be sweet because the sugar is a preservative and that’s how it keeps, I hate jams that taste like sugar.

There are a few things that are imperative to jam making. Firstly, clean hands, clean jars, clean lids. Clean. Bacteria getting inside a jar can become botulism, and that scares the hell out of me. Seriously.

Secondly, in order to get a really fresh fruit taste, you have to do it in small batches. Just use two pots. You’ll do it in half the time, and you’ll be able to taste a huge difference.

Thirdly, I say I don’t measure the sugar. The basic formula is 2 parts sugar to 1 part fruit, by weight (so two kilos of sugar for one kilo of fruit) but I find this excessive and so I use a little less.

I also don’t boil the jars, I clean them very carefully and then I keep them hot in the oven, I find this method easier.

Strawberry Jam

2lbs Strawberries

3-4 cups Sugar

1 Vanilla Bean

Juice of half a lemon

Place a plate in the freezer.

Preheat the oven to 300F

Wash your jars and lids very carefully, put them on a tray in single row and place them in the oven.

Hull the strawberries and cut them in half.

Wash them very carefully.

Put them all into a big pot and cook them, stirring frequently, on medium heat until most of the liquid has been dissolved, about 20 minutes.

Add in 3 cups of sugar, lemon juice and the vanilla bean and cook until that has reduced. Now taste it. If your using really good fresh local strawberries you may find that it’s sweet enough as is, or if your strawberries were a little less ripe you may need to add more.

Be careful at this point, the sugar is likely to burn if your not watchful and stirring pretty regularly.

Now check the consistency- take the plate out of the freezer and spoon a little jam on top. Let it sit for a minute and then push it around. If it’s done it won’t spread thin and if you spread your finger through it it will hold it’s shape and not spread out again. If your there jam is done! If not keep it on for another 5 minutes or so and then try again.

When your ready take out the jars and fill them up with about a quarter inch left from the top. You can do this wth a ladle or, if you have one, a canning funnel is very helpful!

Put the lids on and just barely screw them on.

Put them back in the oven for 5 minutes.

Take them out and let them cool at room temperature. You should hear popping noises as the jars seal.

And your done, strawberry jam!

Hazelnut Scones with Macerated Cherries and Vanilla Whip Cream

A few years ago I ran the kitchen of a wonderful cafe called Little Nest. It’s a small restaurant with a full kitchen that makes only breakfast and lunch, and about half the menu changes daily. I had never run a kitchen before, never written my own specials before, never done the ordering before, never done the hiring before. To say I was in over my head was a serious understatement.

And while everyone was very patient in my slow understanding of how it all works, it’s important when your feeling entirely under qualified for a job to have a trick or two up your sleeve.

I call this the Amelia Bedelia.

You know the kids book about the maid who takes everything literally? She puts sponges in sponge cakes, and when asked to dress the turkey she puts it in childrens clothes. She absolutely makes a mess of her employers house BUT she always has just a little bit of extra time and she always bakes the most amazing pies. So. When the Mr. And Mrs. Rogers come home and freak out they eat the pie and all is forgiven. I think this book had an alarmingly large effect on me as a child.

So at Little Nest my Amelia Bedelia was pasta. It changed everyday but it was always dang good. And I gave one to the owner and manager nearly every day for a month and they decided I would be okay in the end.

Thank God.

So for the last few months I’ve been running on nearly nothing but adrenaline because I’ve been working so much and I will admit some very stupid mistakes have been made. Silly silly things, so silly I’m to embarassed to tell you, BUT fortunately I make killer scones. You know, they are super light and fluffy and with layer upon layer of butter flakeyness and that my friends, is my Amelia Bedelia.

Even though, my boss certainly doens’t always notice them, I do, and it give me the confidence when I feel dreadful (and maybe put coriander into the 10 times batch of cardamon cookies accidentally) I know that at very least I can do one thing very well. And that means that with some practise I can do other things very well.

I hope.

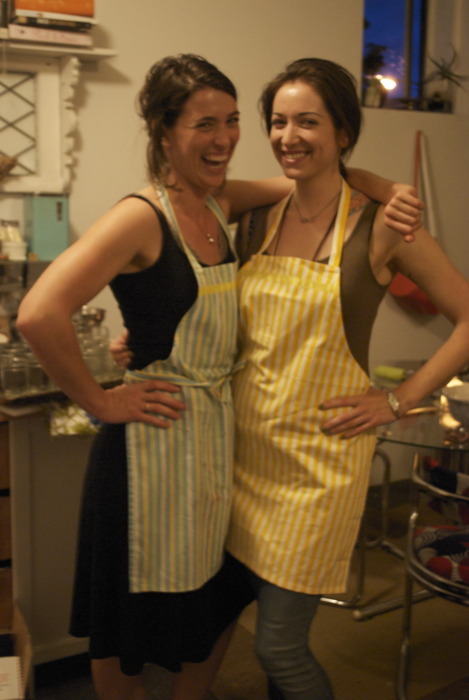
So, now that I’ve quit my second job and am focusing on not making stupid mistakes at the one job that’s actually important to me, I thought I’d make some scones for a girlfriend who came over for brunch the other day.

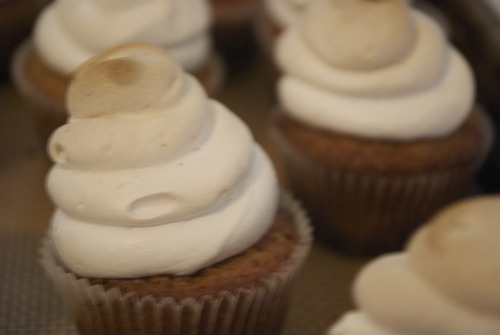
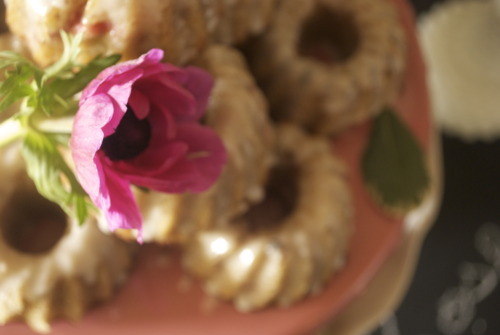
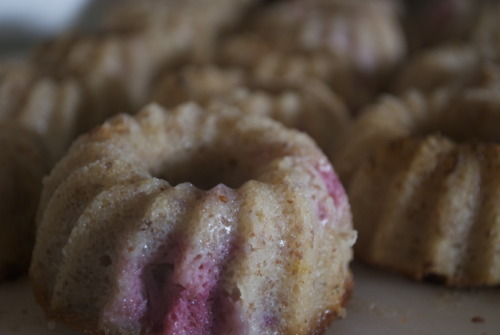
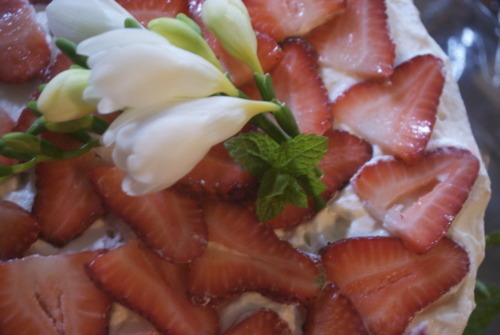
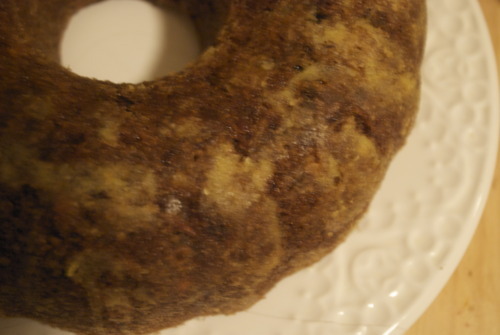
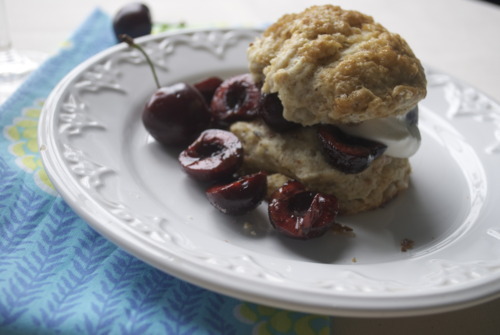
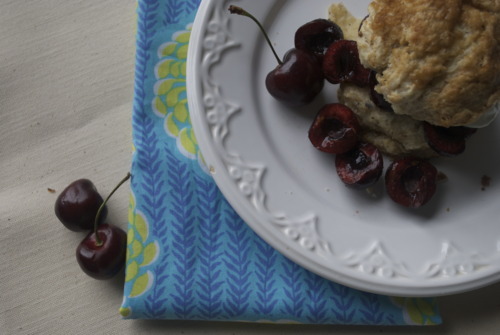
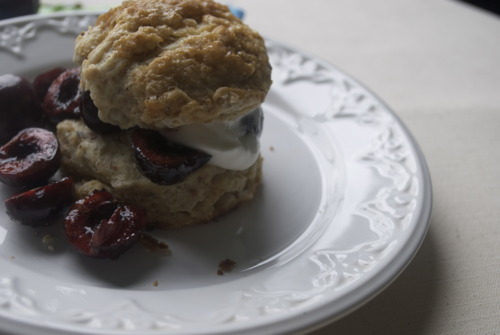
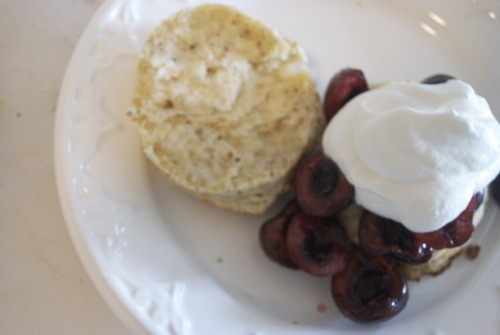
Light fluffy, flakey scones, these ones full of hazelnuts and then cut in half and stuffed full of fresh cherries and whipping cream.

Because if that isn’t going to save your job and make you feel a hundred times better, well, I don’t know what will.

Hazelnut Scones with Macerated Cherries and Vanilla Whip Cream

For the Scones:

4 cups AP Flour

1 tbsp Baking Powder

1 tsp Baking Soda

1 1/2 cups Hazelnuts

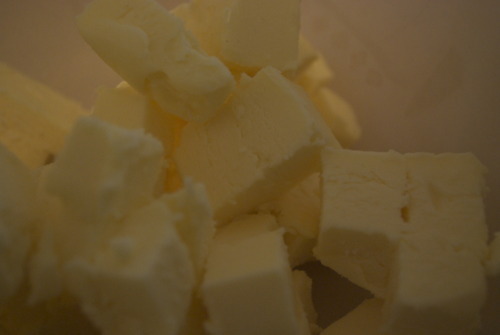
1 cup Butter, very cold

1 1/2 cups Buttermilk

Vanilla Whip Cream:

1/2 cup Whipping Cream

2 tbsp Icing Sugar

1/2 Vanilla Bean, or 1 tsp Vanilla Extract
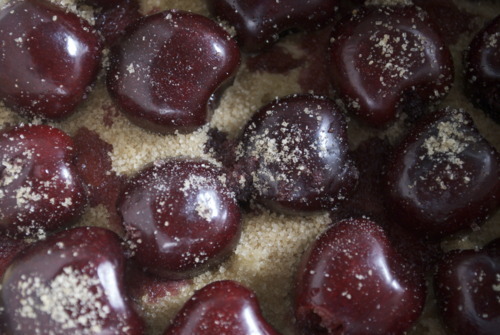
Macerated Cherries:

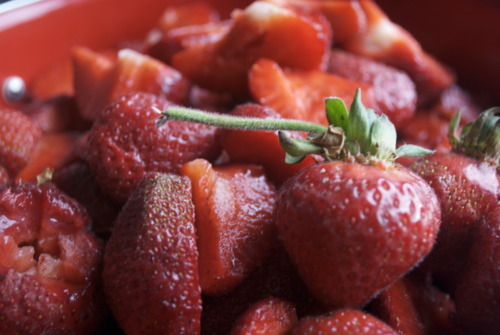
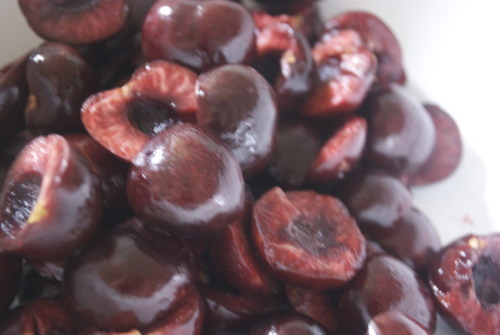
1 1/2 cups Good, Ripe Cherries, cut in half and pitted.

2 tbsp Granulated Sugar

To Make Scones:

Preheat oven to 375F

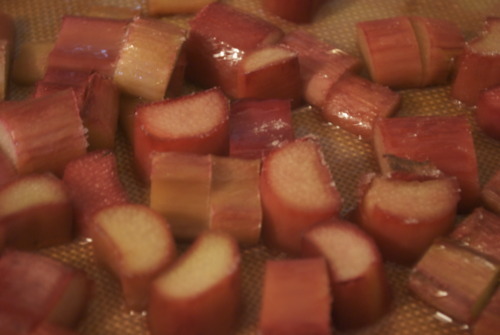
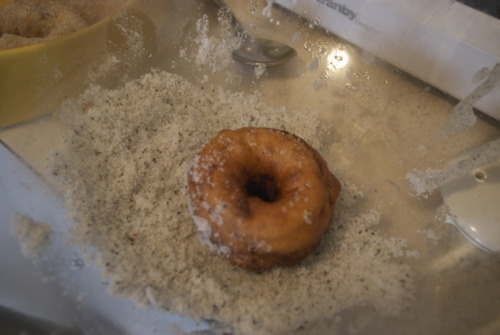
Put hazelnuts in a single layer on a tray and bake until they turn a pretty auburn colour and smell very fragrant.

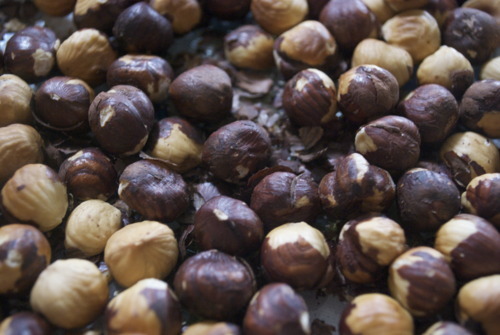
Using a towel try to scrub off the loose pieces of skin.

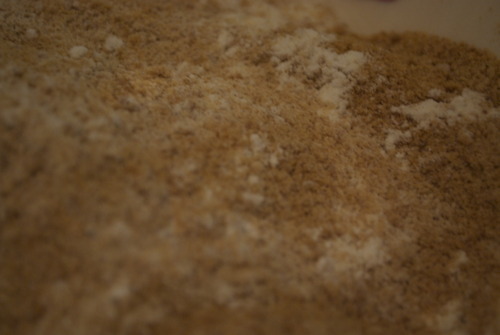
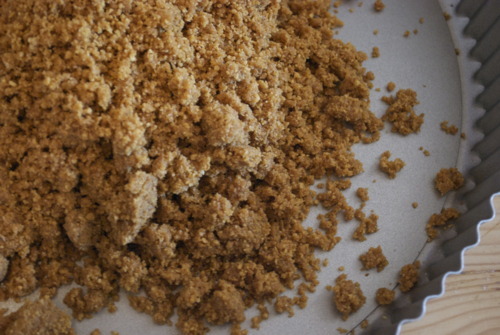
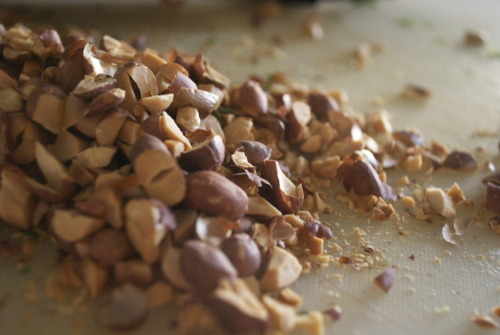
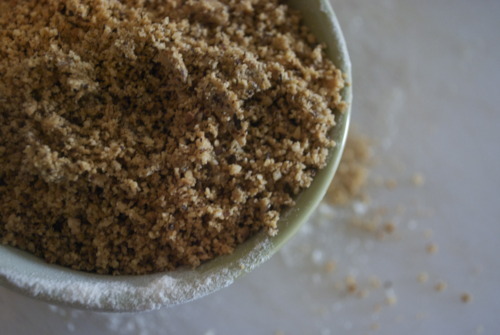
Grind them up very fine in a food processor and then measure out 1 cup.

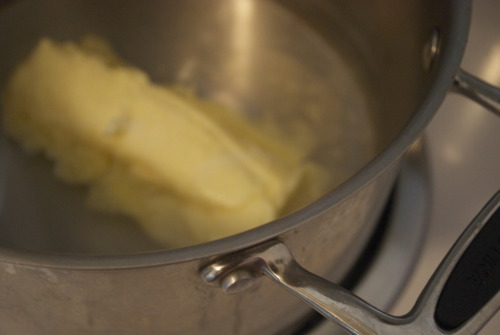
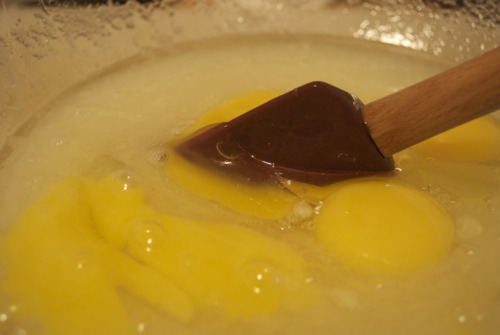
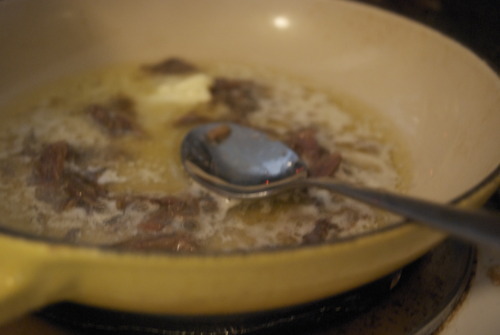
Cut up the butter into cubes

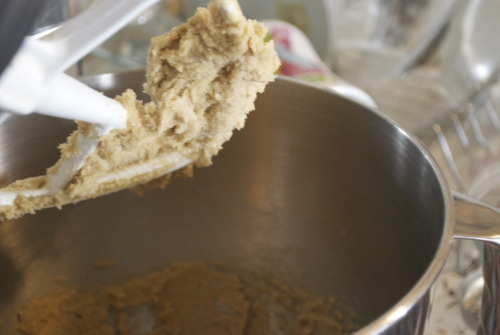
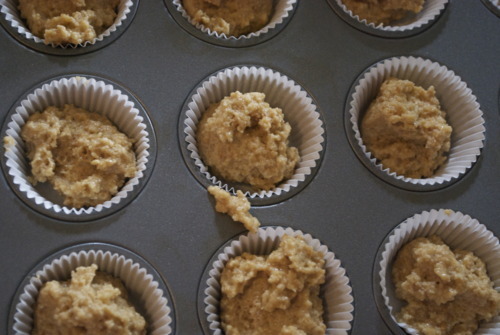
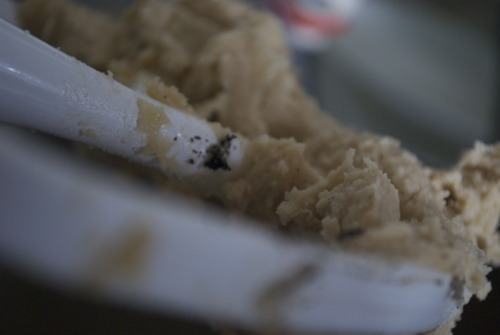
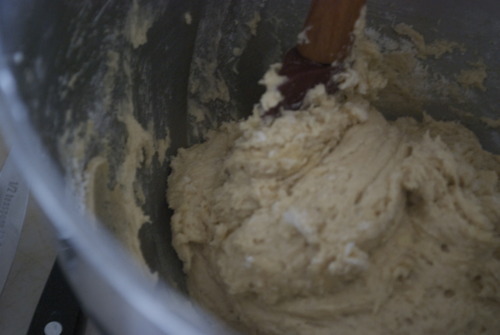
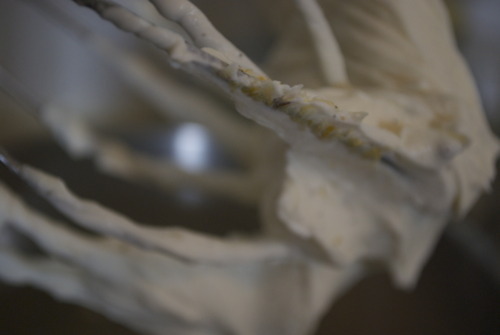
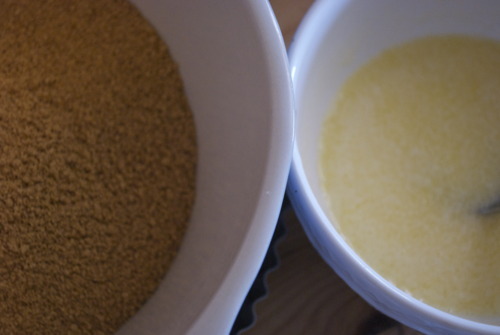
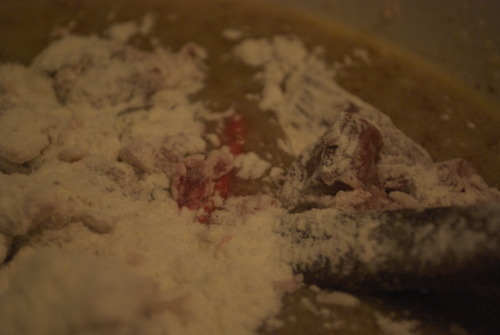
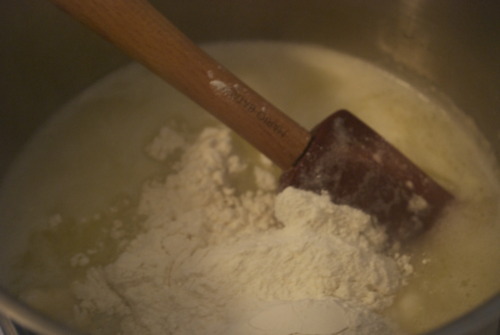
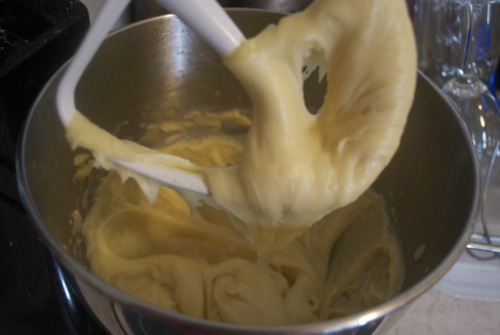
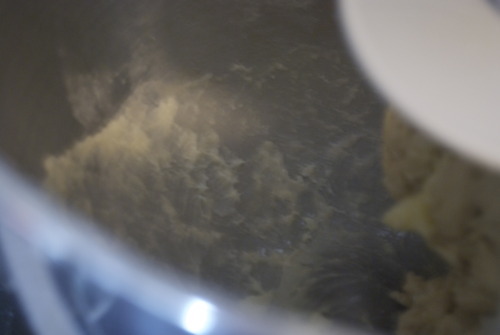
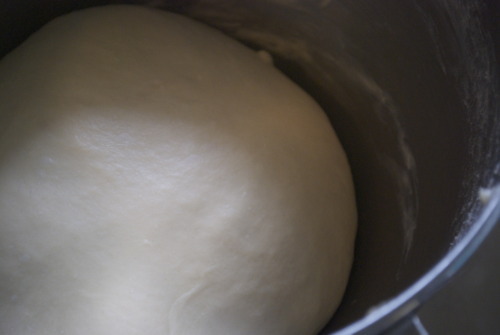
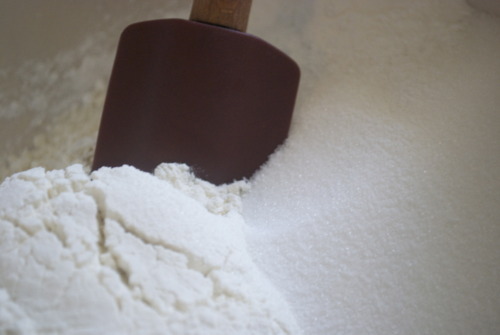
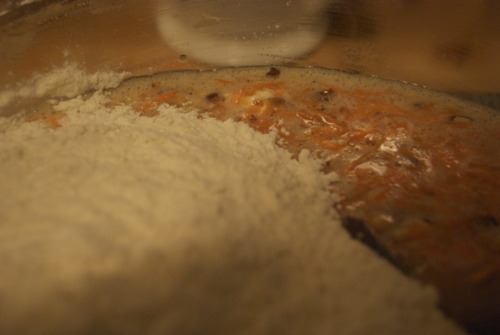
In a bowl mix all the dry ingredients and then cut in the butter, breaking it up with your hands until the butter is in chunks, roughly the size of your baby fingernail.

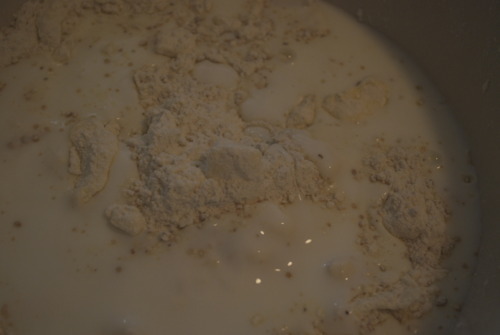
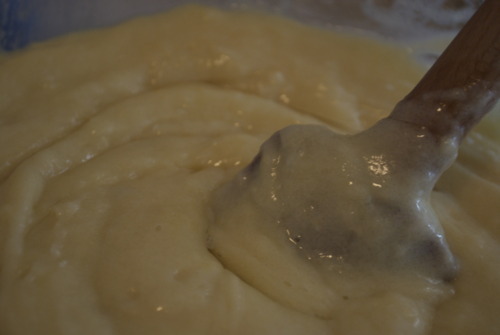
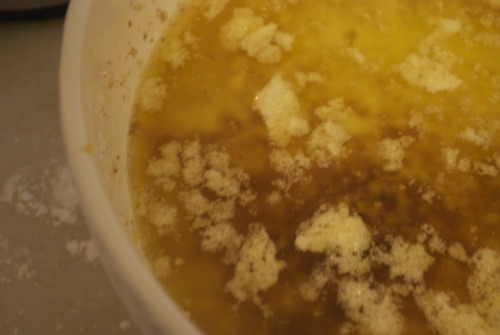
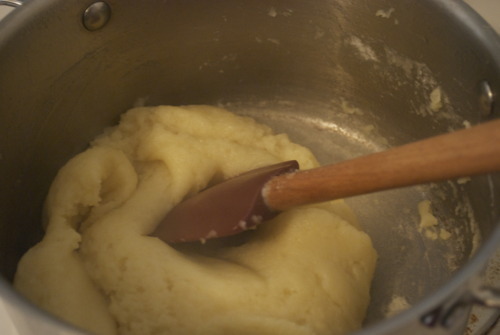
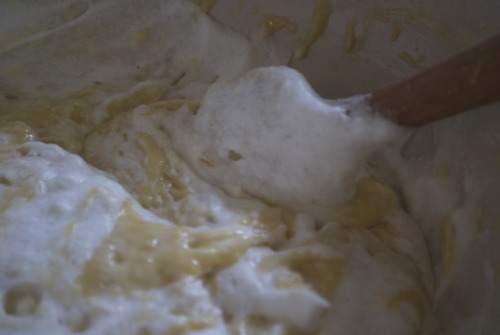
Pour in the buttermilk and mix gently until it is almost combined.

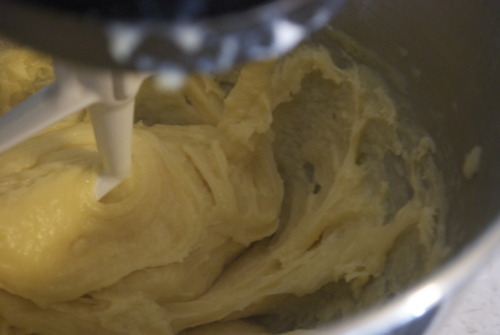
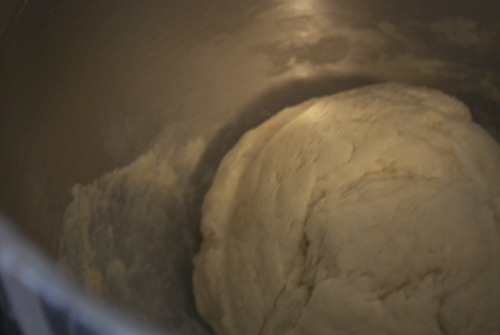
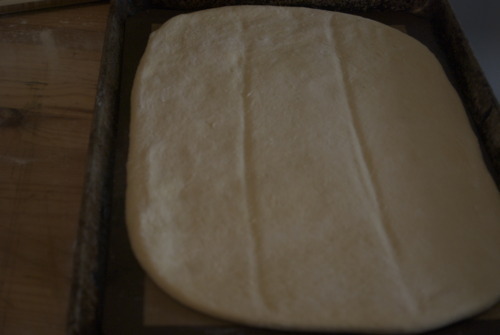
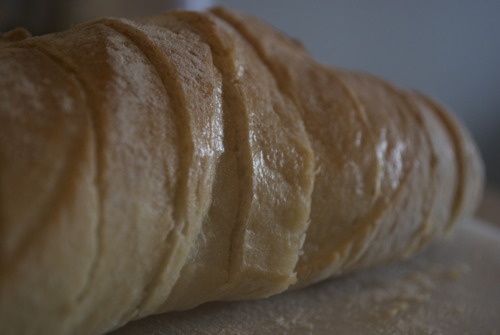
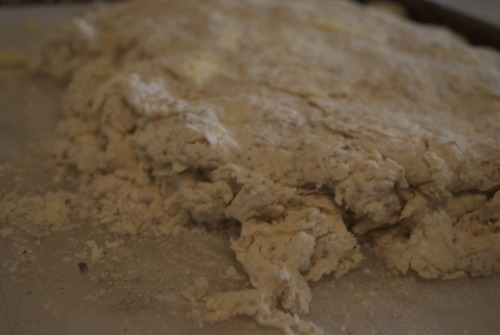
Then put it out onto a cutting board or counter and gently push it down, fold it in half, push it down, fold it in half until your dough is cohesive, but not at all tough. As soon as you start to feel a resistance, stop.

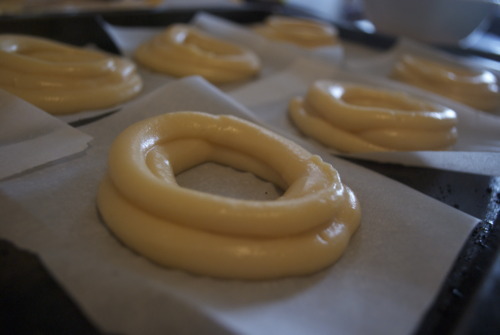
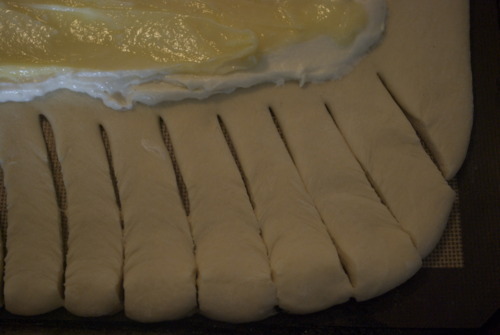
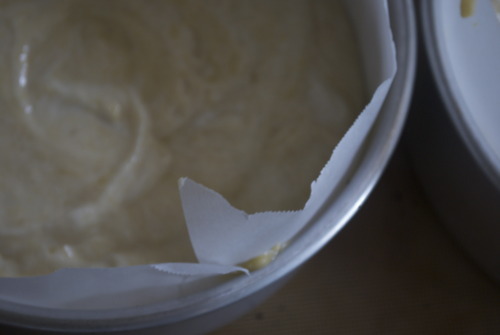
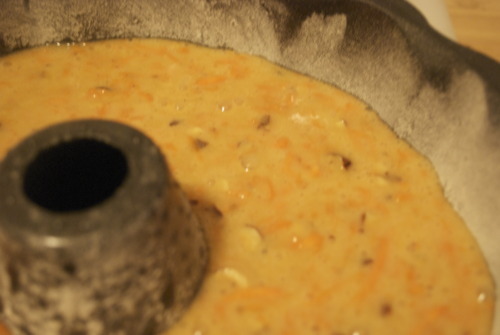
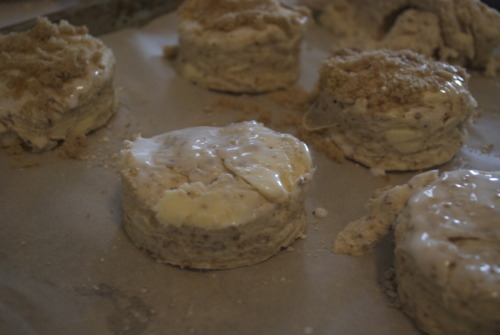
Cut into circles and put on a tray, then put the tray in the fridge to cool for at least 20 minutes. You get nice flaky scones because the big pieces of butter which are very cold go into the hot oven and the change of temperature makes the butter produce steam which causes the layers.  So it’s important to let them chill.

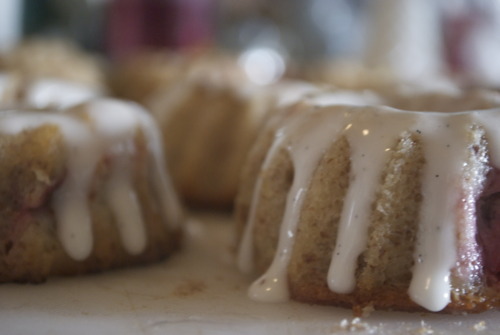
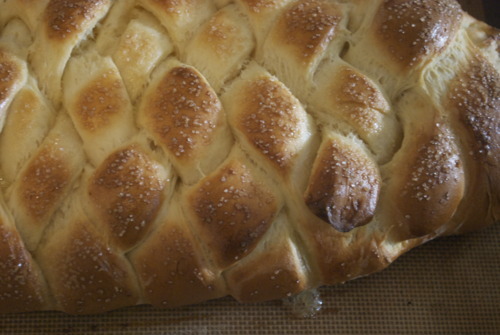
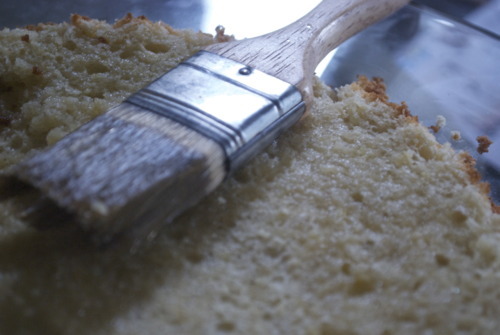
Brush with a little extra buttermilk or cream and sprinkle some brown sugar on top if you’d like.

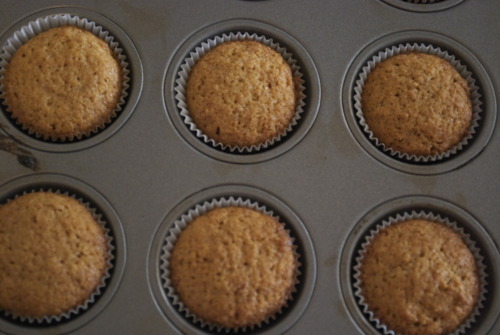
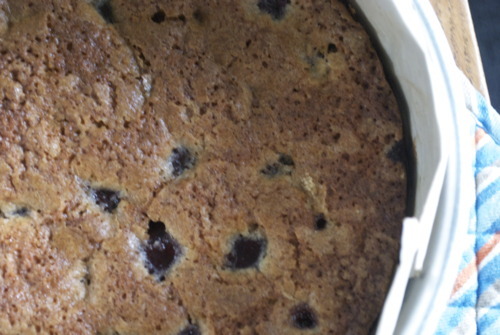
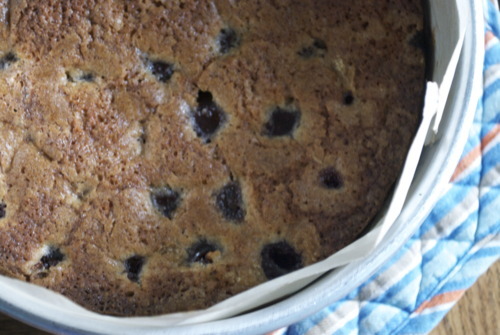
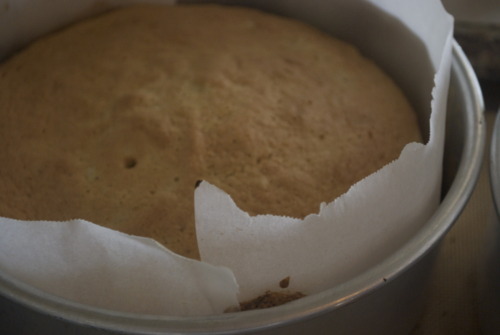
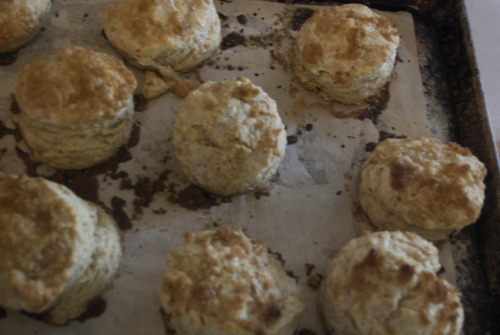
Get them into that oven right away and bake until the tops are nice and brown.

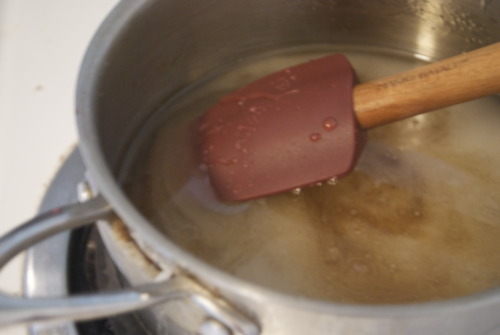
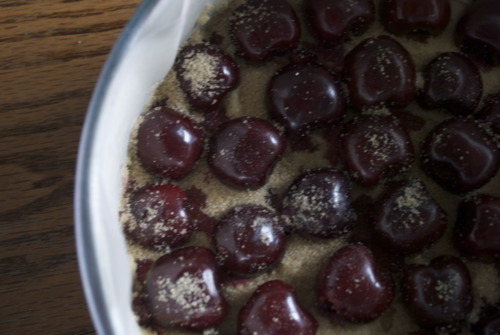
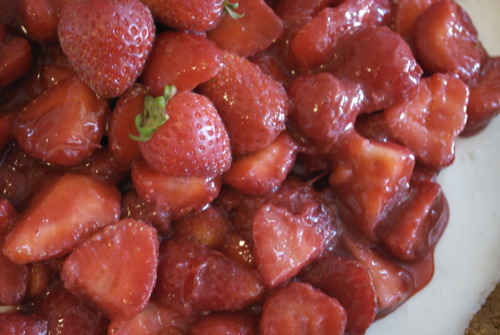
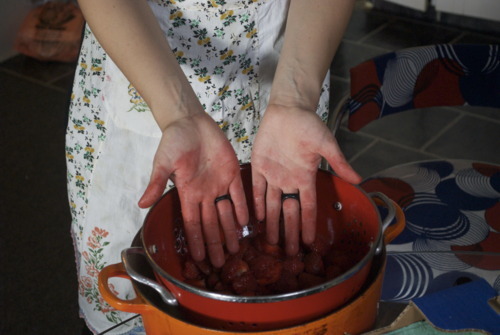
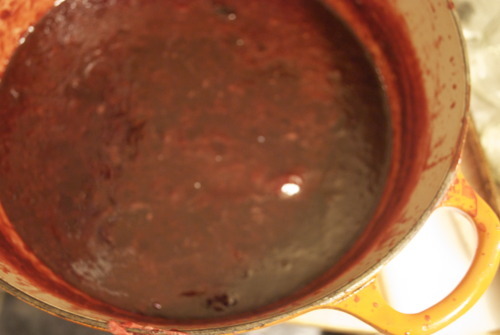
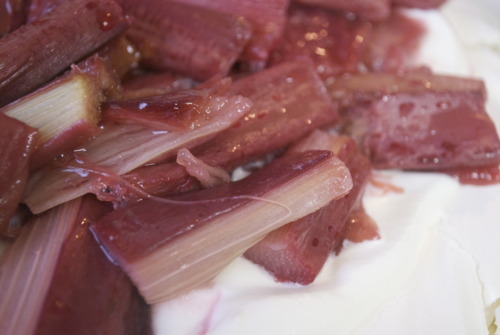
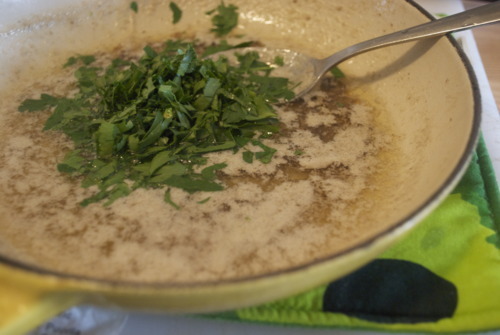
Meanwhile mix those cherries and sugar together and them sit and meddle and be happy together.

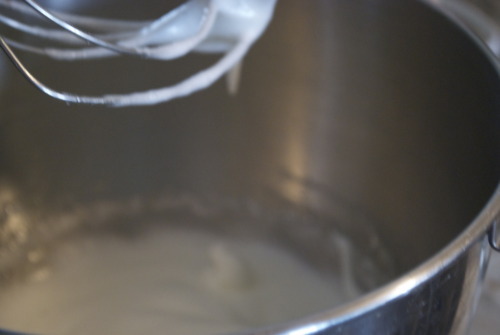
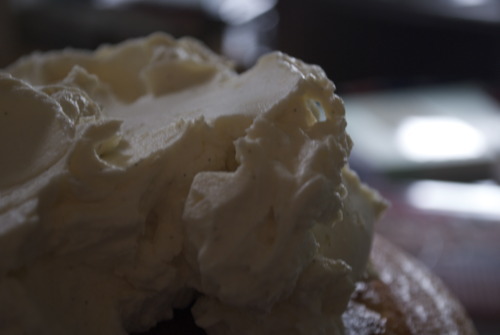
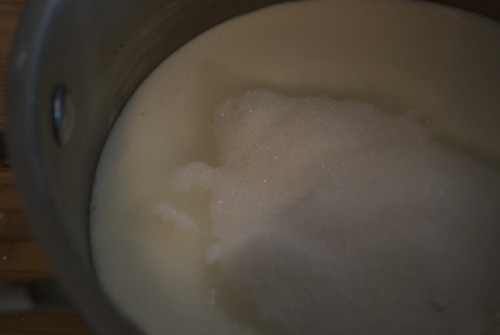
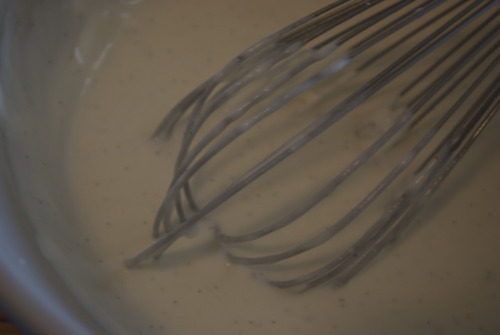
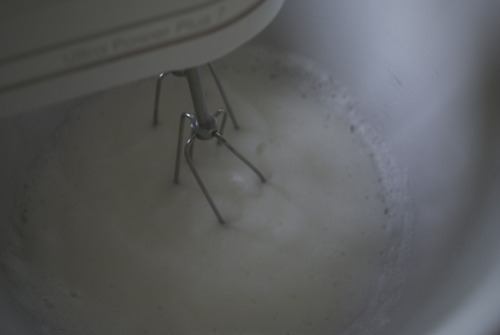
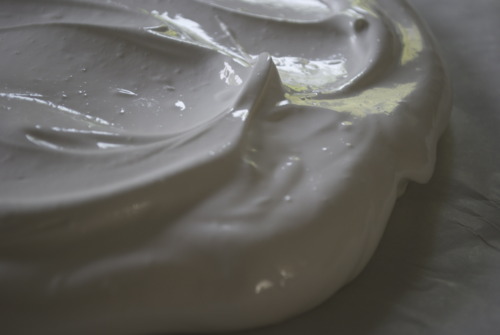
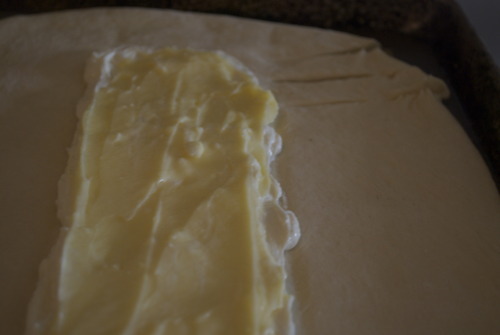
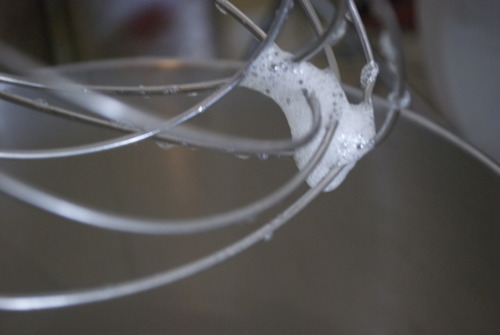
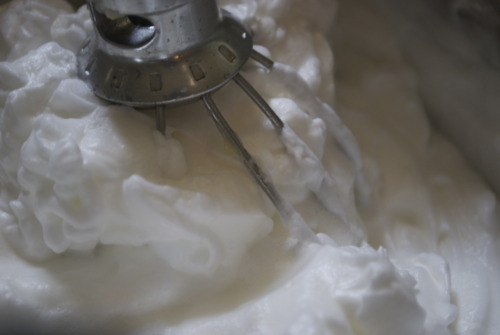
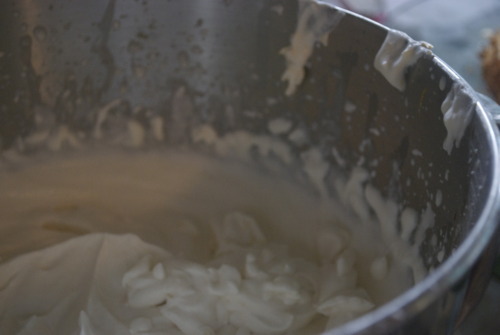
Whip the cream with the sugar and the vanilla (sorry i forgot to take a picture of that!)

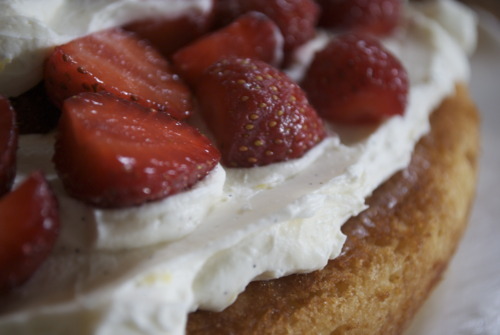
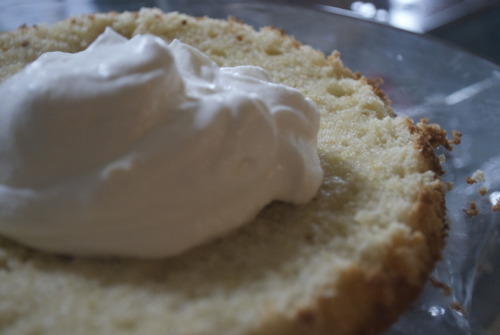
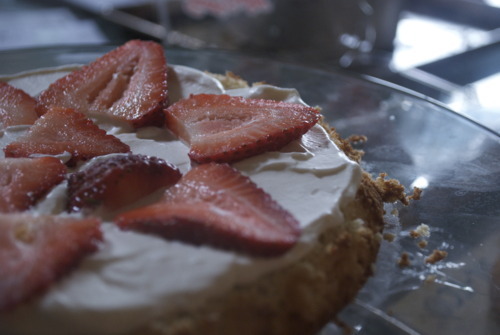
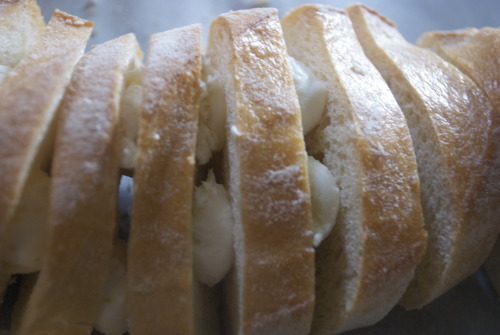
And then break a scone in half, plop some cherries down put a dollop of whip cream on top and top oit with the other half of scone and hot damn thats a good breakfast, lunch, or dessert.

Finch's Cafe/ New Ideas

Last week I met up with a girlfriend at one of our favourite places to grab a bite to eat and have a long over due catch up.

We were eating a terrific meal at one of the cutest ever cafes, and I thought to myself, I should put this on my blog. I have my camera, I have a great back drop, and this is a restaurant I really want to succeed. So this is the first post in a new section, not where I review restaurants, but where I talk about places that I love. Places, that are sometimes off the radar, but sometimes they’ll be ones people talk about too. But they’ll be places with great food, lovely decor, and something about them that makes me want to revisit over and over again.

The place that inspired all this was Finch’s. Finch’s is a beautiful cafe.

It is below a dodgy looking hostel, which made me for a long time disregard it, but a couple years ago when a friend asked me to meet her there, I fell in love.

The space is amazing it’s not a large space, but its on the corner and it has huge windows which are adorned with vintage lace curtains. There are pretty details liek an old type tray hanging on the wall with little trinkets in it, and an old china cabinet over flowing with pretty mismatched dishes.

The menu, which is features baguette sandwiches like prosciutto with backed blue brie and toasted walnuts, is all written up on gold framed chalkboards. I had the avacado baguette sandwich which is full of avacado, cucumber, lettuce, walnuts, and edam (although i don’t like edam so i had applewood smoked cheddar in mine!)

Francesca had the gypsy salami, which is what i usually get actually, which is just super stuffed with salami, lettuce, dijon, and mayo. But its perfect that way.

The service is nearly always very friendly, although do expect to wait at least 5 minutes for a coffee. I drink tea though, and they have a great selection. They also have a few baked goods, always a chocolate chip cookie and an oatmeal cookie, and sometimes a cake or two.

For me Finch’s is very close to the perfect lunch place, it’s good simple food, very affordable, and in a beautiful space.

Finches Cafe

353 West Pender (at Homer)

Carbonara

They say that scent is the sense most linked to memory and I think, despite not knowing who they are, that they’re right. I think about it occasionally, if a man walks by wearing Jordan’s old cologne and I get a flash in my head of his old apartment, or the way freshly cut rhubarb makes me think of my mom making pie, but never is it more obvious to me then when I smell bacon.

Bacon, which I have eaten literally hundreds of times in at least dozens of ways.

But every time I smell bacon cooking all I can think of is a pale pale yellow bowl with thin red and blue stripes around the top of the inside. I can see it vividly, sitting on top of the glass tabletop from my childhood backyard, with our neighbours overgrown shrubs turning into trees in the background. I can feel the warmth of the hot Toronto summers, but mostly what I see is the Spaghetti carbonara inside that striped bowl, and what I smell is bacon.

It was the ultimate summer meal, it took minutes to throw together, cook bacon, cook pasta, toss with eggs and pepper and parmesan, put on table. The speed of it was important not only because my Mom was a busy woman, but also so the burners wouldn’t be on and heat up the house.

For me, this pasta is the epitome of simple Italian food, and I am a snob about it. I adamantly don’t believe that there should be anything in it besides pasta, eggs, parm, pepper, bacon and salt. I don’t like cream in mine, i think it should be creamy enough as is. The crucial thing is that everything be of great quality. Using DeMecca pasta will not give you good carbonara. Using a brand, made in Italy, that has 100%duram semolina flour is important. (I have found, although I’m sure there are lots of exceptions to this rule, that the pasta in boxes is often of a lesser quality then the kind in a bag with the label stapled to the top.)

Good eggs are also crucial, and maybe most important is the parm. Try to get grana padano, or real parmesanno reggiano.

And also, don’t skip on the pepper. The name Carbonara means black, like coals, and though I don’t like quite that much pepper in mine it should have a fair bit.

Spaghetti Carbonara

10 thick slices of the best bacon you can get. Pancetta is a lovely subsistute as well.

2 Free Range Organic Eggs

3/4 cup Grated Parmesano Reggiono, or Grana Padano

1 package Very good Quality Spaghetti, or Spaghettini

Salt and Pepper

Cut the bacon into thick pieces.

Fry them on medium heat until wonderful and crispy, but with a little chew to them still.

Strain and set aside.

Get a big pot of water on high heat.

Meanwhile mix your eggs, parm and a healthy cracking of pepper.

I was a little crazy this time and added a bit of parsley. You could do that too if you wanted.

Now put that strange eggy sauce in the bottom of a large bowl.

Now, perhaps you have a good stove and your water is boiling already. In that case, throw your pasta in, give it a good stir and cook it depending on the package instructions, but basically if until it is cooked throw with a bit of bite to it yet. If you don’t have a good stove, throw on some Aretha and dance around a bit, and then add your pasta, stir it a bit and cook it by the package instructions. Whatever works for you.

Once it’s cooked strain it and then quickly put it into that big bowl with the sauce in the bottom and give it a good toss. You want to move quickly now.  If you take to long the eggs with curdle, but if you move just fast enough you’ll have a wonderful silky sauce that wraps around each noodle. And it will be glorious.

Rhubarb Pavlova

I reguarly am told by friends that I am an intimidating person to cook for. That I’m picky, (only true when I’m making it, if someone else cooks for me I’m over the moon happy!) that my food is always pretty (well I’m flattered really, but honest my non blog food is pretty non pretty) and that I don’t screw things up. Well the last one is a terribly terribly misconception.

Let the records show that I, Claire Lassam, have made some terrible meals. Terrible!

A great/tragic example of this was on Valentines Day. I came home to an amazing meal. Jordan had braised lamb, and made a wild mushroom risotto, and sauteed brocollini (my favourite!) and had put an excessive amount of love into the meal.

For my part I had found fresh passionfruit at a local market that deffinately does not usually sell fresh passionfruit and thought, perfect! Passionfruit curd on a pavlova. Simple, light, perfect.

Only my pavlova was hard as a rock, and with my terrible oven starting to brown, and the curd was overwhelmingly sweet. It was, absolutely, inedible.

So last weekend, when I was at Jordan’s parents place to make them an early Father’s Day dinner, (which is to say that I was in the presence of a properly working oven) and I couldn’t find the flour (of course it was there but I found it too late) and I had loads of rhubarb (pleasantly acidic) I decided to try a round two.

This time, I had a couple tricks up my sleeve. Mostly, instead of getting it off Martha, which does normally have good recipes, I got it off Smitten Kitchen, because she said she had tried two recipes and had made a master recipe that was perfect. And also because I love Smitten Kitchen and nearly everything she makes is brilliant. Also, an Australian friend told me that, when in doubt, keep whipping, and I did and it turned out very well.

And it is brilliant. It’s a light crisp exterior that leads the way to a marshmallowy centre. Marshmallowy. I don’t think I need to say any thing else except that with whipped cream and rhoasted rhubarb, this is not only a showy and incredibly good dessert, but also a very simple dessert, and those are the best kind in my books.

Meringue:

4 large (120 grams) egg whites
Pinch of salt
1 cup (200 grams) superfine (castor) or regular sugar
1 teaspoon white vinegar
1/2 tablespoon cornstarch, potato starch or arrowroot powder

Rhubarb:

6 stalks of rhubarb

1/2 cup Sugar

1 cup whipping cream, whipped with one teaspoon of vanilla extract.

Preheat oven to 225F

Whisk together your egg whites and your salt until soft peaks, using an electric mixer, unless you have incredibly strong arms and a great amount of determination, in which case, do it by hand.

Slowly add in the sugar and cornstarch, tablespoon by tablespoon until all of it is incorporated. Then keep whipping. Aren’t sure if it’s glossy enough? Keep whipping. Does is hold stiff enough peaks? Keep whipping. Basically keep whipping and whipping for a long time, until it is very glossy, and very stiff.

On a parchment lined pan spread the meringue out into a circle with an inverted spatula, i made mine about 10 inches wide.

Put it in the oven for about 45 minutes. If it starts to get brown turn the oven down, if it starts to crack turn the oven off. Once it feels firm to the touch but still has some give inside of it crack the oven open, turn the oven off and let it cool completely inside.

In the meantime, take your rhubarb and cut it into one inch pieces. Lay it on a parchment lined baking sheet and pour sugar over top. Once your pavlova has cooled, crank the oven up to 400F and put the rhubarb in until it is soft but still holds it’s shape, about 15-20 minutes.

To Assemble:

Transfer the meringue onto your serving tray.

Blob heaps of the whipped cream on top, and then dollop the rhubarb on top of that. Don’t be shy with the rhubarb, you need lots to balance it out.  

And if you’ve done everything right you get marshmallowy goodness.And you get happiness.

Wanting to Travel...

I love going to cafes and little breakfast and lunch restaurants.

I love sweet little spots with great coffee, wonderful little baked goods, and maybe a sandwich or a salad that tastes fresh and like it was made with love.

I love the places that you don’t feel strange having a bite to eat alone, and that you can sit for an hour with a book and be very content just like that.

Which is to say that when I was in London last fall I fell madly, deeply, overwhelmingly in love with Ottolenghi.

Oh it’s just… just perfect.

It’s clean and crisp, it’s mostly white with some bright read details. It has a large counter filled with the most perfect salads. Ones like Brocolini with Chilis and Almonds, or Braised Globe Artichokes, with Broad Beans, Pink Peppercorns and Preserved Lemons. And then just past the heavenly salads are the baked goods.

The most beautiful Pistachio Cakes, dripping with rosewater icing, and Blackberry Friands, and dense and wonderful Chocolate cake you’ve ever had.

It’s the sort of place you could go everyday for a month and not try the same thing twice.

It’s the sort of place that’s hard not to fall in love with.

And fortunately for those of us not living in London there are cookbooks and a weekly column in The |Guardian for us to steal his recipes and try to replicate it at home.

Which is what I did the other day when I was in dire need of some sweets.

The recipe for these came from the Guardian and it called for blackberries but it’s to early for them here so I went with rhubarb, and then because I love rose so much I put some of that in the icing which really was wonderful.

These cakes are very moist and very rich, thanks largely to the addition of ground almonds in them. Because of that they will stay very moist for several days, so it’s a great cake to make in advance of something, or just to keep in a jar for a week and eat one a day. But they are so pretty, they would also be perfect for an afternoon tea.

Rose Scented Rhubarb Almond Cakes

4 big stalks of Rhubarb, washed and cut into 1centimeter (about 1/2 inch) pieces.

1/2 cup sugar

Cakes:

10 egg whites
100g plain flour
300g icing sugar
180g ground almonds
1tbsp Vanilla extract
⅓ tsp salt
Grated zest of ½ lemon
1 cup unsalted butter, melted and left to cool, plus extra for greasing

Icing:

1 cup Icing sugar

1 tbsp Rose water

1 tsp Lemon Juice

Preheat oven to 400F

On a parchment lined baking sheet spread cut rhubarb out in a single layer and then sprinkle sugar on top. Bake for about 20 minutes or until rhubarb is just beginning to get soft. Take out of the oven and let cool.

Turn heat down to 350F.

Butter mini bundt pans, mini loaf pans, or mini cupcake pans.

Whisk up the egg whites until they’re frothy, but not full whipped.

Add in the lemon zest, melted butter and vanilla.

Sift in all the dry ingredients and fold gently together.

Then fold in the roasted rhubarb and spoon into the prepared trays and bake until an inserted skewer comes outs with only a few moist crumbs, about 15-25 minutes. Allow to cool completely.

To make the icing mix all the ingredients together until smooth. If it looks a little thick, add in some water or more lemon, if it looks thin add in some more icing sugar.

And then drizzle them on the very tops of each, the icing will run down and leave lovely little drips around each of them.

Lavender Donuts Please!

I’ve been working part time for the last few months at a trendy sandwhich shop called Meat and Bread. It is full of beards, black tee shirts and burly men. I am the token girl.

When I first started there it was my only job and I was baking and blogging more often, and I brought them in a lot of treats. But then I got another job, started working 60 hours a week and I am a way less charming employee now. So last week when I got to sleep in and work only the one job (usually I’m up at 4:30am so if I work at 10am it is a great productive morning for me!) I thought I would be sweet and bring them some goodies.

These aren’t really donuts, they are for all technical purposes crullers. Crullers are donuts simple, friendly, and lovable cousin. They take minutes to put together, can be done by easily by anyone and are just as adaptable in what you put on them. This is the magic of choux paste. If you bake choux paste and put chocolate on top you have an eclair, if you bake it in little balls and put pastry cream in it you have a cream puff, if you add cheese to the batter and bake it you have gourgeres. Basically you want to know how to make choux paste. And then you’ll probably want to fry it and toss it in lavender sugar, and then you’ll deffinately want to eat too many. But you’ll be very happy, I promise.

Lavender Sugar

1 cup Sugar

1tbsp Dried Edible Lavender

Choux Paste

1 cup water
8 tablespoons unsalted butter (1 stick)
1/2 teaspoon salt
1 cup all-purpose flour
4 large eggs

Mix the sugar and lavender in a food processor until the lavender is small and crushed up, or use a mortar and pestal to mash up the lavender and then add it to the sugar.

Combine the salt, water and butter in a saucepan and bring to a simmer.

Add in the flour in one go and mix vigourously still on the heat until it is smooth,

And then beat for another minute or two.

With a mixer fitted with the paddle attachment add the eggs in one at a time beating will between each addition, you could also do this by hand pretty easily.

Put the batter into a piping bag and pipe whatever shapes you want. I did the traditional donut shape. An easy trick: pipe them onto little squares of parchment paper. The paper will slide right off when you fry them. 

Meanwhile heat up the oil, on medium heat until it comes to 350F. If you don’t have  a thermometer you can test it by dropping in a drop of water. It will drop on the bottom for a second and then will bubble away quite quickly. Thats when you know your oil is ready.

So get a couple donuts in!

Within a couple seconds the parchment will slide off, and in a minute or two you should flip them with a slotted spoon or tongs.

When they’re nice and a deep golden brown toss them into your sugar and then eat them as quickly as you possibly can.

Lemon Braided Bread

It’s probably fair to say that I’m a little obsessive with baking. There are so many baked goods that I make that don’t get up on this blog because they weren’t quite fluffy enough, or moist enough or pretty enough. I’m constantly tinkering with recipes here, a little more of this, a little more of that. Or sometimes I just have to spend a little more time on the presentation, I don’t like putting things up here that don’t look great.

Which is why it’s so surprising to make a recipe and go, goodness, I don’t need to change a thing. It is rare and unusual and wonderful, and it happened this week.

The amazing Smitten Kitchen had a recipe for lemon braided bread and hot damn was it good. The bread is very moist and very butter, and the cheesy layer is the perfect amount of sweetness without really being all that sweet and the lemon sets the whole thing over the edge. And it’s shockingly easy for something that turns out as beautiful as this bread.

A girlfriend of mine was coming over for lunch and, despite us both being pretty small girls, we ate two thirds of it in one sitting. Oh just one more slice, maybe a little bit thicker, oh come on thicker still, yes there we go

.

Sponge

6 tablespoons (3 ounces) warm water
1 teaspoon sugar
1 1/2 teaspoons instant yeast

1/4 cup (1 ounce) unbleached all-purpose flour

Dough

Sponge (above)
6 tablespoons (3 ounces) sour cream or yogurt
1/4 cup (4 tablespoons or 2 ounces) unsalted butter, softened
2 large eggs, 1 beaten for dough, 1 beaten with 1 teaspoon water for brushing bread
1/4 cup (1 3/4 ounces) sugar
1 teaspoon salt
1 teaspoon vanilla extract
2 1/2 cups (10 5/8 ounces) unbleached all-purpose flour

Egg Wash

1egg yolk

1 tbsp Water

Lemon Cream Cheese Filling

1/3 cup (2 1/2 ounces) cream cheese, softened
2 tablespoons (5/8 ounces) sugar
2 tablespoons (1 ounce) sour cream
1 teaspoon fresh lemon juice
2 tablespoons (1/2 ounce) unbleached all-purpose flour
1/4 cup (2 ounces) Lemon Curd

Mix all the sponge ingredients together and let sit until bubbly, about 15 minutes

In a standing mixer fitted with the dough hook attachment, or with some strong arms add in the dough ingredients except the salt and the butter and need until it becomes a shaggy mass. (Yes that actually is the technical term) and then add the salt.

Work it until a nice dough has formed and it pulls away from the side of the bowl.

With the motor still running add in the butter piece by piece until it’s all combined and the dough is smooth and elastic.

Cover it with a tea towel and let it rise in a warm place for about an hour or maybe a little longer until it’s doubled in size.

On a lightly floured surface roll out the dough into a long rectangle, roughly the size of the baking sheet your going to bake it on. Lightly press in two lines that divide it in thirds lengthwise.

Carefully transfer it to your lined baking sheet.

Mix together all the ingredients for your filling except the lemon curd.

Spread the sour cream layer onto the middle section of the dough, then spoon on the lemon curd.

Cut dough on either side of the lemon layer into strips, trying to get as many on both sides.

And you can either fold them over, or weave them through.

And let it proof, again, in a warm place covered with a tea towel, until it has doubled again in size.

Preheat your oven to 350F

Mix an egg yolk with a couple tablespoons of water and brush them onto of your bread.

Sprinkle with your coarse sugar and get it in the oven!

You want to, because when it comes out, it comes out like this:

And it smells like heaven and no matter what else you might serve, if you make this for brunch no one will eat anything else.

Vietnamese Noodle Salad with Halibut

Jordan has a lot of Italian friends. I`m not sure why or how he, being half Portuguese and half British, got in with this group of guys but any way he did. And while they may all be upstanding citizens with no mob connections they, without fail, always know a guy who knows a guy.

We know a guy who knows a guy who can fix our plugged drain, another who can build us a bookshelf, someone who give us fresh tomatoes in the summertime, and someone who makes their own prosciutto in their backyard shed, and yet another who sometimes give us fish.

Which is how several beautiful black cod and an alarmingly large piece of halibut appeared in my appeared in my fridge last week. They had never been frozen. They were unbelievably fresh. I was unbelievably happy.

So, while I wrecked my eyebrow tweezers plucking out pin bones, I thought about summer. About the sun pouring through the window, about fresh veggies, and all things green. I thought about hiking, which made me think about canoeing, which made me think about bikinis which made me think that perhaps we should eat a salad with this piece of fish.

But here,s the problem with salads: I always think their great until an hour later when I’m super hungry again.

So instead of just veggies, I made a Vietnamese noodle salad, with edamame, and peanuts, and cucumbers, and sprouts. And of course, on top in it`s place of honor, the most incredible buttery, soft piece of halibut imaginable.

Vietnamese Noodle Salad with Halibut

Don’t worry if halibut is out of your price range, it’s out of mine nine times out of ten. Just use any kind of white fish, cod, talapia, snapper, whatever looks good and fresh at your market will be delicious here.

For Halibut

2 fillets of halibut

Juice of 1 lime

1 tbsp Soy Sauce

1 tsp Fish Sauce

Oil for frying

Salad

Half a package of rice noodles, or rice stick noodles

1 cup Edamame, shelled

5 green onions, slices thinly on a bias

1 cup Bean Sprouts

1 cup Pea Shoots

Half a Cucumber, cut into quarters lengthwise and then cut on a bias.

Half a Cup Peanuts

A big handful of Cilantro

A handful of Thai Basil

For Dressing

1tbsp Lime Juice

2 tsp Soy Sauce

1 tsp Fish Sauce

2 tbsp Peanut Oil, Canola Oil, or Olive Oil

Preheat your oven to 400F

Get a big kettle on the stove and bring to a boil.

Prepare your Fish

Put the lime, soy, fish sauce and halibut into a ziploc bag and shake it up a little to disperse everything. Set aside. This can be done up to 2 hours in advance.

Make Salad

Cut up your veggies, pull apart your herbs, peel your beans.

Roast your peanuts at a 400F oven for about 10 minutes or until they start to get yummy and brown inside. The skins might smoke a bit, but that doesn’t mean that their done yet, cut one open or bit one in half and see. Peanuts need to be nicely roasted to be tasty.

Roughly chop them up.

Mix all the ingredients for your dressing and taste it. Is it seasoned properly? Is it lime-y enough for you?

That kettle should be boiling by now. Put all your rice noodles into a big bowl and then pour the water over top. Give it a little shake and let it sit there until they cook through but there is still a bit of bite to them.

Strain it into a colander and rinse with cold water, stirring sometimes to make sure it all cools down evenly.

Mix all your salad ingredients together except the peanuts.

Put the halibut onto a baking sheet lined with parchment and bake until it’s nice and browned inside but still very moist in the middle, about 10 minutes. (sorry, no picture here!)

Put the halibut on top of the salad, sprinkle with the peanuts and your in business!

Strawberry Shortcake

Lately I don`t get out much. I work a whole lot, I bake a whole lot, and I read quite a bit, but mostly when I read I fall asleep, in awkward places in awkward positions that make my neck hurt later.

I haven`t been seeing my friends as much as I should, but I have time to call them sometimes if I walk home instead of running home, which is usually a good enough of an excuse for me.

But sometimes I worry that my friends will all abandon me for being so boring.

So last weekend, for my dear dear friend Arlene`s birthday, I went out.

I wore a short skirt.

I baked a cake.

I drank to much sangria.

I watched some amazing flamenco dancing and cheered on a man named Jose, a 60 year old ladies man who sang Spanish love songs while beautiful women danced in front of him.

I pretended that I didn`t work at 5am the next morning.

I felt like the 23 year old that I am.

It was wonderful.

And on the theme of playful, fun, youthfulness and all those good things that go along with them, I made strawberry shortcake. It was light and fruity, it was summery and it was darn good if I say so myself.

Stawberry Shortcake

Adapted from a recipe from Epicurious

8 Large Egg Yolks

1 1/2 cups Sugar

1/4 cup Milk

1 tbsp Vanilla Extract

Zest of 1 Lemon

1 cup All Purpose Flour

1 tsp Salt

4 Egg Whites

Cream Frosting

2 cups Whipping Cream, very cold

1/4 cup Sour Cream

4 tbsp Icing Sugar

Zest of 1 Lemon

1 tbsp Rosewater

Rose Syrup

1/2 cup Sugar

1/2 cup Water

1 tsp Rosewater

1 lb Fresh Strawberries, cut into slices

Make Rose Syrup

Combine all ingredients in a pot and simmer until the sugar is disolved. Cool. (sorry, I forgot to take a picture of that!)

Make Cake

Preheat oven to 350F

Line 2 8 inch round pans with parchment, do not grease pans! Worst case scenerio don’t use anything. They will come out with some patience.

Sift all the dry ingredients, reserving 1/2 cup sugar, into a bowl

Mix the yolks, vanilla, zest and milk into a small bowl

Add the yolk mixture to the flour mixture and mix until just smooth.

In the bowl of a standing mixer fitted with the whisk attachment whisk egg whites until frothy.

With the mixer still running slowly add in the remaining half cup of sugar, tablespoon by tablespoon, until the meringue is very shiny and holds stiff peaks.

Gently fold the whites into the cake batter being careful not to over mix.

Pour the batter into your prepared pans.

Bake until an inserted skewer comes out with only a few moist crumbs, about 25-35 minutes.

Make Frosting:

Mix all ingredients in a standing mixer fitted with the whisk attachment.

Whisk together until soft peaks form, about 5 minutes.

Assemble Cake:

Slice Layers of cooled cake in half lengthwise.

Put the first layer of cake on your cake plate and brush with the rose syrup.

Dollop with a heafty spoon of cream and gently spread out to the corners.

Spread some slices of strawberries on top.

Continue until you’ve done all the layers

Then ice the outside and put strawberries on the top!

I put some flowers on top, because I’m just like that.

Carrot Cake

Last summer I spent 6 months working at a resort in a remote island in Northern British Columbia, where I baked the breakfast pastries and generally wished I wasn’t trapped on an island for 25 day stretches.

There was however a few amazing people that I met up there, one of them was a girl named Kelsi. She was witty and sassy and had one of the biggest laughs of anyone I have ever met. She ended up leaving early, feeling the need to get off the rock. She did however, replace herself with her cousin Caitlin. Caitlin has the same sass, the same big heart an eerily similar huge laugh. She now lives a couple blocks away from me and she has become a great friend of mine.

So imagine my excitement a couple months ago when I was invited to her family birthday dinner. More sass? More crazy laughs? I promised to bring cake, and I was in. She asked for

This all coincided with the photo shoot I did for the Order a Cake page on this web site so I thought I would hit two birds with one stone and make a pretty cake to bring to the dinner.

When Caitlin came to pick me up on the way she came in to ogle at the the cuteness of the set up and then, slightly concerned, asked where the carrot cake was. Oh, I said calmly, it’s the three tiered wedding cake.

I’m a keener, it’s true.

BUT, the cake was a great success and I’ve been invited back for dinner since, which is great. Because they’re family dinners involve gay men singing Beyonce, bagpipes and a lot of bourbon. And, of course, a room full of the loudest laughs I’ve ever heard.

I didn’t end up posting about that cake at the time, but Jordan asked for breakfast foods the other day and apparently carrot cake counts (?) so I thought I’d bust out this recipe again. And when he brought some into work and got seriously into the good books of his boss! I love happy endings.

Carrot Cake

2 cups Sugar

1 1/2 cups Vegetable Oil

4 Eggs

2 cups All Purpose Flour

2 tsp Baking Soda

2 tsp Baking Powder

1 tsp Cinnamon

1/2 tsp Nutmeg

1 tbsp Vanilla

3 cups Grated Carrots

Preheat oven to 325F

Butter and flour a bundt pan, or 3 8 inch round pans.

Mix oil and sugar

Stir in your eggs.

Add in the carrots and hazelnuts, if using.

Sift in your dry ingredients and carefully fold them in, being sure not to overmix.

Pour into your prepared pan and bake until an inserted skewer comes out with only a few moist crumbs, about 45 minutes.

Flip out of the pan and allow to cool completely.

Icing

8oz Cream Cheese, softened

1/2 cup Butter, softened

3 cups Icing Sugar

Beat together butter and sugar,

Add in cream cheese until just combined

(Sorry, I forgot to take pictures of this part!)

Now ice it how you like, be it a simple bundt cake or a 3 layer wedding cake.

Roman Crostini-nini

My “Aunt” Silvia is an endlessly chic Roman woman who fell in love with a brilliant Canadian man, my “Uncle” Frank. The best job for him was at McMaster University in Hamilton Ontario and thats where they lived throughout my childhood.  Aunt Silvia was not like anyone else I knew.

She has an immaculate salt and pepper bob, wears nothing but black, and is looks endlessly chic smoking like a chimney, the way only French and Italian woman can.She had a beautiful husky voice, and a fiery temper.

When my Dad was doing his PhD Uncle Frank was his Professor and my Mom ended up becoming very good friends with his wife. I picture them in the late 70’s, both beautifully dressed, making wonderful meals and talking about literature.

We didn’t visit all that often, they lived about an hour or so away from us, and while I remember eating well when we went to visit, mostly I remember so many of the staple things my Mom used to make that were recipes from Aunt Silvia. Those really simple Italian meals that just take four or five ingredients but turn into something magical.

The one I remember most is Roman Crostini. It’s one of my all times favourite things, in fact, if you look in my grade 2 yearbook you’ll see that “crostini-nini” is listed as my favorite food. The best par of crostini (nini) is that it literally takes 5 minutes. It’s a perfect h’or deurve and it’s always a crowd pleaser. It’s super cheap and, once again, it literally takes 5 minutes.

It doesn’t take much, just good bread, good mozzarella, and fresh parsley. The secret ingredient is anchovies, which are so prevelent in Roman food and so absent in ours. I have served this to people who swear they hate anchovies, (after making sure there are no allergies) and they’ve loved it. The anchovies just disintegrate into the olive oil leaving this rich deep flavour without any fishiness. And then the cheese oozes in and the bread crusts up and the parsley just makes it all snap together. It’s amazing, and it takes 5 minutes to make.

Roman Crostini

1 good quality Baguette, it can be stale!

3 Anchovy Fillets, get the good ones, packed in olive oil.

1/4 cup Olive Oil

3-5 Balls of Boconccini, depending on the size

A Small Handful of Flat Leaf Italian Parsley

Preheat the oven to 400F

Line a baking tray with parchment paper.

Cut the baguette into slices, leaving the bread just barely attached at the base so that the loaf still looks like a loaf afterwards. If you cut through the bottom a couple times, don’t worry about it, just keep going.

Slice the boconccini into slices and then stick them in between the bread slices like so:

Cut up the anchovies in the smallest little strips and then cook them in butter or olive oil on medium low heat, squishing them with the back of a spoon periodically to help them fall apart.

Then take it off the heat, chop up that parsley and add that in too.

Then pour it on top of the bread. You can let it sit like this for a while too, if your making dinner, and then pop it in the oven just as friends are arriving. Or you can make it right away and eat it right away.

Then pop it in the oven until the cheese is oozing, the bread has browned, and your house smells amazing.

Throw it on a plate and eat promptly.