Sunday Sides- Roasted Squash with Yoghurt Cilantro Sauce and Pomegranate Molasses

image

Hi All, 

I’m just letting you know that for the next couple months I’m going to be changing up my Sunday Salad column to a Sunday Sides column. This is to prep for American Thanksgiving (Sorry Canada) and for Christmas. It will be full of veggie side dishes (and sometimes mains) that will hopefully inspire your holiday tables. I’m also doing it because this time of year begs for hot dishes, and as much as I love salads, and I do, I am craving things warm and cozy. And now to begin!

As sad as I am to see the summer go, and I am, there is something comforting about the fall. The cozy sweaters, the thick socks, the covering up your bad hair day with a cozy hat. I have been doing a lot of this lately, largely in my apartment. Why are you wearing so many layers in your apartment you ask? Because, my apartment is heated through radiators, and my landlord, who is essentially a slumlord, turns off our heating at night. Yes, that is correct. He doesn’t turn down the heat at night (from the very low temperature he keeps it at during the day), he turns it off.  Let it be clear that it’s not like I have thick windows to keep out the draft (they are in fact so thin they rattle aggressively when someone playing music with a loud bass drives by) or I have heated flooring or anything like that. 

Friends, it is a high of 3 degrees celsius today (that’s 37 to you crazy non metric people). It is bloody cold. So cold in fact that I started keeping my oven on with the door open during the day to heat my apartment. 

The things we do for cheap rent. 

So, now that the oven is on 8 hours a day I’ve been roasting everything in sight so I don’t feel so wasteful of energy. Chickens, squash, carrots, apples. Nothing is off limit, as long as I can open the door every half hour or so to keep the temperature of my apartment up. No soufflés here, just straight up roasting. 

One of the things I roasted were these lovely acorn squash. And after they were roasted I spooned on some cilantro yoghurt sauce, and then I drizzled them with some pomegranate molasses.  And they were crazy delicious. I recommend you do the same, weather or not you are heating your living room with your oven 

image

Yoghurt Cilantro Sauce

1 cup Greek Yoghurt

1 bunch Cilantro

1tsp Cumin Seeds, ground

1tsp Coriander Seed, ground

2 tbsp Lemon

2 tbsp Olive Oil

Salt and Pepper

2 Acorn Squash

1/4 cup Pomegranate Molasses*

Salt, Pepper, Olive Oil

Preheat your oven to 400F

Line 2 baking sheets with parchment paper.

Peel your acorn squash. It’s a bit tricky to get into the grooves but try to be meticulous. 

Cut them in half and scoop out the seeds. Reserve the seeds!

Slice the squash into pretty U shaped pieces

Toss them with some salt, pepper, and olive oil and and put them on one of your prepared baking trays.  Roast unit they are cooked through, roughly 45 minutes. 

Meanwhile, put the seeds in a colander and wash to remove the bits of squash flesh. 

Toss them in more salt, pepper and olive oil and put them on the remaining prepared sheet tray. 

Bake until they are crispy- about 15-20 minutes. Open the open half way through cooking and stir. 

Meanwhile make your dressing:

Combine all ingredients except the lemon juice in a food processor and pulse until combined. Add the juice to taste, so that it is zippy but not too sour. If you don’t have a food processor just finely chop the cilantro up and mix it all in a bowl. It will still be delicious. 

When the squash is finished roasting place it in a pretty pattern on your serving dish. Drizzle the pomegranate molasses on top, and dollop the cilantro dressing around. Sprinkle the squash seeds on top!

image

Cocktails Cocktails Cocktails!

It has been a long week. It’s been a good week, don’t get me wrong. No complaints here. But none the less, a long and exhausting one. I for one and very excited about leaving this coffee shop that I have been calling home these days, and heading back to my actual home, and pouring something stronger than the green tea that is currently sitting beside me. 

And in the name of sharing, I thought I should mention a couple good ones, ones in fact that I have made and written about in the last couple weeks over at HelloGiggles. 

First is the Rosemary Lime Gin Spritz, which tastes like a crisp fall day in a glass. It’s a thing of beauty. 

The second is what I’ve been drinking perhaps too much of lately. Maple bourbon sours. Need I say more?

And lastly is the Rainmaker, which is just a bit of gin and earl grey tea happiness. I think you’ll be into it. 

And with that in mind, happy friday! See you on Sunday with a salad! 

hello giggles- rosemary cocktail

Tuesday Tutorial- Homemade Ricotta Cheese

,I live in a very Italian neighbourhood, and my local market makes the most outrageously good ricotta cheese. The thickest, creamiest, most glorious ricotta I’ve ever had. It’s so good.

It’s also $12.00 for 500mL. The deliciously is directly linked to the price tag.

I have made a lot of ricottas in my life. Sometimes for restaurants, sometimes for home, and it’s always good. It is. But it’s never as good as the kind I can buy at the market. So I gave up for a while, I didn’t want to go through the trouble. I forked over the cash when I had a craving.

The trouble, is that to fully appreciate ricotta you have to eat it at room temperature, or slightly warmer. When it has just been made, slathered on good bread, and dipped in olive oil and sprinkled generously with maldon salt- it is the best and simplest snack ever. Put a salad beside it and you’ve got a downright brilliant lunch.

So I started experimenting with recipes, trying to make one as good as the Italian brand down the street, but that I could make at home and then eat while warm. Ricotta isn’t hard to make, you just bring some milk to a boil, add in some lemon, stir it until it occurs, and strain it. It’s a funny thing really, because traditionally ricotta is made by reboiling the whey of other cheeses, the whey of course being nearly completely fat free (the word ricotta literally means twice cooked), but ricotta is ever so much more delicious when you add in fat.

A lot of recipes call for 1 litre of milk and one cup of cream, but I add just a half cup more cream, and it makes a world of difference. Such a difference in fact, that I prefer it to the store bought kind down the street that costs twice as much. Small miracles my friends, small miracles.

Ricotta Cheese

1 litre Whole Milk (or homogenized)

1 1/2 cups Whipping Cream

Juice of 1 Lemon

1 1/2 tsp Salt

Line a large sieve with cheesecloth

Bring the milk and cream to a roaring boil.

Add in the lemon juice and stir, still over the heat, until thick curds have formed.

Pour the liquid into the prepared sieve, put the sieve over a bowl and allow to cool at room temperature for about an hour. You can make it a bit thicker by letting it sit longer if you’d like.

Remove the cheese from the cloth, and serve immediately, or store in an airtight container in the fridge for up to a week.  

Shakshuka

image

When I was about eight, and my sister was twelve, she became a vegetarian. And because I wanted to be just like my older sister, I followed suit. She stopped after a couple years, but to make sure my family didn’t think I was just copying her I ended up staying vegetarian for nine years. I copied a lot of what my sister was doing. She was a trend setter.

I now eat meat, and I love it I do, but I’m pretty sure I could be vegetarian 75% of the time. I love veggie dishes. I’m all about them really, but I live with a man who expects meat with every meal.

This is a totally novel idea to me, and if we’re being honest, it’s a pretty novel idea for mankind.

So I’m always making vegetarian dishes and hoping he doesn’t notice. This pretty much never works, but I try friends. For purposes of money and health, I try.

But then something amazing happened. I made this breakfast and Jordan said it was the best breakfast he had ever had. And this breakfast was essentially a thick tomato sauce, filled with peppers and spiked with cumin and coriander, that you make little hole in and cracked eggs into. It’s rich without being heavy and it’s balances the salty, spicy, tart, sweet thing perfectly. On top of that it’s super healthy, takes half an hour to make from start to finish, and it also only takes one frying pan to make, and as someone without a dishwasher, let me tell you, that is wildly important.

image

Shakshuka

(Not surprisingly this recipe is adapted from Jerusalem, the amazing book by Sami Tamimi and Yotam Ottolenghi. This book is amazing, truly, I can’t recommend it enough.)

2 Red Sweet Peppers, thinly sliced

1 can Plum Tomatoes or Cherry Tomatoes (look for brands that don’t add citric acid)

1 Onion, thinly sliced

2 cloves Garlic, minced

1 1/2 tsp Ground Cumin

1 1/2 tsp Ground Coriander

1 tsp Ground Pepper flakes, or in a pinch some Siracha will do

4 Eggs (the best free-range ones you can find!)

Salt and Pepper

3 tbsp Olive Oil

Toast to serve with.

In a large frying pan (cast iron if you have it) warm the olive oil over medium-low heat.

Add in the peppers and onions and cook until the peppers are very soft and the onions are just starting to brown around the edges, about 7-10 minutes

Add in the garlic, stir for about a minute, then add in the spices.

Stir them in until they are fragrant but not burning at all.

Add in the tomatoes and mix.

Bring heat up to medium-high and let simmer for 10 minutes, stirring regularly, until the sauce has thickened.

Bring heat down to medium, and make 4 divets in the sauce.

Crack the eggs into the holes, and cover with a lid for 3 minutes.

While this is happening you can warm up some naan or toast.

When the yolks are still soft but the whites are firm remove the shakshuka from the heat and serve immediately, with thick toast to sop up all the sauces.

Sunday Salads- Curly Endive Salad with Bacon, Chanterelles, and a Poached Egg

image

Friends. I have no been eating enough salad lately.

I came back from visiting a few months ago on a veggie eating mission. I was so excited about vegetables! And lettuce! I was eating so much lettuce.

I am embarrassed to tell you how much cake I’ve eaten in the last week. How many gross sugary candies that have been put near me that I have scarfed down. How much bread I’ve consumed. It hasn’t been good. I’m not going to give you numbers.

So it’s probably time to get jazzed about salad again. It’s already started a little bit, I walked by my favourite green grocer and they had the most beautiful swiss chard out, and something stirred in me. The part of me that loves healthy foods. The part of me that has been pushed down in favour of sour cherries and fuzzy peaches.

I never eat candy. What is up with me lately?

Anyways. Salad.

This salad is a slight twist on a French bistro classic. Slightly bitter frissee lettuce, tossed with a dijon vinegrette, sprinkled with flecks of bacon, and topped with a poached egg. It is the best salad. And you can eat it for any meal of the day. It’s a brilliant thing.

There are two twists on this staple. The first was just that I couldn’t find frissee. So I used curly endive. It’s fabulous, but use frissee if you can. Butter lettuce would also be appropriate here.

The second twist is the addition of some beautiful chanterelle mushrooms. I just added these on because I couldn’t resist buying them. I love chanterelles, and there season is so fleeting. You have to put them on everything while you can.

Of course, you could omit them, or use another kind of mushroom, I wouldn’t judge you for that. But if you can find chanterelles. Do it.

image

Curly Endive and Bacon Salad with a Poached Egg, and Chanterelles.

3 cups Curly Endive, washed and torn into small pieces.

100 grams Thickly Cut Smoked Bacon, cut into small rectangular pieces.

200 grams Chanterelle Mushrooms

2 Eggs

1/4 cup + 2 tbsp Extra Virgin Olive Oil

1 tsp Grainy Dijon

2 tbsp Lemon Juice

Salt and Pepper

Bring a large pot of water to a boil.

In a frying pan over medium-low heat slowly render out of the bacon, so it get’s nice and crisp but doesn’t dry out.

Scoop bacon pieces out of the fat and put them on a towel lined plate to cool.

Clean the chanterelles- with a pastry brush, carefully brush out all the dirt. With a paring knife cut the very bottom of the mushroom off, just a tiny bit, and then cut the mushrooms into wuaters or sixths, depending on the size.

In a small frying pan warm up the extra 2 tbsp of olive oil.

Add in the mushrooms and cook until the mushrooms are nicely browned. Season generously with salt and pepper and set to the side.

In a small bowl mix together the remaining olive oil, lemon juice and dijon.

Poach your eggs- gently crack your eggs into the pot of gently boiling water.

Let them cook for about 3 minutes, or until, when gently lifted from the water with a slotted spoon, the whites feel hard but the yolk still feels soft.

Mix the endive with the dressing. Divide it into two bowls.

Sprinkle the bacon and chanterelles onto the lettuce, and then place a poached egg onto each bowl.

And done. Get it in you.

Pumpkin Loaf, and Fun New Jobs.

image

I think it’s safe to say that I always have a project on the go. I’m adding new things to roster all the time, and currently I juggle 6 jobs. Some of them pay, some of them don’t, some of them are things I love, and one of them, serving at a restaurant, is something I do just to make ends meet. It’s a hectic life. But it’s a fun one.

One of the best parts about it, is that I am always meeting new people, doing new things, trying new recipes. And one of my favourite projects right now is with my friend Brett Holland. He is an exceptionally handy guy, who built a solar powered coffee food cart on wheels, that he bikes throughout the city, selling great coffee, and some darn good pastries, if I do say so myself. It’s called On the Grind Cafe

As he’s working out the kinks of the cart, he’s parking at the corner of Union and Jackson (right on the Strathcona bike path!), and if you’re passing by the area, you should probably pop by, drink some coffee, and perhaps get a pastry that I’ve baked.

Right?

And if you don’t live close by, and can’t get a slice of my pumpkin loaf, you should definitely make some yourself.

It is so moist, and so simple to make, and it just feels like fall. It makes a great breakfast with a coffee in the morning, but it’s also darn good slightly warmed before bed, with a cup of tea.

image

Pumpkin Loaf

Loosely adapted from Smitten Kitchen

1 1/2 cups AP Flour (or whole wheat pastry flour)

1 tsp Baking Powder

1/2 tsp Baking Soda

1 tsp Cinnamon

1/2 tsp Nutmeg

1 cup Pureed Pumpkin

1/2 cup Olive Oil

1 1/4 cup Brown Sugar

2 Eggs

Coarse Sugar to sprinkle on top.

Preheat oven to 350F

Line loaf pan with parchment paper.

In a large bowl mix together to the oil and sugar.

Add in the eggs.

Mix in the pumpkin.

Gently stir the dry ingredients in until just combined.

Pour the batter into the prepared pan and level with a spatula.

Sprinkle the coarse sugar on top and cook until an inserted skewer comes back with only a few moist crumbs- about 30 minutes.

Allow to cool before removing from pan.

http://www.youtube.com/watch?v=SNK2T44No78

Sometimes I look at my life, and just feel so lucky. Do you ever get that? 

Don’t get me wrong, my life is certainly not without it’s work dramas, and bad ankles, and the odd just absolute crap day. I have those. 

But I also have an extraordinary amount of love in my life. That sounds cheesy but so be it. I do. 

And lately more than ever, I’ve been feeling the friend love. There have been some great phone chats, some wonderful conversations over a mug of tea (or glass of wine, or cup of whiskey…) 

So when two of my favourite people on the planet were both in Vancouver on the same day a couple weeks ago, we made brunch, drank cocktails, gossiped for hours, and then made a little stop motion video. 

The cocktails in question were Strawberry Rose Mimosas, and it is with great pleasure that I tell you that you can find the recipe here, on my new cocktail column I’m writing for the cutest site (co-founded by Zooey Dechanel) Hello Giggles. So make them this weekend!image

I thought that it would be fun to just have the camera going and it would catch some great stills of us just begin goofy, but it ended up being an adorable little video, I think. Remember when I did that cake photoshoot with the pink ribbon behind it?

Well I used that same technique but brighter colours (and some gold sequins!) and used that as a backdrop, set up my tripod, and we just made goofy faces and danced in front of it. I have some truly great photos of us from it, as well as the video. 

image

A big thanks to two extraordinary woman Natasha and Maudie, for letting me put pictures of them on the internet. 

Tuesday Tutorial- Bechamel Sauce (and Mac and Cheese)

image

When I was little, and us kids were feeling picky, my mom would make pasta with red sauce and white sauce. Which is to say, she would boil up a big pot of spaghetti, make tomato sauce and cream sauce and let us mix it up as we liked. It was a staple.

And we would pray that there would be leftover cream sauce, because that would mean we would be getting baked potatos with cheesy sauce the next day. Or mac and cheese. Or lasagna.

There are a million uses for cream sauce, or bechamel.

Rich and creamy, it is a simple sauce thickened with flour and made mostly of milk. It’s considered a “mother” sauce in French because it spawns so many others and it is the base for so many dishes.

Once you get the technique down, which won’t take long at all, you’ll find that cooking a bit of flour in butter, and slowly adding in liquid, is the base for stews, soups, and sauces all over the place.

It is one handy trick to have up your sleeve.

image

Bechamel Sauce

2tbsp Butter

2tbsp Flour

2 cups Milk

1 tsp Salt

image

In a medium pot over medium heat melt the butter.

Add in the flour and stir for a couple minutes, until the mixture is very thick.

Add in a quarter cup of milk and don’t stir. Wait until the whole thing is boiling, and then whisk. Waiting before stirring will ensure that you get no lumps.

It will get super thick. That’s good!

Now add another quarter cup of milk, wait until it boils and stir it.

Keep doing this- the pouring, the waiting, the stirring, until all of the milk is mixed in.

And you’ve mastered a French Mother Sauce! Congrats.  

Entertaining- Late Summer Provence Menu

image

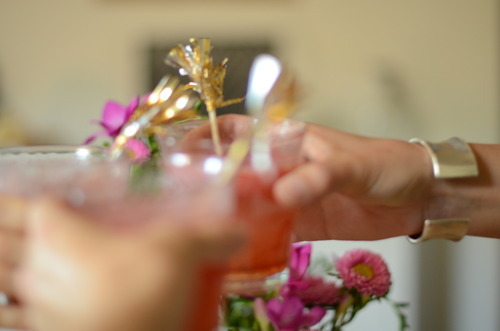
There is little I like more than having friends over for dinner. There is the prepping, the cooking and the baking, things I love and do every day. But that is followed up with wine, and eating, and laughing. It is the most satisfying thing to me. I love entertaining.

Here’s a secret too- I kind of think I’m awesome at it.

I know that sounds like I’m blowing my own horn, and that’s totally because I am. But I have a cute little apartment, and I can bake a mean cake, and Jordan- the handsome man who lives with me- stirs a great cocktail. We have people over fairly often, and I think we’re good at it.

image

There are reasons for that though, and mostly it’s because I have cooked, and currently bake, professionally, and Jordan used to bartend. After cooking for a hundred people a night for 5 years making dinner for a few friends doesn’t seem so hard. And when you paid your way through school keeping people liquored up, it’s almost second nature in your own home to keep wine glasses filled.

I’m often surprised though when we head over to other peoples houses how stressed out they get. They often make things fussier than they ought to be, or doubt their skills, or find themselves rushing around at the last second.

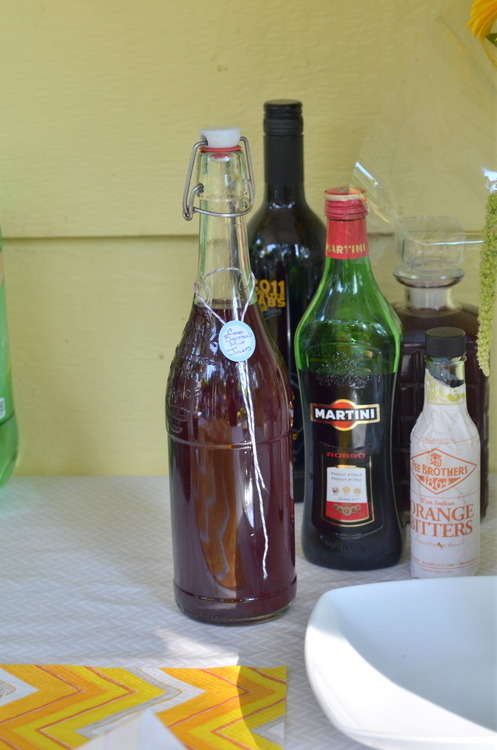
So I thought that I might start writing about throwing a great party. About planning a menu that is simple and elegant, what you can make in advance, and little ways to make your dinner table pop. And, with the help of Jordan, I think I’ll also give some suggestions for drinks.

And so, without further ado, here is our first Entertaining section!

image

Menu

Warmed Spiced Olives

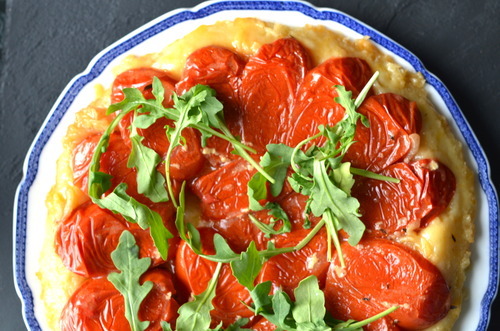
Pissadierre with Arugula Salad

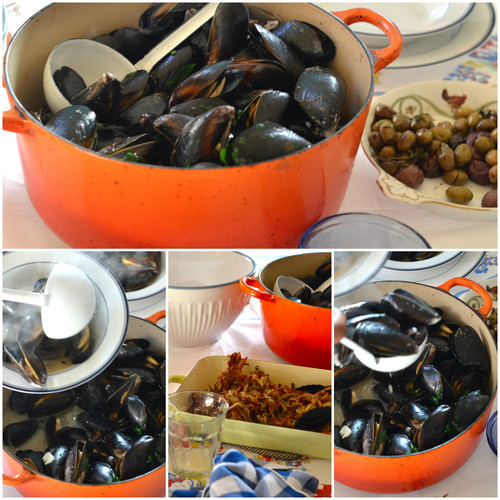
Local Mussels with Bacon, Garlic, and White Wine

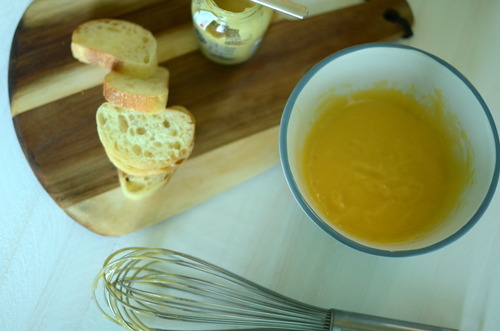
Baked Frites with homemade Aoli

Hazelnut and Fig Jewel Cake

To many of you this might seem like the simplest and most basic thing, and it is, but when I’m thinking of a menu I try to stick to one geographical area. No “Around the World” dinners, I keep it simple by staying in one region. For this dinner everything was inspired by the South of France.

I also hate serving food in the kitchen and bringing it to the table. I love family style meals, I don’t want to pretend I’m in a restaurant when I’m at home. Plus, this way you don’t have to ask your host for seconds!

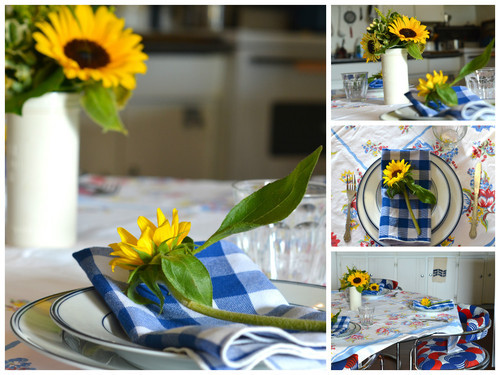
In the theme of the South of France as well I wanted a relaxed table setting, I had a small bouquet of sunflowers in the centre, a floral tablecloth and my blue gingham napkins. I set each setting with appetizer and dinner plates and I marked each spot with an additional sunflower.

I love sunflowers, and while they may not be abundant in Provence, they are aplenty here. And they go beautifully with my “flame” coloured pot that I served the mussels in.

image

To help make sure you know what to do when;

Timeline:

Two Days Before Hand:

  • Get all ingredients

  • Make Puff Pastry

  • Spice Olives

  • Caramelize Onions

The Day Before

  • Clean your house

  • Do small things like iron your tableclothes and make sure you have enough clean napkins. You don’t want to worry about things like that when your guests are arriving.

The Morning Of:

  • Make the puff pastry

  • Make and bake the cake

  • De-beard the mussels

  • Make Aoli

Now go clean yourself up, do another tidy (I sweep my flour about a thousand times before guests arrive, as I am always dropping things!) and pour yourself a glass of wine.

An hour before your guests arrive:

  • Bake your pissaldierre

  • Make your salad dressing

  • Set your table up nicely.

When Guests Arrive

  • Warm up and serve the olives

All the rest can be done as you’re ready- from tossing the salad and serving it up with the tart, to cooking the mussels for the main.

Recipes:

Spiced Olives:

1lb Mixed Olives (I like to get a mix of green and black, but I always try to find nicoise olives, the tiny Italian black olives. Ooh I love nicoise olives!)

1 tsp Edible Lavender Flowers

1 tbsp Fresh Thyme

1 tbsp Olive Oil

1 tsp Fresh Rosemary, finely chopped

Mix all the ingredients together and let sit as long as possible, for at least 1 day.

When you’re ready, warm them in the oven (they are very forgiving, any temperature between 300 and 450) for about 5 minutes.

Serve with an additional bowl for the pits.
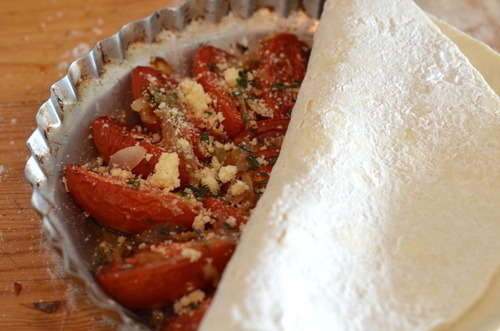
Pissaladiere

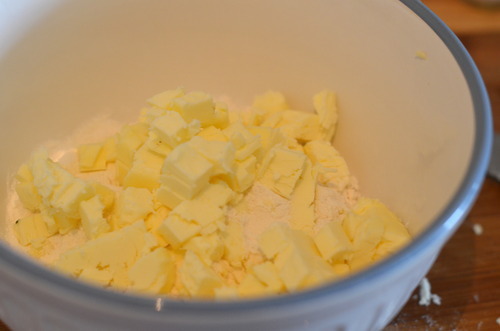
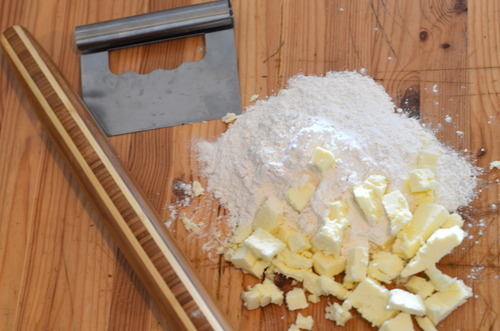
1 cup Cold Unsalted Butter, cut into cubes

2 cups AP Flour

1/2 tsp Salt

1/2-3/4 cup Ice Water

4 medium Onions

1 tin Good Quality Anchovies in Olive Oil

15 Pitted Nicoise Olives or other good quality black olives.

1 tbsp Olive Oil

Sa;t ad Pepper

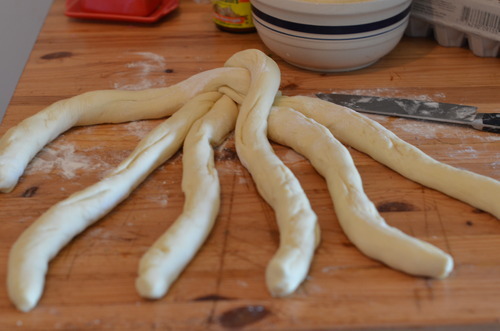
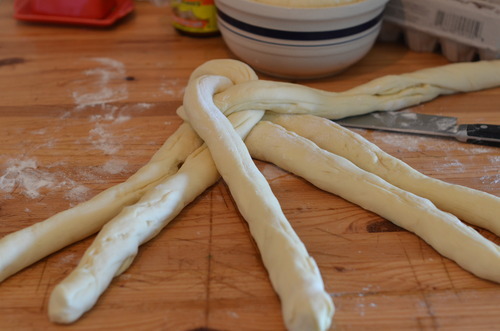
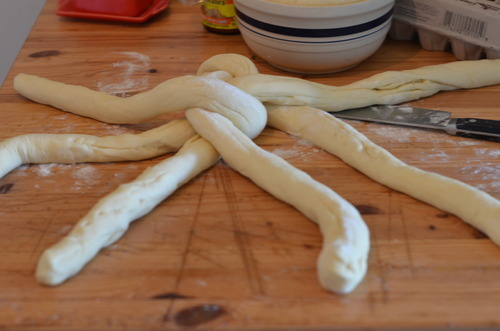
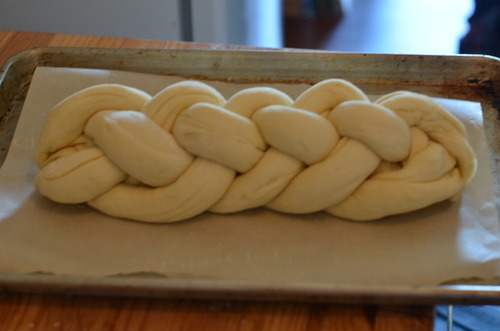
(To see my full tutorial for the dough click here.)

On a clean countertop toss the cubes of butter into the flour and salt.

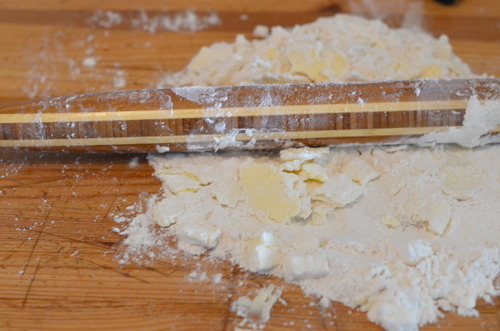
With a rolling pin roll out the butter, flipping it over often with a spatula or pastry scraper.

Continue to do this until all the butter is in long thin strips.

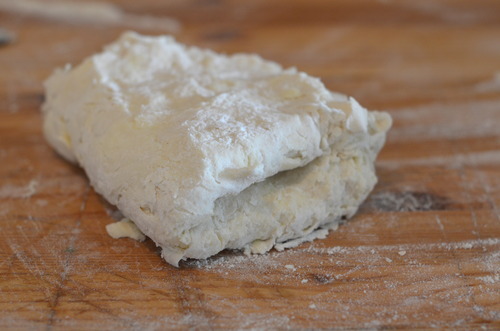
Pour 1/4 cup of the water on top and gently fold the butter mixture on top of it.

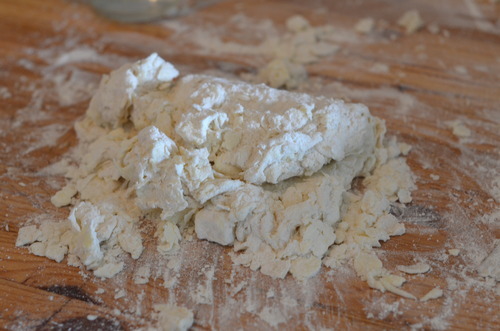
Continue doing this, adding more water as needed until a cohesive dough is formed.

Chill the dough for at least an hour, or up to two days.

Slice the onions thinly.

In a medium pot over medium heat warm the olive oil.

Cook the onions, stirring regularly, for about 10 minutes.

Lower the heat and let the onions cook until very soft and a light even brown color. The onions should be soft enough that you squish them in half when you pinch them with your fingers.

These can be kept in the fridge for up to 5 days.

To Assemble:

Preheat the oven to 400F

Roll out the dough on a well floured surface, to a rectancle about 1/4 inch thick (it can be square or circular in a pinch!)

Carefully cut the edges of the dough- you don’t want to drag the knife- that can seal the layers together. Instead cut straight down.

Now do the same thing about 1 inch from the edge of the dough, creating a border. You do not want to cut all the way through.

Put the dough on a parchment lined baking sheet.

Spread the onions on the pastry- keeping clear of the border.

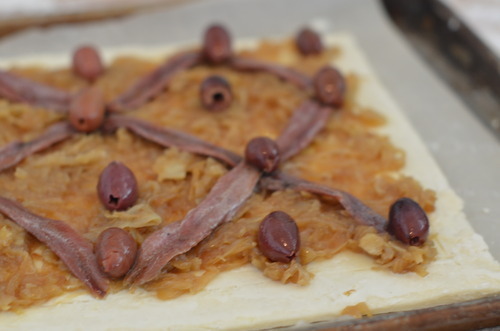
Now put the anchovies in a lattice pattern over the onions, and then place an olive at the point where the anchovies meet.

Bake for about 35 minutes or until the crust is a uniform brown colour.

Allow to cool for at least 30 minutes before serving.
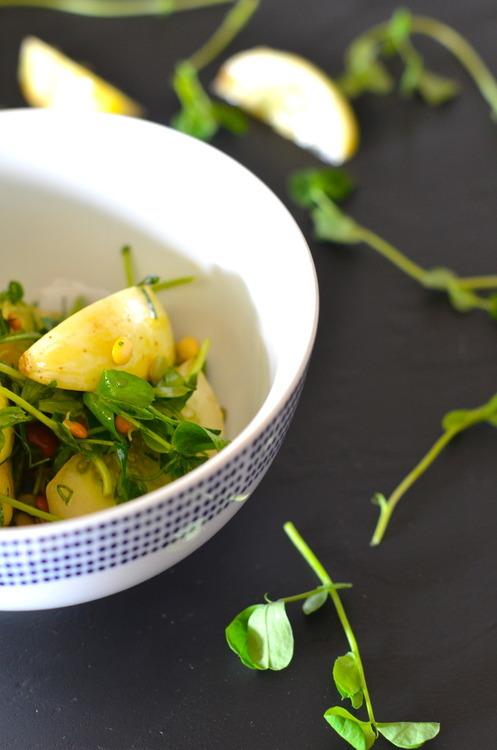
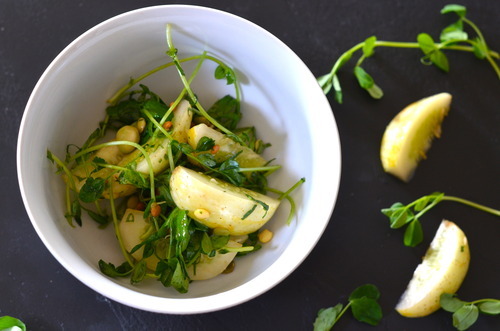
image

Arugula Salad

3 cups Baby Arugula

1 cucumber, thinly sliced.

Juice of 1 Lemon

1 tsp Dijon

3 tbsp Olive Oil

Mic the lemon, dijon, and olive oil. Season to taste with salt and pepper.

Add arugula and cucumber and toss. Serve immediately.

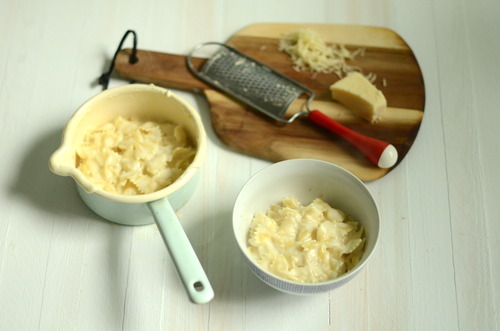
Mussels with Matchstick Frites

8 thick slices of Double Smoked Bacon, cut into 1/2 inch pieces

1 cup White Wine

2 cloves of Garlic, minced.

4 lbs Mussels

1/4 cup Unsalted Butter

Debeard the mussels- each mussel has a hairy bit sticking out of it- this is like it’s arm to attach to rocks etc. Pull it off- this is done easily enough by hand but is extra easy with the help of tweezers.

In a large pot over medium heat cook the bacon until it is very crispy.

Strain off the fat.

Add the garlic and cook until it is fragrant, but not browning.

Add in the mussels and the wine and immediately put a tightly fitting lid on top.

Shake the pot vigorously and cook for about 3 minutes.

Take off the lid. When the mussels are all opened add in the butter and shake again.

When butter is melted you’re ready to serve!

Frites

3 lbs Yukon Gold Potatoes

1/4 cup Olive Oil

1 tbsp Rosemary, finely chopped

1 tbsp Salt

1/2 tsp Pepper

Preheat oven to 450F

With a mandolin (or a lot of patience and practise) cut the potatoes into matchstick sized pieces.

Coat with the olive oil, rosemary, salt, and pepper.

On a parchment lined baking sheet spread out the potatoes

Bake, stirring every 15 minutes or so until the potatoes are evenly cooked, about 45 minutes.
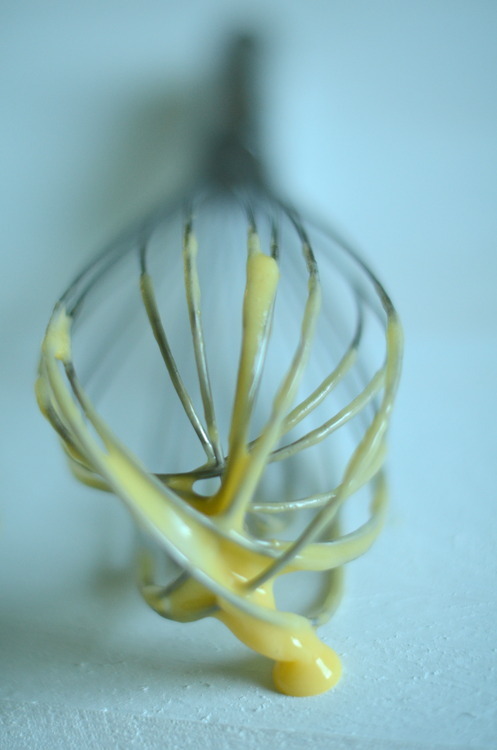
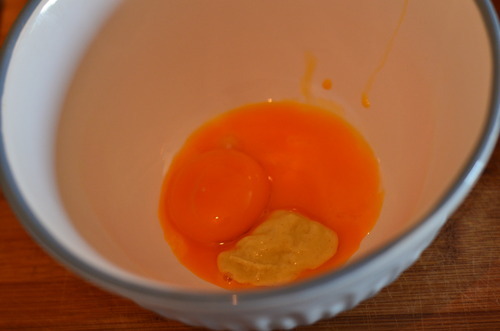
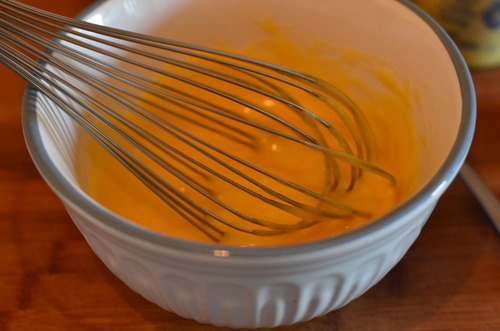
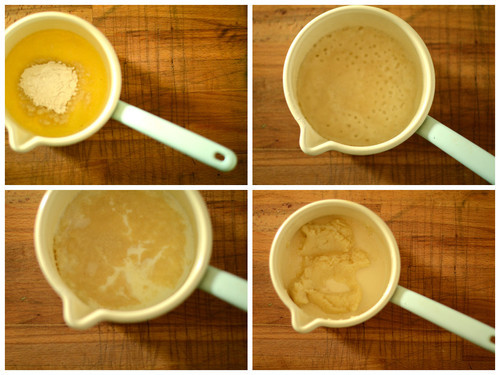
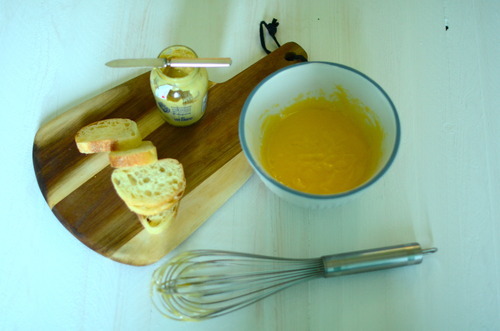
Garlic Aoli

1 Egg Yolk

1/4 Extra Virgin Olive Oil

1/4 Canola Oil

1 tsp Dijon

1 tbsp Lemon Juice

Salt and Pepper

(For my full tutorial click here!)

In a small bowl mix together the yolk and dijon.

Slowly whisk in the olive oil, drip by drip, whisking vigorously to keep it emuslified.

If it starts to get thick add in some lemon juice.

Add in the canola oil the same way.

Season with salt and pepper!

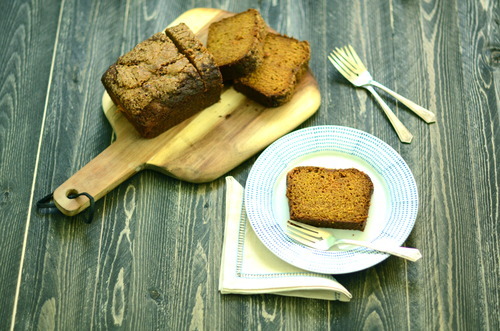
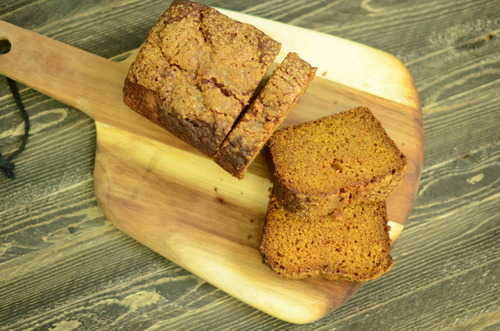
Fig and Hazelnut Jewel Cake

1/2 cup Butter, softened

1/2 cup Brown Sugar

1/2 cup White Sugar

1 tbsp Vanilla Extract

2 Eggs

3/4 cup AP Flour

1/2 cup Ground Hazelnuts

1 tsp Baking Powder

1/2 tsp Salt

about 10 Figs, cut in half

Coarse Sugar for Sprinkling.

Preheat oven to 350F

Butter and flour a 10 inch tart pan, or round cake pan with a removable bottom.

In a large bowl cream together the butter and sugars.

Add in the eggs one at a time. Add the vanilla.

Mix in all the dry ingredients, except the coarse sugar. Stir until just combined.

Spoon the batter into the prepared pan and smooth the top with an offset spatula.

Place the figs in a circular pattern around the pan, like a flower.

Sprinkle with the coarse sugar and bake until an inserted skewer comes out with only a few crumbs, about 35 minutes.
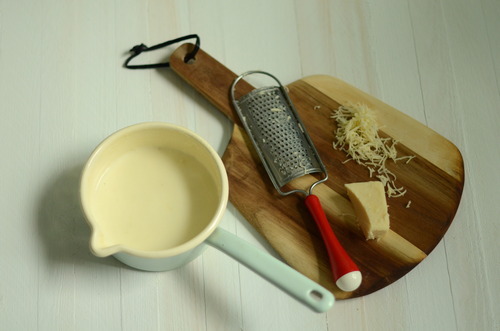
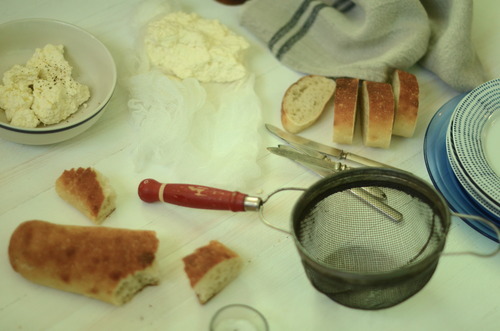
Tuesday Tutorial- Homemade Mayo!

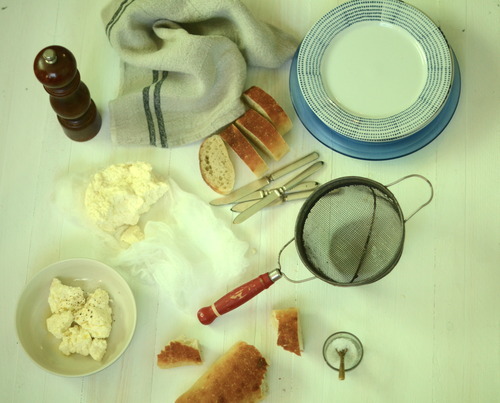
The very first thing I learnt at the very first restaurant I ever worked at, was how to make mayo. Specifically this herb laden, lemon spiked, garlicky mayo that we served with the frites. The sous chef at the time swears to this day that when he tried mine, and I had made it taste just like he showed me, he decided to take a chance on me and mentor me.

So when I say my life was changed by mayo, I am not even kidding a little bit.

Career altering mayo. Fact.

I still make mayo pretty regularly- the idea of keeping egg yolks and oil at room temperature for months at time creeps me out, so I try to do it myself as much as possible. It takes only minutes, is preservative free, and tastes just a world better than the jarred variety.

And once it’s made the fun comes in. Adding roasted garlic? Squeezing in some more lemon? Flecking in some parsley and thyme? Maybe mixing in chipotle spice, or smoked paprika, or Old Bay seasoning.The options are limitless, and nearly all of them are delicious.

Homemade Mayo

1 Egg Yolk

1 tbsp Dijon Mustard

2 tbsp Lemon Juice

1/2 tsp Salt

1 cup Vegetable Oil

Mix together the yolk, dijon, salt, and lemon juice.

Very slowly drip in the oil and whisk vigorously.  

When it starts to get very shiny, add in a few drops of the lemon juice. 

Repeat this- adding oil, and then lemon juice, until all the oil is mixed in. 

Taste it and check for seasoning. I like mine pretty lemony but you can play around with it and add less if you’d like. 

And you’re done! Easy isn’t it?

Tomato Tart Tatin

Here’s the thing about tomatoes. They might be my favourite veggie (I know I know, they’re a fruit, but you know what I mean.). They’re sweet, they’re savoury, they’re juicy.

Here’s the other thing about tomatoes. If you put them in the fridge, they suck. They get grainy, they get flavourless, they loose everything special about them.

Here’s the thing about my local green grocer: they put their tomatoes in the fridge at night.

So when I got all excited about fresh tomatoes the other day and they were all warm from sitting in the sun I grabbed myself a big bag full. And then I got home to find grainy sad tomatoes, far from their peak.

image

Here’s the thing about sad grainy tomatoes: they’re still pretty good when you cook them. Usually this means tomato sauce, but the other day it meant this fabulous tart tatin that was on Design*Sponge a couple weeks ago. This is a damn good tart, it’s very savoury (a lot of veggie tatins tend to be a bit sweet for my taste) the pastry is flaky and light, but just buttery enough to have enough flavour to hold it’s own with the tomatoes, and the onions and cheese help bring a depth to it that rounds the whole thing out.

I didn’t use the crust from the original recipe, because I tatins should always be made with puff in my books, and after last Tuesday’s Tutorial on quick puff we’re all pros right? Right.

image

Tomato Tart Tatin

(Adapted from Design*Sponge)

Dough:

1 cup Cold Butter, unsalted, cut into cubes

2 cups AP Flour

1/2 tsp Salt

1/2-3/4 cup Ice Water

For a full tutorial on making this dough with lots of pictures, click here!

On a clean surface toss the butter cubes with the flour and salt.

With a rolling pin roll out the butter so that all of it forms into long thin strips.

Add the water, a couple tablespoons at a time and fold the dough, push it out, add more water, and fold the dough again.

Continue this until it has come together as a cohesive dough.

Wrap with plastic wrap and put in the fridge for at least an hour, or up to two days.

Tart Tatin:

1 recipe of quick puff pastry dough (aboce)

10 Roma Tomatoes

1/4 cup Grated Parmesan Cheese

1 Onion, thinly sliced

2 tbsp Olive Oil

1 tbsp Fresh Thyme Leaves

Preheat oven to 400F

In a medium pot over medium heat warm up 1 tbsp of the olive oil.

Add in the onion and cook, stirring often, for about 10 minutes, until they are soft and just starting to brown on the edges.

Grease a pie pan with the remaining olive oil. Cut a circular piece of parchment and line the bottom of the pan.

Slice the tomatoes in half and put them skin side down in the pan. They will shrink up as they cook so overlap them a bit so that when they are cooked they will still cover the bottom of the pan.

Top them with salt and pepper, the onions, parm and thyme.

On a lightly floured surface roll our the dough into a circle just larger than pie pan.

Cut the edges to clean them up and put it into the pan.

Bake for about 40 minutes, or until the pastry has turned a nice brown and the juices bubbling up the sides are browned as well.

Allow to cool for about 10 minutes before flipping it onto a plate.

Serve while warm or at room temperature.  

image

Tuesday Tutorial- Quick Puff Pastry

The rains have started. We’ll probably have a couple more sunny days, but mostly it’s Fall here. Our mountains won’t turn red and orange, they’ll stay a blackish green, but the tops will fall under a fog. Even though it’s still warm now, it will be sweater weather soon. As much as I love summer, and I still have a small vacation to take, I’m looking forward to the cold. The cozy feeling of watching the rain fall with a cup of tea in your hands. The gentle scratcing of wool scarves at your neck. New boots.

The time of year to take things a little bit slower, and to make pastries by hand.

This is my absolute favourite kind of dough to make, I remember my mom teaching me as a little girl. Gently breaking up the butter with my hands and kneading the dough were two of my favourite things as a kid. I have since made it hundreds, if not thousands of times in my life. It is the kind of pastry that normally takes a few tries to get right, but this little trick- curtesy of the Tartine Bakery Cookbook- in which you roll the butter, makes all the difference.

I like to call this dough a rough puff pastry, it’s not quite as light as a puff, but it’s not far off, and while the method is closer to a pie dough, it’s much flakier and crisper than that. I rarely have the energy or patience for puff pastry, and almost any recipe that calls for it gets this instead. I use it for pies, tarts, cookies, savoury tarts, mini cinnamon buns. Nearly anything that calls for pastry, you could use this. It’s the ultimate pastry in my books.

Rough Puff Pastry

2 cups AP Flour

1 cup Butter, unsalted, cut into cubes

1 tsp Salt

1/2 cup – 3/4 cup Ice Water

On a clean flat surface sprinkle the flour and salt.

Break the butter apart into the cubes and toss to coat them in the flour.

With your rolling pin begin to roll the butter out. It will stick to your rolling pin and the counter but don’t worry. Use a pastry scraper, or a spatula and scrape the pastry off. Then keep rolling.

Push the butter bits from the outsides in to make sure all of the butter has been rolled into thin strips.

Pour about 1/4 cup of water on top of the flour mixture and, again using the pastry scraper or spatula, fold the dough on top of it’s self.

Add more water, a couple table spoons at a time, and keep folding the dough over, pushing it down, and folding it again until some flour remains on the surface but it’s holding together. It shouldn’t be sticky to the touch but it shouldn’t be falling apart either.

Keep folding the dough, pushing it out, and folding it again. This is putting the layers into your pastry that will make it so light and crisp.

The dough should be soft to work with, as soon as you start to notice it resisting your touch stop.

Wrap with plastic wrap and refridgerate for at least an hour. I usually make two batches and keep one in the freezer, so I always have some on hand.

It will last 2 days in the fridge, or a month in the freezer.

Sunday Salads- Cucumber and Sprout Salad

I know that I don’t need to tell you how much I love butter and sugar. It’s obvious.

But in my day to day, I’m trying to get healthier. I work out a couple times of week, I eat a lot of veggies, I drink green juice like it’s going out of style, and yet I still feel like all my friends are so much more disciplined than me when it comes to food.

I went out for brunch with a girlfriend recently, and before eating anything, she added a strange green powder to her glass of water and chugged it.

“It has all the good stuff in it” she explained. Is this a thing now? Do I need to start drinking spirulina before every meal?

The answer, of course, is no. And I hate the idea of having to drink powders in order to get your daily nutrition and so I won’t. I can’t. The Italian in me just wanted to shake her and tell her to eat and be happy.

But I’ll give my health nut friends this- I love sprouts. I’ve been putting them in everything these days, and I am loving it. I’ve been growing my own sprouts for ages (remember this post on growing them in vintage tins?) and my local organic shop has started selling sprouted grains and legumes, and they are just the perfect bit of crunch in a salad. Especially when that salad is already a bowlful of crunch in the form of these wonderful little cucumbers. Throw in some lime and cilantro, and this is just about the healthiest salad you could eat!

Cucumber and Sprout Salad

1 lg English Cucumber, or a handful of small cukes- I used organic lemon cucumbers

1/3 cup Sprouted Legumes and Grains

1 1/2 cups Pea Sprouts

Juice of 1 Lime

1/4 cup Cilantro, finely chopped

1/4 cup Extra Virgin Olive Oil

Salt and Pepper to taste

In a medium sized bowl mix together the lime and olive oil. Season with the salt and pepper and stir in the cilantro. Check the seasoning adding more salt, lime, or oil depending. 

Cut the cucumber- if using a long cuke, cut lengthwise in quarters, cut out the seeds and then cut the pieces on a bias. If using small ones just make them look pretty- I cut my in 6ths lengthwise. 

Add the cukes to the salad dressing, and then toss in the sprouts. 

Serve immediately. 

Gin, Elderflower, Mint Spritz

image

Guys, my neighbourhood is the best. I don’t want to rub it in or anything, but it is. There is no where else in Vancouver I would rather live. In a city famous for being cold and shiny, Commercial Drive is surprisingly warm. It is full of old Italian coffee shops, parks full of drum circles, and the best butchers in the city. I know all my neighbours, all the people who work at my local green grocers. It is full of the kind of warmth I associate with small towns, but I can still bike downtown in 10 minutes. It is the best. It completely amazes me when I meet people who live anywhere else. Honestly.

The best part about Commercial Drive though, is the summer time. And the best part of the summertime on Commercial Drive, are Drive Days. It’s when nearly 20 blocks are shut down and hundreds of thousands of people flood the streets to eat grilled sardines, drink fabulous coffee, and much to much beer.

It is totally overwhelming, but the best part about our apartment is that is directly on The Drive, which means we can watch the excitement from the fire escape when it gets overwhelming. It also means, that our house is full of people coming and going, and that means, we need lots of drinks on hand.

Jordan, my resident bartender, made these super simple cocktails this time, and I’ve been drinking them every weekend since. They take almost no time to make, easily scale up so you can make them for however many people show up on your door step, and are the perfect refreshing cocktail after eating oysters and getting pushed around in the crowd.

image

Gin, Mint, and Elderflower Spritz

Per Drink you Need:

1 1/2 oz Gin

3/4 oz Elderflower Syrup

1/2 oz Lemon Juice

3 Mint Leaves

1 dash Lemon Bitters

Soda to Top up Glass

If you are making just a couple drinks:

At the bottom of the glass muddle 2 of the mint leaves. (Press them down with the back of a wooden spoon to release their oils)

Add in the gin, lemon, and elderflower syrup and some ice. Stir until the liquid is very cold.

Top with soda and the bitters.

If you are making these for a crowd (as we often are):

The easiest way to do it it so mix the gin, syrup, lemon, and mint with ice in a martini shaker and shake for a minute or so. Pour them into the glasses top with soda, fresh ice, and the bitters.

image

Nutella Marshmallows, and some very fun times

image

I am a very lucky person. I am lucky for a whole lot of reasons, for my family, for my friends, for my job. But everyday I wake up and think, how did I get so lucky not only to find such a tremendous person to spent my days with, but also for him to have come from such a terrific family.

The horror stories about mothers-in-law do not apply. Mean sisters are not a concern, and grumpy fathers do not exist. Jordan’s family is a small miracle to me, because not only are they such great people, but they also have welcomed me in with reckless abandon, which is so appreciated when my own family is so far away. (which is my fault, I know.)

So when it was decided that we would throw Jordan’s parents a surprise party for their 40th wedding anniversary, I got excited.

image

(They were very very surprised!)

Here is something you should know about me- I love throwing parties. Like, a lot.

image

(Jordan’s Dad, Steve, looking very pleased with a stiff drink and a cigar)

It was held at his older sisters house, because she has an incredible back yard, and as a group we made some pretty fabulous food (halibut sliders on brioche buns anyone?) made some great drinks (last weeks post on cherry bourbon for starters!) and I spent several weeks cutting out triangles of yards and yards of bunting, and spent hours deliberating what to do for dessert.

There was a lot of pressure on this.

In the end, I went with a s’mores theme. It was a backyard party after all. I made s’mores pops, s’mores cupcakes, straight up s’mores (with my caramel marshmallows to get that burnt sugar taste, and smothered in ganache) and laid out bowls of coconut marshmallows and Nutella marshmallows.

Guys, I’m not going to lie, I thought it looked pretty spectacular.

And while there wasn’t a lot left over, the biggest hit might have been the Nutella marshmallows. They were killer.

image

Actually, everthing was killer, it was a terrific party. His parents were so surprised (and as they’re anniversary is actually in a couple weeks they took several minutes just to figure out what we were yelling “Surprise!” about.) His dad was ecstatic, and his mom was thrilled, we drank, we danced, we played bocci, and we had a really really great time. With a really great family.

Nutella Marshmallows

2 tbsp + 1/2 tsp Unflavoured Powdered Gelatin

2 cups Sugar

1/2 cup Corn Syrup

2 Egg Whites

1 tbsp Vanilla

1 tsp Salt

1 1/2 cups Nutella

Icing sugar for coating.

Line an 8 inch square pan with parchment paper and oil it generously.

Sprinkle gelatin over 1/2 cup of cold water.

Put your egg whites in a standing mixer fitted with the whisk attachment.

In a medium pot mix together the sugar, corn syrup, and just enough water to give it the texture of wet sand (about 1/2 cup)

Put a lid on it, and put it on a burner with medium heat.

In a couple minutes give it a quick stir and then put the lid back on- this build up of steam in the pot will prevent crystals from forming.

Once the sugar has COMPLETELY dissolved, remove the lid.

Bring the heat up to high and put in your candy thermometer.

When the thermometer reads 230F start your mixer.

When the thermometer reads 240F mix the gelatin into the sugar mixture, and start carefully pouring the sugar into the mixer with the whisk running. It is important not to pour into the middle of the bowl- or all the sugar will splash to the edges. Instead pour the mixture down the side of the bowl, it’s okay if it sticks to one spot, as the marshmallows whip up in size they will pull any left over sugar in.

Keep the motor running for about 10 minutes or until the marshmallows have become big, white, fluffy, and marshmallow-y looking. The bowl should be nearly cool by now.

While you’re waiting for that to happen, warm up the Nutella either in a microwave or in a double boiler, until it is fairly thin.

When your marshmallows are ready, pour them into your prepared mold- move quickly! They will firm up quickly now!- and spread them out with an offset spatula.

Now pour the nutella on top and swirl in with toothpick, or chopstick. It’s important to mix them in really well.

Allow for them to firm up completely, about 4 hours, or overnight.

When they are ready to cut use ample icing sugar on every surface! Cut into the desired shape, roll in icing sugar, and eat!

image

Sunday Salads- Nectarine, Raspberry and Basil Salad with Manchego

I have never thought much of nectarines. I’ve always sort of thought that you could buy them, but why would you when peaches are sitting in the bins next to them? If I could get nectarines in February I’d be all over them, but in peach season? No thanks.

Except, last week Jordan brought some home and I, thinking I should eat them quickly so I could fill up our fruit basket with peaches, brought them on a hike we went on.

I know there was a certain amount of hunger and fatigue in the mix, but hot damn that was a good nectarine.

And you know what nectarines have on peaches? You don’t have to peel them! (I passionately hate peach fuzz)

So this summer, I’ve been buying them like they’re going on of style. I’ve been making ice tea with them, I’ve been sauteeing them with maple syrup and pouring it over French toast, and I’ve been making this salad.

A simple simple fruit salad, but one that, while definitely sweet, has a savoury edge in the way I find sort of satisfying after spending a day making (and admittedly sampling) cakes.

Nectarine, Raspberry, Basil and Manchego Salad

4 very ripe Nectarines

1 cup Raspberries

1 tbsp Honey

1/2 tsp Apple Cider Vinegar

1 tbsp Olive Oil

6 big leaves of Basil

6 big leaves of Mint

25g Manchego, or other mild sheep’s milk cheese

The tiniest pinch of salt

In a medium sized bowl mix together the vinegar, honey and oil.

Cut the nectarines into slices (about 8-10 per fruit) and mix immediately into the vinaigrette so they don’t oxidize.

Add in the raspberries.

Place the herbs on top of each other, roll them lengthwise, and slice them into the thinnest strips. (This is called a chiffonade.)

Mix them gently into the fruit, and then use a vegetable peeler to shave the cheese on top.

This will last a couple hours at room temperature- if you can wait that long!

Tuesday Tutorial- Challah!

It’s funny, the kind of food you fall in love with. I grew up in a pretty Christian neighbourhood, but not too far away was a big Jewish area, and that always had a strong pull for me. Early Sunday mornings were spent buying bagels, and words do not begin to describe my love of lox. But it wasn’t until high school, when I became friends with a Jewish girl and started being invited regularly to Sabbath dinners when I really started to appreciate the food of that culture.

I don’t ever eat Jewish food now, because there pretty much are no Jewish people in Vancouver.

I mean, there are a few. But it’s slim pickings.

Which is why I found myself on a hot summer day making challah.

Oh challah.

Challah is brioches sister, the prettier sister.

The main difference is that there is no dairy in challah, instead the eggy dough has olive oil added to it, instead of butter- this keeps it Kosher, but as I don’t keep Kosher (as I’m not Jewish) I slather butter on mine once it’s cooked.

This will also make the best damn French toast you have ever had.

Challah Tutorial

(adapted from Smitten Kitchen)

1 1/2 tbsp Dry Yeast

1 3/4 cup Luke Warm Water

1 tbsp Honey

3/4 cup Olive Oil

5 Eggs

1 tbsp Salt

7-9 cups AP Flour

1/4 cup Sesame or Poppy Seeds (optional)

In a large bowl mix together the yeast, water and honey. You can also do this in the bowl of a standing mixer.

When it starts to get foamy add in the oil and 4 eggs, stir to combine.

Slowly add in the flour.

I only needed 7 cups, but you may need more. Once the flour is combined, begin to knead.

If you use you’re Kitchenaid it may be a bit much for your machine- I am lazy and didn’t want to knead it, so I split the dough in two and did it that way.  

I drank a glass of wine. 

Put the dough in a greased bowl. Let is rise for an hour, then punch it down, and let is rise for another half hour. 

Divide the dough into two portions. You can make them into loaves, braided loaves, buns (the best hamburger buns!). 

I did a 6 piece braid, which is the classic way to make challah. I could try to explain it to you, but I would probably nto do a very good job.  does a great one though- at about 2;12 the braiding part of the tutorial starts. 

Preheat the oven to 375F.

Mix together your remaining egg with a pinch of salt. Brush it on the top of your loaf. Allow it to sit for another 20 minutes, and then brush again. Sprinkle with the sesame seeds or poppy seeds, if using. 

Bake for about 45 minutes, until the top is nicely browned and it feels hollow when you tap it. 

Allow to cool completely before slicing into it!

Cherry Infused Bourbon Mint Juleps

It’s a funny thing, but in the winter time, I don’t really drink much. I don’t have much of a desire to. People always talk about glasses of red wine and books, and sometimes I agree with them, but mostly I drink tea. Or sometimes hot chocolate. That’s about as crazy as I get.

Summertime though is different. It’s so hot out all the time, and I just always want a cold beer, or a crisp glass of white in my hand. Perhaps too much. Which is why, as I write this, I’m on a cleanse.

Nothing crazy- just 5 days of no booze, no sugar, no flour and no caffeine. Oh, and no dairy.

I’m just feeling like perhaps a bit of a reboot to the system might not be a bad idea. I think my body needs a recharge.

However, on Friday, that will be done. And a long weekend full of long weekend parties will be waiting for me, and I think it will feel good to go into it with my body at full strength. You, however, should go into this weekend with one of these in your hands.

These are Jordan’s creation, and a great one at that. They’re a play off a drink we had at a fabulous bar in Portland a few years ago- the simplest old fashioned with one little twist- the bourbon was infused with perfect summer cherries.

The result was a drink so well balanced and sweet without hardly any added sugar. It was a thing of beauty. So we started playing around with cherry infused bourbon a while back, and this is what we learnt- to do this the proper way, you need to infuse the bourbon for over a month. If you cheat a little and slowly warm the bourbon, while keeping it airtight, you can be drinking these tomorrow.

This was one of the cocktails for Jordans parents big 40th wedding anniversary (lots of pictures to come from that soon!), he played around with it and went away from the super boozy old fashioned into something a bit easier for most to sip- a mint julep with cherry infused bourbon.

He also, being the clever man that he is, omitted the muddling step tradition to a julep and just made a mint simple syrup, but you can do it up proper if you prefer.

Cherry Bourbon Mint Juleps

1lb Fresh Cherries

1 750mL bottle Bourbon

1 cup Sugar

1 cup Water

10 stems of Fresh Mint

Soda Water

Lemon Juice

Remove the stems from the cherries and wash them carefully. Split them into 2 1 litre mason jars.

Pour the bourbon over top, filling until just under the lip.

Close the jars and put them in the bottom of a large pot.

Fill the pot up with water until just below the lids, and put the pot on a burner with medium heat.

Slowly bring the pot to a simmer, let it stay, barely bubbling for 10 minutes, and then allow to cool in the water. The jars should seal.

Wait until they are completely cooled before removing.

Bring the sugar and water to a boil. Remove from the heat and put the mint in. Let steep for 20 minutes, and then remove. Transfer to a sealable container and store in the fridge.

When everything is cooled you’re ready to make the drink!

Mix

1 1/2 oz Cherry Bourbon

1 oz Mint Simple Syrup

1 oz Lemon Juice

Stir together on ice and top with soda water!

For the party Jordan made a big jar full of the bourbon, simple syrup and lemon combined, and people just poured it on ice and topped with soda themselves!