A good Drink.


The man of the house loves bourbon, scotch and cognac. He likes drinks like sazzaracs and manhattans. He likes his drinks strong, classic, and often bitter. Having spent several years in his youth tending bar, the man makes a mean drink. And, despite his love for drinks I can imagine Don Draper sipping, he is also very creative and, not infrequently, appeases me and makes something a little girlier.

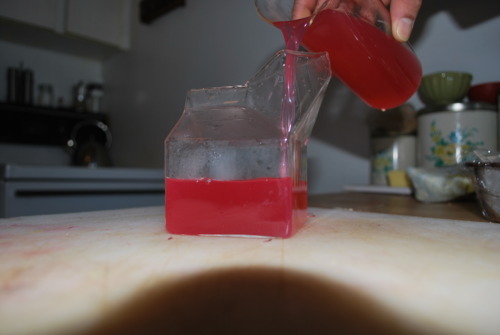
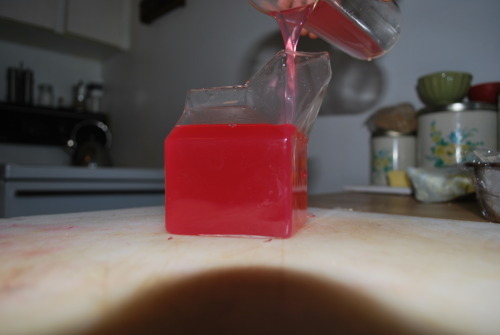
One of my favourite summer drinks is a capraina, the national drink of brazil made with lime, sugar cane, and cachaca, a liquor somewhere in between rum and vodka but much much smoother. We had some friends over for dinner last night, and I always like to start the night with a cocktail and so Jordan went above and beyond with a rhubarb and rose caprainia.

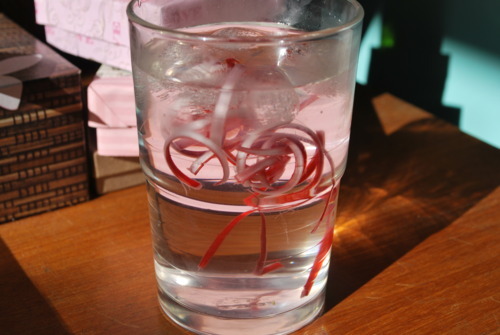
Isn’t it pretty? And girly? And delicious? The curly red things are just strips of rhubarb put into ice water and they curl up like ribbons. I realize this is a bit of a time commitment and you might not ever make this, but I really think you should. It’s not hard. I promise, and its so good!

Rose and Rhubarb Capraina

Rhubarb Simple Syrup

1 cup Sugar

1 cup Water

1 cup Rhubarb, sliced

1/4 tsp Rose Water or 1 tbsp Rose Petals

Bring sugar and water up to a boil.

Add in rhubarb and bring back to a boil.

Take off the heat and let sit for 2 hours.

Strain.
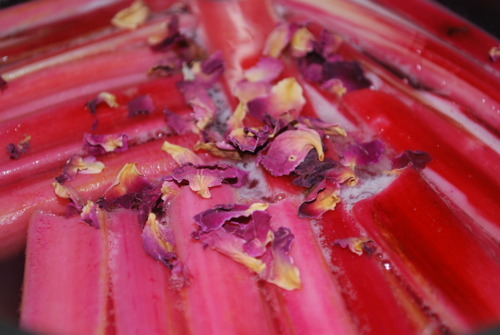
 Rhubarb Garnish

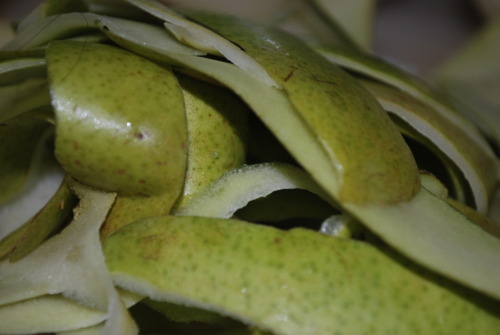
Peel the bright outsides of one 3 inch piece of rhubarb. The rhubarb is very fibrous to put the peeler up to the very top of the rhubarb to so that the peeler starts on the cut flesh of the stalk, and pull it all the way through.

Cut into thinner strips and put in a glass with ice water for at least half an hour.
 1/2 Lime

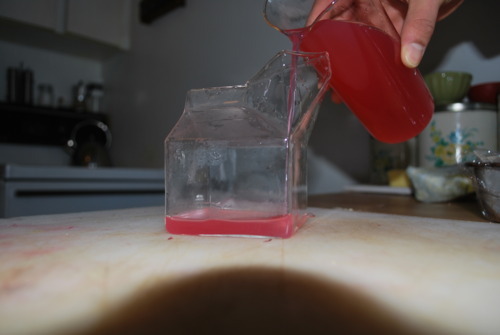
1oz Rose and Rhubarb Simple Syrup

2oz Cachaca

1/2 cup Mineral Water

Squeeze the lime and mix with syrup and cachaca.

Top with mineral water and pour over ice.
The Show Off


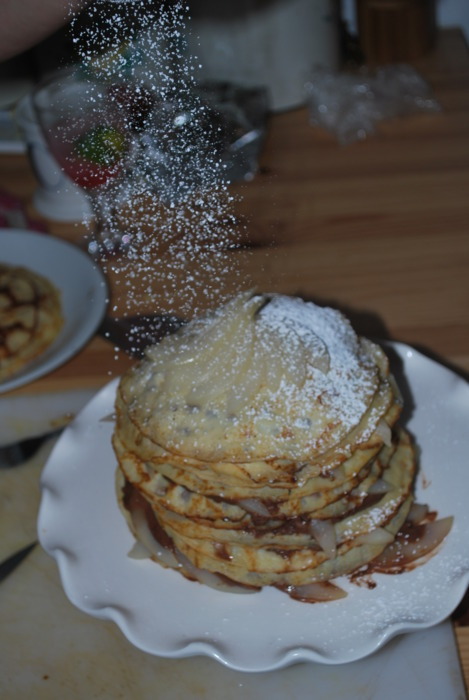
This is not a cake for the faint of heart. This is not a cake to throw together after work, or a cake to make for a kids birthday. Oh no. It will take several hours to make, and multiple steps and some patience. This cake is a labour of love. But, this isn’t a hard dessert to make, just a time consuming one I promise. And if you time yourself well, and make a few things the night before you won’t hate yourself for saying you’ll make it. And when your friends see the cake you’ve made, they will be intensely impressed. This is a show off cake. This is the cake to make if your boss is coming over for dinner, or for an anniversary. Or if your me, with to much time on your hands it’s what you make when you have friends coming for dinner on Friday night.

Crepe Cake with Dark Chocolate Ganache and Poached Pears

This is a long process, you will want to make the ganache first, because it takes several hours to firm up. Then make the crepe batter, because it will take at least an hour to cool. The poach the pears, then make the crepes. Then assemble it all!

Ganache:

500g Heavy Cream

250g Dark Chocolate, finely chopped

1tsp Vanilla Extract

Bring the cream and vanilla up to a boil

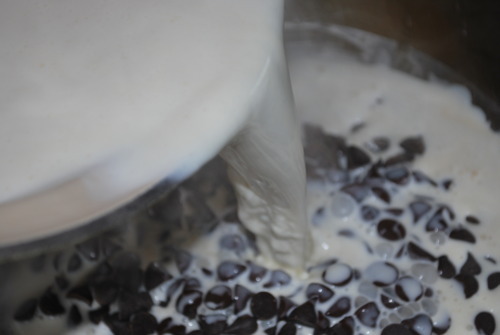
Pour over chocolate.

Let is sit for a couple of minutes, then stir. It may seem to take a while but it will get smooth!

Crepes

6 eggs

7 tbsp Sugar

1tsp Salt

1 1/2 cups Flour

1/3 cup Butter

3 cups Milk

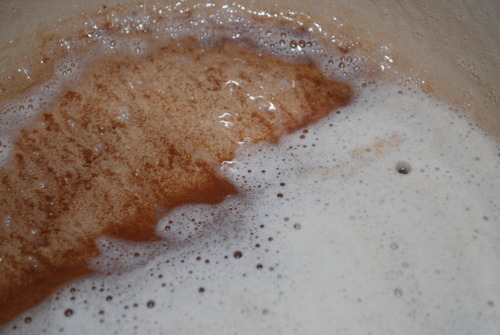
In a pot bring melt the butter. Keep it on the heat until it is very frothy, stirring regularly. In a couple of minutes the milk solids will start to get brown and it will smell nutty.

Immediately pour the milk in and bring it to just belove a simmer.

Meanwhile mix the eggs and the sugar in a mixer with the whisk attachment.

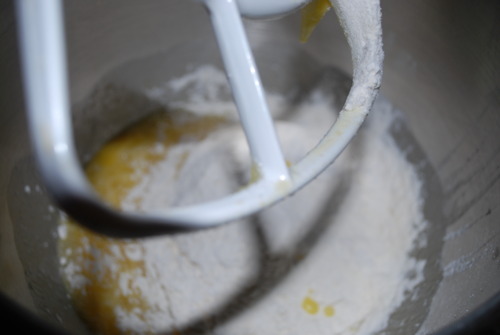
Add in the flour and then slowly pour in the milk and butter mixture.

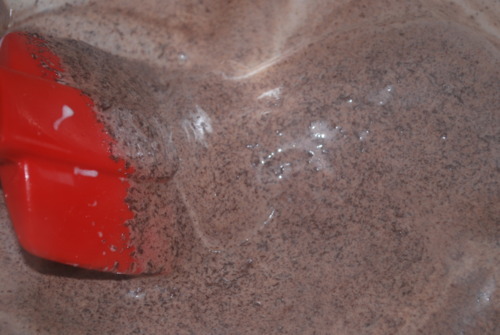
Whisk until you have nearly no lumps.

Cover and set to cool in the fridge.

Bring a small frying pan, not stick if you have it to medium heat.

Put a small nub of butter into the pan and tilt the pan to either side until the whole pan is covered.

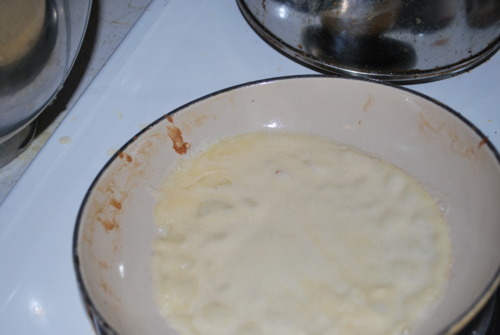
Pour about a quarter cup of batter into the pan. It should spread pretty thin.

Let it start to bubble up a bit the tilt the pan to let excess from the middle spread to the sides.

Carefully, with a rubber spatula, push the edges gently and shake the pan until the whole crepe is moving.

Flip the crepe, with a spatula if your new to this, or with a flick of the wrist if your an old pro, and let it cook another minute on the second side.

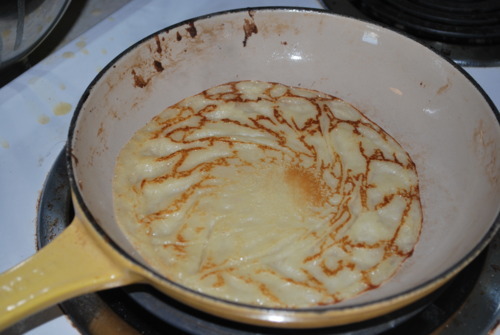
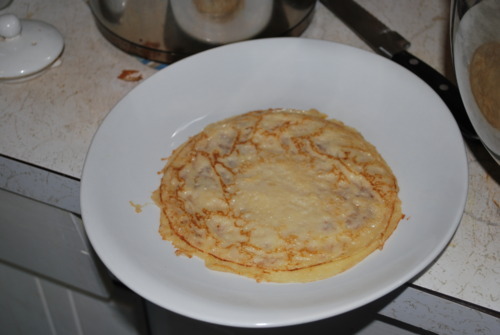
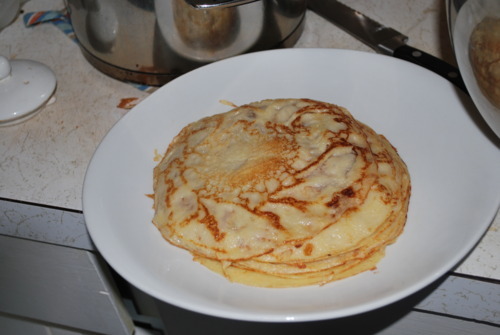
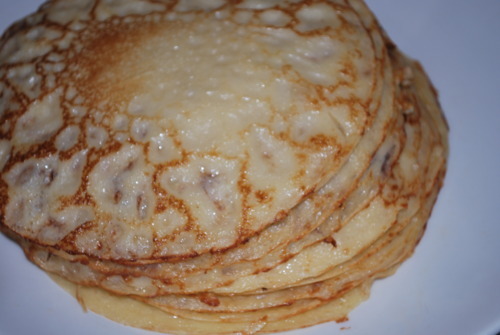
 Slide it onto a plate and go for the next! Repeat until the batter is finished, this will take a while.

Poached Pears

5 medium sized firm pears, I used Anjou.

1 cup sugar

1tbsp Vanilla Extract

Zest of an orange, peeled with a vegetable peeler into thick strips

Peel pears.

Cut them into quarters and core them.

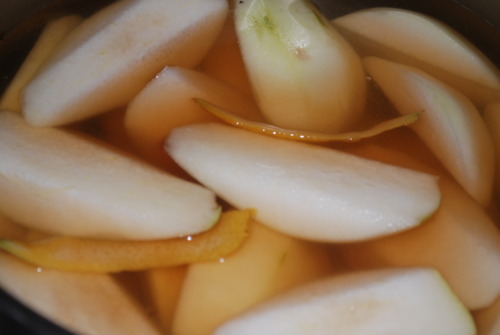
Put them into a pot with sugar, vanilla and zest. Cover with water.

Bring to a simmer and gently cook for about 10 minutes or until just becoming translucent and are soft enough to cut with a spoon. Take off the heat and let cool.

Assemble

Slice the pears into thin strips.

Put a dollop of ganache on your plate

Lay a crepe down, spread it with ganache, then layer some pears on top.

Put a small dop of ganache onto the next crepe and place it face down on the crepe before, the ganache will work as glue to keep the layers from separating.

Repeat, repeat repeat.

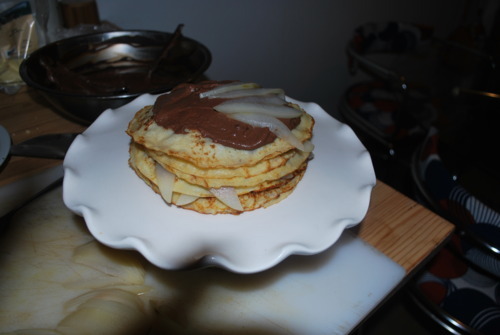
 I used about 17 layers of crepes, and now I’m writing this while eating the left overs.

I then used some pear slices on top to decorate it and sprinkled some icing sugar on top too.

I hope you make this cake,and I hope you like it as much as we did!

I Have A Kitchen Table Again!

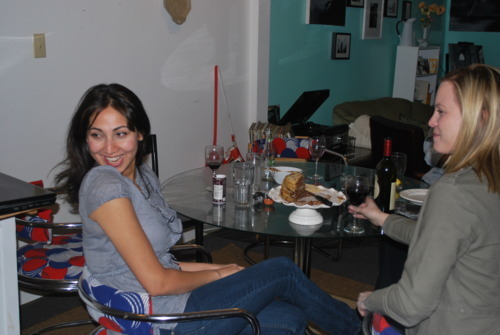
I smashed my dining room table a couple months ago. I feel compelled to say that it wasn’t very dramatic in fashion, I just put something hot on it forgetting it was glass and it shattered.
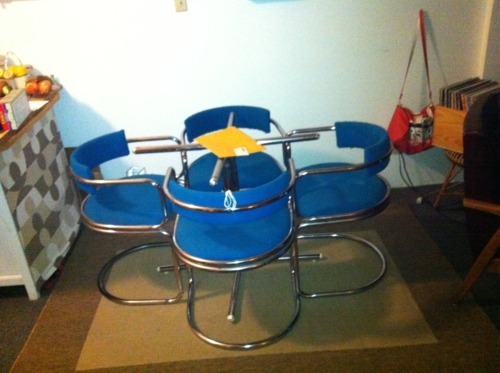
I also feel compelled to say that I loved that table.

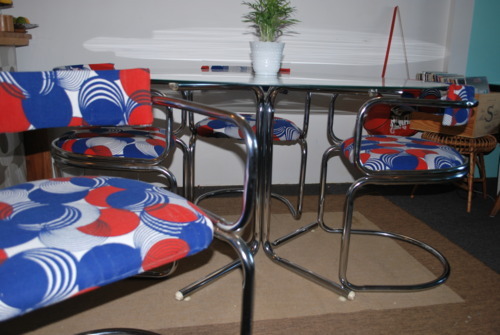
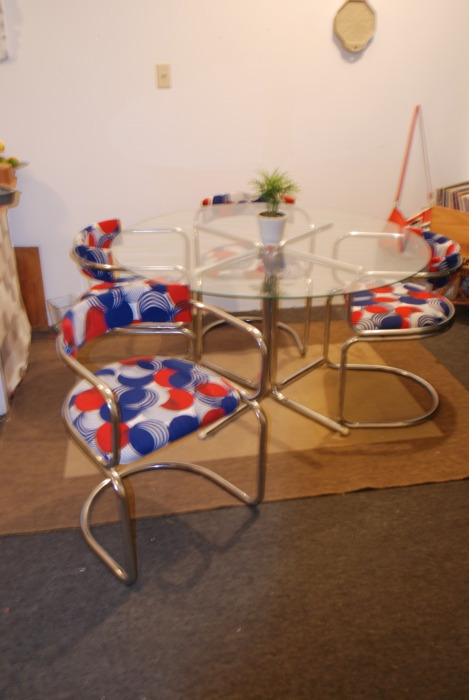
Everything I own is second hand. Most of it came from the “free section” of my building where people leave things to nice to throw out but that they don’t want (my couch, my rug, my bookcase) a few things came from my best friend who used to live upstairs when she moved across the country (a bookshelf, a bedside table) and a few things came from my mom and sister when they visisted and realized how shabby my place was (my desk, my kitchen island). The one thing I actually bought was my kitchen table and chairs. I got some Christmas money and pooled it together and bought it. It’s an awesome mid century modern chrome and glass table with low round chairs. It wasn’t in the best of conditions- the steel was a little rusty and the upholstery was definitely pilling, but it was mine. When I broke that table I cried.

Mostly I cried because Jordan hates that table and I figured if he would make a big push for us to get rid of it, but I didn’t give him enough credit. We kept the table and chairs with the agreement that I would reupholster the chairs and he would get us a new glass table top. So I found me some gorgeous vintage curtains and voila! Well, not entirely voila, I had never reupholstered anything in my life but I took out a book, read a few blogs and I’m feeling like an old pro now (although I bought fabric to redo my couch and I am now terrified all over again.) It took a little longer for him to find a proper sized glass table top but he did and now we have a kitchen table again!

So to celebrate we are having friends over for dinner tomorrow night and I will let you know all about the desserts I made but in the mean time, here’s my DIY reupholster.

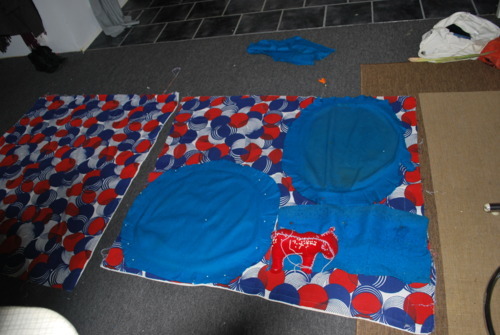
My chairs just unscrewed in the backs, so I took off the cushion-y parts. Then i painstakingly took them apart (and by me, I mean me and Jordan who was very bribed with cookies to help) You will need to use them as a pattern so be patient. This involved using a flat-ended screw driver to pull out the staples and needle nose pliers to pull out nails. We learnt that we weren’t the first to reupholster these chairs, they were a terrible brown corduroy before!

Lay out your fabric and pin the old pieces on top like a pattern.

 Lay out your fabric and pin the old pieces on top like a pattern.

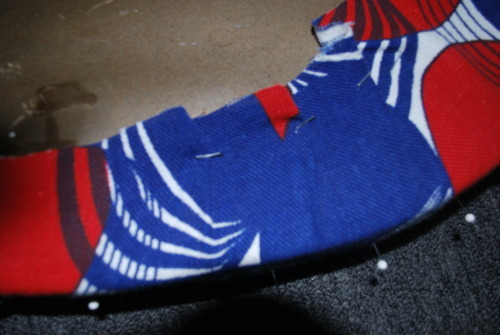
Cut them out! Then pin them to the original cushions.

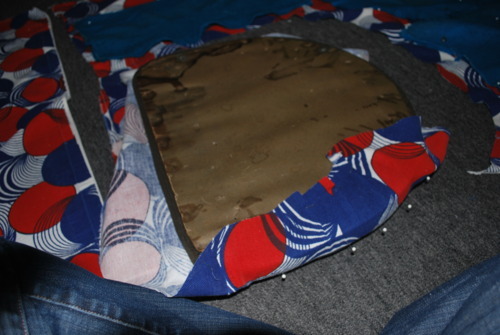
Staple staple staple. This will take time. Start at the back to get used to it. You need to get the tension right so that it’s very stable but won’t buckle. That very important.

For the tops of the chairs I just sewed the sides together and stapled the bottom again.

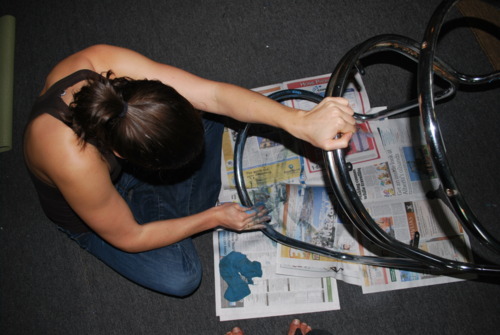
Then I scrubbed the hell out of the chairs. That was a lot of work.

And then I screwed them back together, and look! I have a new kitchen table set! and It really only took me one night to do it. So you can do it too!

Chalkboards and Children

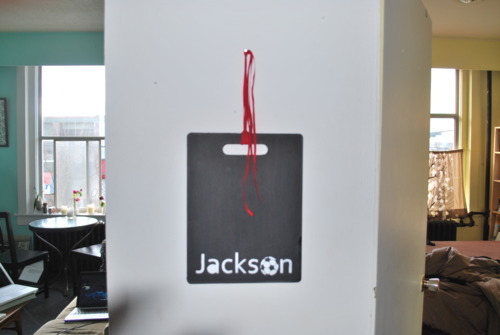
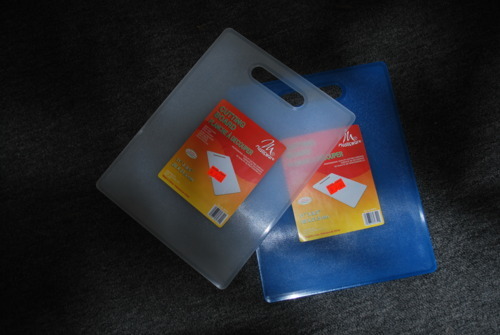
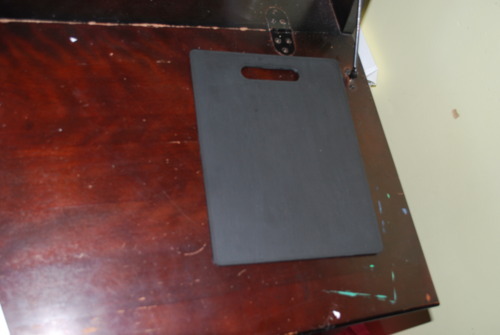
I have two obsessions right now. Chalkboard paint and Jordan’s nephew Jackson. Obsessed. So, when I decided to make Jackson a Congratulations-on-your-new-baby-sister present I didn’t really have to think about it. Chalkboards. BUT my local home hardware doesn’t sell wood! I was terribly disappointed, especially because I wanted them to use a mechanical sander to make the edges round, and if I found scrap wood I would have to do it myself. And that didn’t sound fun at all. So I went to the discount kitchen store next door and bought a cutting board. It already has rounded edges and a hole for hanging it. Perfect! This would also work really well in the kitchen with a “Things We Need From the Store” or a “Don’t Forget” by the front door. I have a beautiful chalkboard by the wonderful Regional Assembly of Text by my front door that says “Matters Of Importance” in much more elaborate scroll then I have the patience to cut out! So this is a slightly simpler version, and here’s the how to:

Take your chalkboard and wash and dry it very carefully

Paint it with chalkboard pain, let it dry and then paint it again. The paint is really thick so I had to sand it at the end and wipe it down again, to make it as smooth as possible.


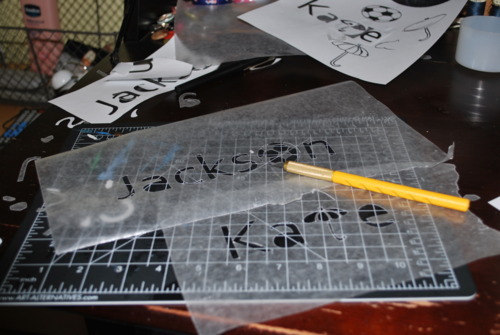
On your computer decide on a font and type the name or words your want on your board. I would suggest a simple font, because you will have to cut it out!. I changed the O in Jackson to a soccer ball using a template I found online.

Use spray adhesive or plain old tape to stick a piece of wax paper on top of your template.

Carefully use an exacto to cut out the letters,

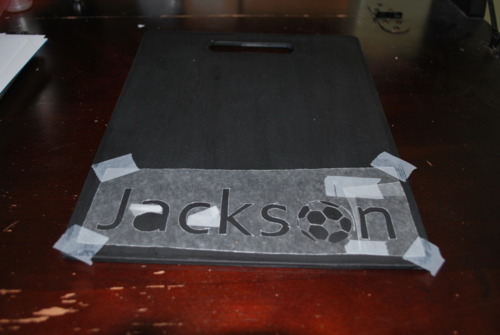
Use that spray adhesive or tape again to very carefully stick down the letters. I used a lot of tape here, and its better to have to much then to little I think.

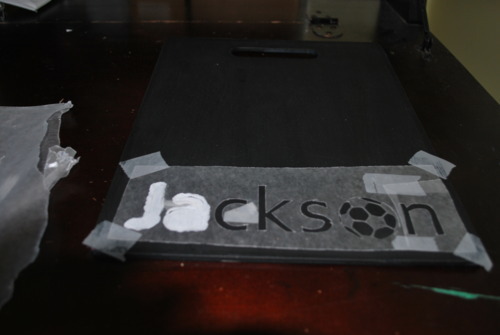
Take your paint (I used white to make it pop but you could use any colour!) and brush it onto your template.

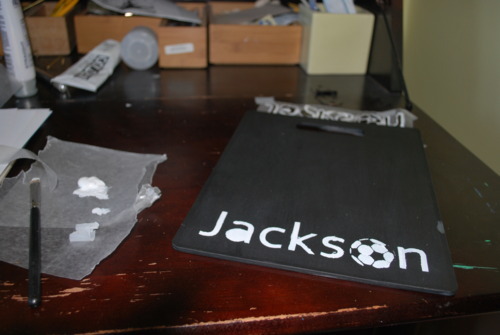
Let your paint dry completely then peel back the stencil.

I had a few smudged parts so I just did a little fix up with some more chalkboard paint, but if you are more careful then me then you won’t have to!

Allow to dry completely and then hang it up and start using it!

Almost a Martha Casserole


When we were kids we always used to play vet. I was the vet, and my sister Nina was the secretary. That’s what she wanted to be when she grew up. A few years ago my mom was moving and we stumbled across a recipe box filled with index cards. All of our stuffed animals names were alphabetized and behind each name were 3 index cards, white for check-up, red for emergency, blue for surgery. It was almost creepy how organized it was.

All of which to say it should come as no surprise that by the age of ten she was in love with everything Martha Stewart. She might have been Martha’s youngest ever subscriber, saving all her babysitting money every January to buy the magazine. So if my sister was 10, I was 6. And while Nina was trying to be Martha Stewart I was trying to be Nina, so Martha rubbed off on me as well.

I know Martha has had her weak moments, (my boyfriend, a former stock broker, and I have decided it’s just best for our relationship if we don’t talk about Martha) but I love her. I really do. Everything she makes I want to make. What, you might ask, would I do with a silk thread covered carrot? Well I’m not totally sure but I know I want to make one none the less, because Martha told me to. Along with silk covered carrots and fabric silhouette bunnies, she also had a feature on casseroles. So at 10 this morning I decided I needed one.

But I had nearly no ingredients and it is (surprise surprise) pouring rain in Vancouver so there was so improvisation. But it worked. It totally worked.

A good glug of Olive Oil

1 large Onion, diced

2 cloves Garlic, diced

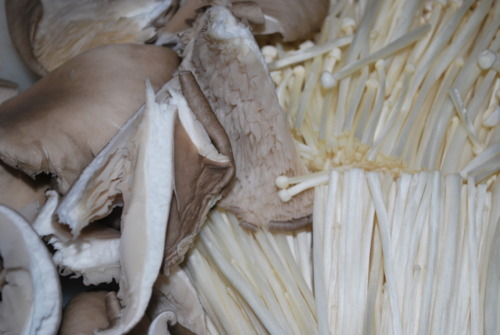
half a pound of Mushrooms, (whatever you have kicking around or is at your local market. I used enoki and oyster but creminis, buttons, portobello, anything really would work here, except maybe shiitake?) cut them into slices.

2 cans of plum tomatos, look for the kind without citric acid added!

3 sprigs of Thyme, picked

1 lb Shell Pasta

100g Cheese, I had some asiago which is grated and some sliced cheddar that i just laid across the whole thing. But if you had provolone, or parm, or even goat cheese use it! Whatever you have kicking around I think is great!

Preheat oven to 375F

Get a big pot of water on the stove on high heat.

Get another pot on the stove on medium heat.

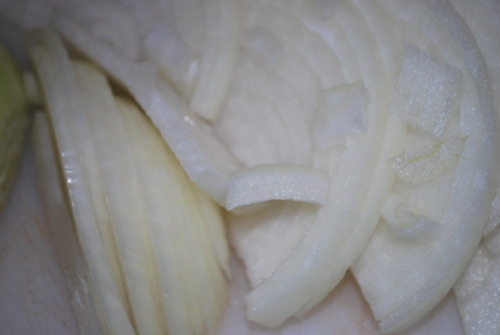
Add in that glug of oil and saute the onion until it starts to get soft and translucent. Add a good pinch of salt.

Add in the garlic, mushrooms, and thyme and stir until the garlic gets aromatic and mushrooms are soft.

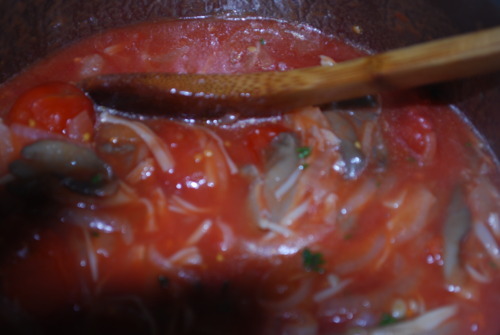
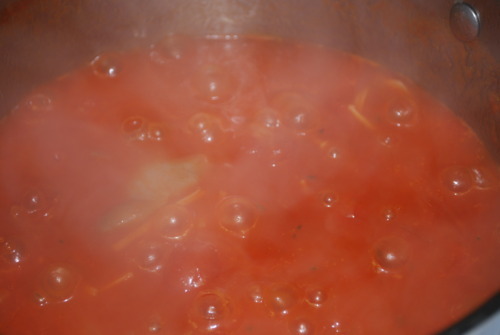
Add in your tomatoes and a little more salt. It will look soupy.

But don’t worry, it will get beautiful and thick, see?

Get your pasta in your boiling water. Add a healthy pinch of salt. Simmer then for 2 minutes less then it says on on the package, you’ll be cooking it more in the oven!

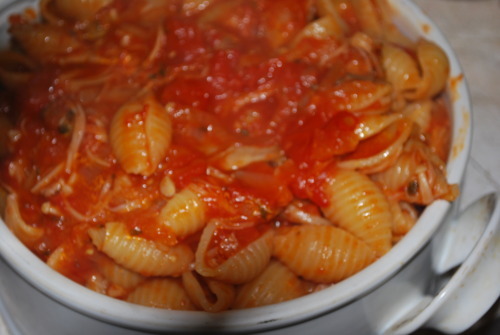
Once the pasta is cooked and strained mix it with the sauce until it all combined.

Now pour the whole thing into a casserole dish

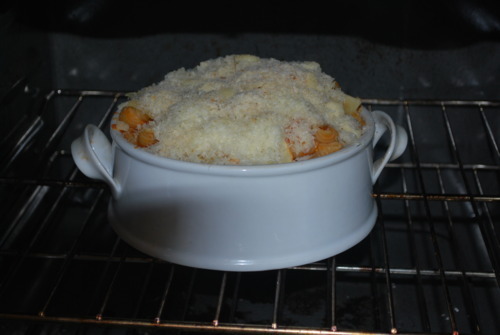
Sprinkle it with cheese. If you have sliced cheese layer it on.

Put it in the oven for about 30 minutes.

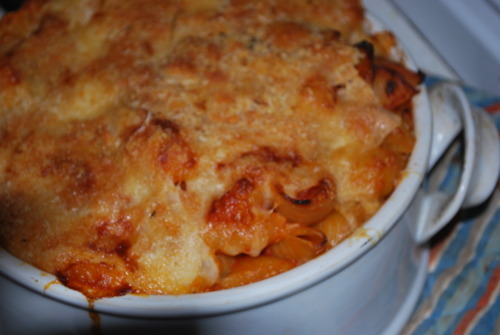
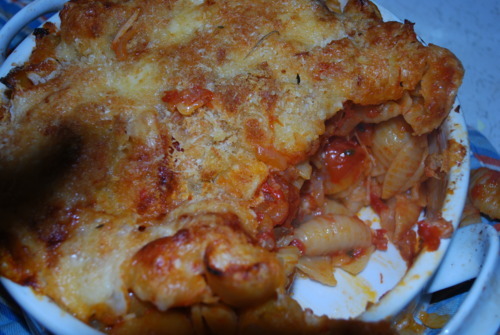
 It will be bubbly and starting to get brown and your whole house will smell delicious.

Let it cook for about 10 minutes and then eat eat eat!!

Almost Healthy

I’ve been feeling for nearly 2 months now that I’m about to get a cold. You know, my nose is just the tiniest bit runny, I’m not quite as full of energy as usual, and I just generally feel a little run down. So I decided about a week ago to not drink for the rest of the month, to drastically increase my vegetable intake and really work on getting my 8 hours of sleep every night. So imagine my surprise when in the middle of this mini health kick not one but TWO of my favourite baking blogs have written in the last week about whole wheat cookies.

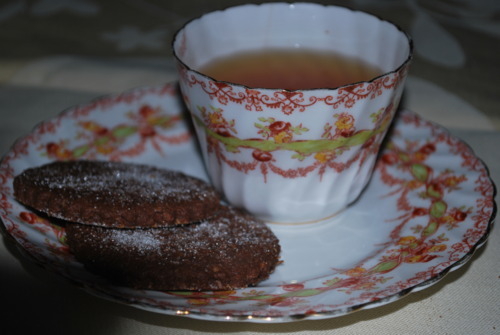
Now I feel compelled to say that I am not a fan of standard “healthy” cookies. I eat granola for breakfast nearly every morning, and quinoa is a regular part of my diet, so I don’t feel the need to put these things in cookies. Cookies are for butter and sugar and things that are good for your soul, if not your arteries. Healthy cookies almost always have terrible texture, because the butter and the sugar lay the ground work for crispy exteriors and moist interiors. I’m a firm believer in that. BUT I like whole wheat flour sometimes. It adds a certain nuttiness and a depth to certain baked goods, a sense of substance which is nice. Especially when it’s in the form of a chocolate sugar cookie and your eating it alongside a cup of earl grey tea.

This in my adaptation of the whole wheat chocolate sugar cookies on Joy the Baker. I substituted molasses instead of brown sugar because Jordan puts brown sugar in his coffee and didn’t tell me we ran out. And thats all molasses is anyways, the brown stuff refined out of brown sugar to make it white sugar. But it also adds a little moisture. I also increased the baking powder a little because I tend to like my sugar cookies a little fluffier. But I did take her advice on sprinkling granulated sugar on the tops to make them crispier. I like crispy.

Oh! The other baking blog that I love that had whole wheat cookies this week was Orangette, and while those did look really good, I felt like chocolate today.

 Chocolate Whole Wheat Sugar Cookies

Sift together the dry ingredients.

Cream butter and sugar until fully combined.

Add in egg and beat for a minute or two.

Add in molasses

Beat in dry ingredients until just combined.

Chill for 2 hours. ( I have a lot of fridge space as you can see!)

Preheat oven to 350F

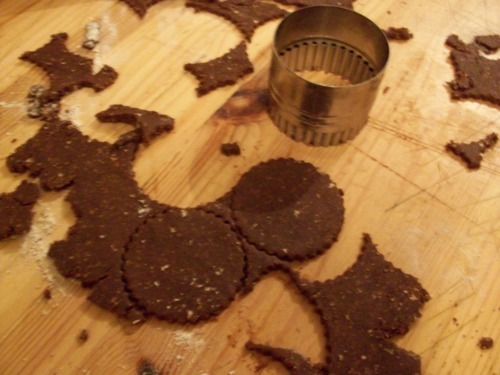
Lightly flour a flat surface and roll out dough to about a quarter inch thick

Cut into whatever shapes you want and chill the dough for another 10 minutes

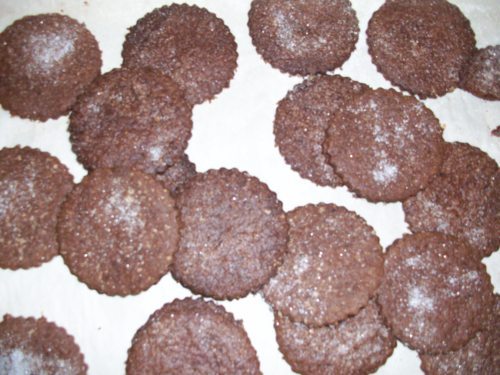
Sprinkle with granulated sugar.

Bake for about 15 minutes depending on the size of your cookies.

Let cool and enjoy with a cup of earl grey tea!

Life is Rough


It’s really hard being me guys. I do not get to sample amazing chocolates all day. I do not have a boss that compliments my decoupaging skills. I definitely don’t spend days making macaron topiaries Nope. I didn’t get to spend the day at the Waldorf Hotel at a Valentines Day themed pop-shop called The Love Hotel.

I also do not have the most wonderful friends who drink tea (and never ever any bourbon) and we certainly don’t make the cutest Valentines for the men in our lives.

Nope. Life is rough friends. Really rough.

I like to think I have a reasonably sophisticated palate. I like very dark chocolate with whiskey, I like aged cheeses and I am probably unreasonably picky about salami. But I’ll confess that I love me a bad chocolate bar. Mars bars? Check. Snickers. You betcha. Bounty bars? Couldn’t live without them. So last October when Martha Stewart Living Magazine did an article on making chocolate bars into elegant desserts you know she had me. I am still wanting to try her peanut butter chocolate mousse tart but the one dessert I kept coming back to was her 100 Grande Bar Cake. Dark Chocolate cake with layers of caramel and crispy popped rice covered in milk chocolate. I know. How good does that sound.

So after months of lusting after this picture I finally got around to making it for my wonderful friend Andrew’s birthday. There are a couple changes I’ve made to the original recipe. I use a different cake batter, which is also a Martha recipe though, because I find it to be a darker and better textured cake. I also caramelize the sugar more then Martha does, and I think that that’s just a better idea. So there.

Now, I know this cake looks like alot of work, and I’d be lying if I said I said I didn’t spend the afternoon in the kitchen for this one. But this cake was amazing. Everyone at the table said it was the best cake they’d ever had. Not one of the best, THE best. So make it. Oh, I’ve also upped the amount of Chocolate covered rice, because I absolutely could not stop eating it while I was baking.

Dark Chocolate Cake

    12 tablespoons unsalted butter, plus more for pans

    2 cups all-purpose flour, plus more for pans

    1 1/2 cups sugar

    3/4 cup unsweetened cocoa powder

    1/2 teaspoon salt

    1 1/2 teaspoons baking powder

    3/4 teaspoon baking soda

    1 large whole egg, room temperature

    1 large egg white, room temperature

    1 teaspoon pure vanilla extract

    1 1/3 cups strong, hot coffee

  •  Preheat oven to 350F
  • Butter and Flour two 8 inch round pans
  • Sift together the flour, baking powder, baking soda, and salt.
  • In a mixer fitted with the paddle attachment cream butter and sugar until light and fluffy.
  • Add in cocoa powder, mix until combined.
  • Add in eggs and mix on medium-high speed for another 2 minutes.
  • With the mixer on slow add in a third of the dry ingredients. Add in the half the coffee and vanilla.
  • Continue alternating dry and wet ingredients. It may look like somethings gone terribly wrong when the hot liquid hits but I promise it’s fine, the cake will be delicious.
  • Pour into prepared pans and bake until an inserted skewer comes out with only a couple moist crumbs, about 30-40 minutes.

Crisped-rice

1 1/2 cups crisped-rice

9 oz. Milk chocolate

  • melt milk chocolate in a double boiler.
  • Pour over rice.
  • Pour onto a a baking sheet lined with parchment paper.
  • Freeze for the first 45 minutes,
  • Cut into rough chunks about a half inch in size, but basically small pieces. Store in the fridge until ready to assemble cake.

Caramel Sauce

1/4 cup water

1 cup Sugar

1 cup Cream

1/2 cup Corn Syrup/Golden Syrup

3 tbsp Butter

1 tsp Vanilla

1/2 tsp salt

  • Combine sugar, water, and syrup in a sauce pan over medium heat until disolved.
  • Turn heat up to high until sugar becomes a nice dark amber colour.
  • Immediately pour in cream. It will bubble up so be careful.
  • Add in butter and salt.
  • With a candy thermometer bring heat to 236F
  • Carefully pour into a metal bowl or other heat proof dish. Keep in a warm place, if it gets to cold it will be hard to pour.

Assemble Cake

  • Put one layer of cake on cake stand
  • Crumble on pieces of chocolate covered crisped rice
  • Pour over half of caramel sauce
  • Put on next piece of cake and allow to set in fridge for about 10 minutes.
  • Use about a third of the frosting to make your crumb coat- Thinly coat the cake with icing not worrying if crumbs get into it. This seals the crumbs in.
  • Allow to set for about 20 minutes in the fridge.
  • Use the rest of the icing around the cake making it as smooth as possible.
  • Pour remaining caramel on top of cake, carefully spreading it out to drip over the edges.
  • Press crisped rice around edges of cake.
  • Eat much to much! Oh my goodness this cake is good.

Paper Cuts (The Good Kind)

Here’s the thing. I love paper cutting. I wish I owned/knew how to use a laser cutter. I just think they can be so beautiful. I love the silhouettes, I love the bold colours, I love the slightly home made feel to them. I always aim for my cuts to be perfect and then when I get close I’m disappointed. I like the lines that aren’t quite perfect. Here’s the other thing. Paper is cheap. So are exacto knives. It makes a double whammy for paper cutting.

It’s not nearly as hard as it looks, I swear, but it does take patience. The trick is to press hard so you don’t have to go back over lines. And start with something simple. I remember being surprised at how easy and quick it goes. And if you hate it you wasted a piece of paper, and not that I am condoning paper wasting, but in my books it’s better then wasting a wooden frame, canvas, oil paints, and the turpentine you need to wash your brushes. Just saying.

Now if you have no time or absolutely no artistic talent (although I really think you do!) Here are my favourite fellow paper cutters.

Firstly is Rob Ryan, I originally bought a couple of his cards and thought they were lovely and then by complete fluke I went into his store in London and then I really fell in love. Everything in there is beautiful. And they not only do paper cuts but also screen prints, printed tape, engraved keys, everything. And they are all beautiful.

If your having trouble finding Rob Ryan things around your town (if you live in Vancouver They sell some of his cards as Dream Design on Commercial Drive) then no one is better then Paper Cuts By Joe. His papercuts are so romantic. I will admit being inspired by his bicycles, and he is, obviously, much more technical then I am.

Valentine's Day Gift Papercut Couple on Bikes- 8x10

So, there are some cute valentines! Hope you feel inspired!

Macarons!

(disclaimer, I did not take this photograph, I absolutly took it from a flicker account, but she has lovely photos http://www.flickr.com/photos/amyrichardson/sets/72157615803522206/ click there to see them!)

 I spent a month in Paris last year, eating, art gallery-ing and just generally being happy. It was glorious. Possibly the most glorious thing about it though was my that teeny tiny apartment that I rented was a block away from Pierre Herme. Sometimes known as the Picasso of Pastries. Words can not begin to describe the croissants there, and I will try, and I promise I will try to make them soon and post the recipe. But the thing hes possibly most famous for are his macarons. Macarons are the perfect dainty little rounds of almond meringue sandwiched between a perfect mound of buttercream icing. They are coloured so bakeries have trays of brightly coloured cookies, pink for rose, green for pistachio, purple for violet. A good macaron is very very light with a smooth crisp exterior with a moist, but not undercooked centre and an extremely flavourful filling.

There are a few tricks to get here. Firstly, make them a day ahead and put them partially covered in your fridge over night. Sound crazy? The fridge is so moist that it helps make the interiors moister and helps the melding of the icing and the cookies. Secondly, take your time! Macarons are not something to rush through. Take your time piping them to make them the same size and when your piping the icing inside. Thirdly, forget what you know about folding in egg whites. You need to be a little rough with them, the egg whites as they start to collapse they become more liquid. You don’t want them to completely collapse, but you want to make the it soft so the tops of the meringues are soft and not peaked. That might sound hard but you’ll get a feel for it as you do it, I promise!

Because Valentines day is approaching I made mine heart shaped which is actually very easy, but you could also just make the traditional circles. I also had a jar of chocolate raspberry sauce in my fridge so i used that as the filling so I will give you the recipe for that as well as the basic ganache recipe.

150g powdered almonds
150g powdered sugar
55g egg whites
15g red food colouring

For the meringue:

150g granulated sugar
40g water
55g egg whites

Fit your mixer with the whisk attachment. Put in your egg whites

Combine first four ingredients into a paste in a bowl

Heat up sugar and water to 115C

As soon as it hits 115C Start whisking your egg whites.

When the thermometer hits 118C very slowly add in the hot sugar mixture. Carefully have it hit the side of the bowl as you pour it in, otherwise it will hit the whisk and splatter on the sides of the bowl and you will loose a lot of sugar.

Once you are finished adding the sugar keep whisking until it comes down to 50C, or just warm when you feel the side of the bowl.

Add half of the meringue mixture into the almond mixture until combined.

Add the remaining meringue in and mix it until it doesn’t hold soft peaks. If you over mix it it will become completely liquid, so this will take some practise.

Put it into piping bags and pipe onto parchment lined sheets.

Let sit for about an hour until a crust forms on the top.

Bake at 350F for 12 minutes. There should be no colour on the tops of the cookies. They should be quite wet inside still if you break one open. Let them cool on the baking sheets.

Raspberry Filling

3/4 cup Chocolate Raspberry Sauce (I used Cocolico brand, you can buy it at most whole foods)

1 cup melted chocolate.

1/2 cup Soft butter.

Combine all ingredients and put into a piping bag.

Ganache

1 cup good quality dark chocolate, finely chopped.

1 cup heavy cream

Bring cream up to a boil. Pour over chocolate and stir to combine. Allow to cool for about an hour and then put into a piping bag.

Pipe the filling into the macarons, and sandwich them together.

An hour later carefully squish them together more, this will make them less likely to come apart.

Leave them partially covered in the fridge over night if you have time, but of course they will be delicious right away as well!

My Mom is an exceptional cook. She makes absolutely beautiful italian food and everyone says shes the best cook in the family. Unfortunately this does not translate into the world of desserts. She tried so hard for birthdays but I swear every cake she has ever made has fallen terribly in the centre and no matter what she does. She redeems herself though in the world of scones and pies, which have nearly the exact same procedure.

So I have very fond memories of scones, or cloud biscuits, as my Grandmother’s recipe calls them. The family recipe is made with shortening instead of butter, probably because the recipe dates back to the depression when butter was much to much of a luxury. It is also leavened with lots of baking powder. These scones are my adaptation of the scones at the inimitable Tartine Bakery in San Francisco. Made with butter and buttermilk they have more flavour and, when done correctly, are just as light.

The crucial thing with scones is the fat. Scones get their layers from big chunks of very cold butter going into a hot hot oven, causing the liquid to steam. The steam makes those beautiful pockets and layers of a perfect flaky scone. If you mix the butter to small or don’t chill it properly you get a Starbucks scone. And that makes no one happy. So be patient, let it chill properly and you’ll be amazed at what a scone can be!

Buttermilk Scones (adapted from Tartine Bakery)

2 1/2 cup AP Flour

2 tsp Baking Powder

1/4 tsp Baking Soda

2 tbsp Sugar

1 tsp Salt

1/2 cup Butter, very cold, cut into cubes

1 cup Buttermilk

  • Combine all dry ingredients
  • Cut in butter, squishing it with your hands until the pieces are about the size of a fava bean (bigger then a pea)
  • Slowly add in the buttermilk and mix until barely combined
  • Sprinkle some flower onto a board.
  • Fold dough onto surface, and fold in half. Press down and fold in half again. The dough should be quite malleable. When it begins to resist and start to feel a touch tough wrap with saran wrap and refrigerate for at least 1/2 an hour.
  • Preheat oven to 350F
  • Unwrap dough and press it down until about 1 inch thick
  • Cut with a cookie cutter or into triangles with a knife.
  • Place onto a cookie tray and bake for about 20 minutes or until a deep amber colour forms on the top.
  • And eat eat eat!!

Sweet Lemons!


If you have read a cookbook from any restaurant based in California in the last 10 years you have probably heard of the elusive meyer lemon. Sweeter then your regular lemon, smaller, with skin less bitter and an after taste like vanilla. If you don’t live in California you can expect a 1 month window in which you can buy them for an exorbitant price. (try up to 2 dollars a lemon.) But don’t despair, just head to China town.

My local Asian green grocer carries something called sweet limes that taste almost the same as a meyer lemon for $1.69lb. That’s not bad friends, I bought a dozen for just over four dollars. Unfortunately they to have a very short growing season and so I always make marmalade. Now before you you say “gross, I hate marmalade” try me out here. I always thought I hated marmalade until I started making it. There are ways of making it less bitter without making it overwhelmingly sweet. It’s true, I promise!

I not writing a precise recipe here because it think its very subjective, and no two pieces of fruit are the same.

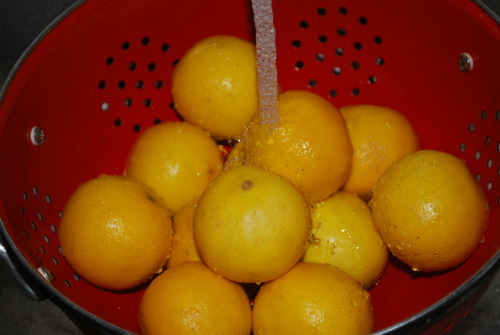
  • Wash your fruit like crazy, citrus fruits have tons of pesticides on them from the assumption that you won’t eat the peel. I wash mine with soap.
  • Slice your fruit in half and then slice as thinly as you can. I find using a serrated knife works best, unless your knives are much much sharper then mine!
  • Bring a large pot of water to a boil, add in a pinch of salt.
  • Add fruit to the pot and bring back to a boil. Drain.
  • Bring the pot back up to a boil and add the fruit, this time without the salt. Bring to a boil and drain again. If your using thick skinned oranges or grapefruit I would blanch it one more time.
  • Put the fruit back in the pot and cook on low heat, stirring regularly. It should seem dry at first and then begin to leach out liquid.
  • If you have a vanilla bean kicking around and scraped the beans out into your beautiful marmalade, you will be very happy you did it.
  • When all this has simmered and it begins to seem dry again add your sugar. For 12 lemons I added about 2 1/2 cups of sugar. Remember, you can always add more but you can’t add less!
  • This should make more liquid leach out of the fruit, so let it simmer until it becomes almost dry again, with just a thick syrup surrounding the pieces. Because of the high sugar content your susceptible to burning so be sure to stir it regularly.
  • And there you have it! Just put in a sterilized jar to keep for months, or into a Rubbermaid container if you’ll finish it in the next couple weeks, which I would reckon you might!

Happy Birthday Papa Cam


This summer I worked for an exceptionally talented pastry chef named Cam. He has worked at some of the best restaurants in the world and has uncompromising standards for bloody everything.

This is not a man who gives compliments.

BUT he is a man who, after you’ve done all his boring prep work (while he was outside foraging for wild sorrel or onion flowers)will show you how to make rosemary port foam, or chocolate terrines, or gellen glazed rhubarb. Which is very rare in a kitchen.

So because I trailed around him all the time pestering him with questions on everything he was dubbed Papa Cam.

It was his birthday on Monday and I wanted to make him a cake but Cam is so entirely not a cake person, so i figured i could go crazy elaborate (which reeked of effort) or i could go kitschy. Kitschy won out in a heart beat. Queue red velvet cake.

I am a new lover of red velvet. Usually I make deep dark chocolate cakes but the hint of cocoa in a red velvet is really wonderful, and with cream cheese icing! Lordy. A red velvet cake should be incredibly moist not overly sweet and have a beautiful deep red colour. The red traditionally comes from undutched cocoa but now a days comes from food colouring. I don’t like mine astoundingly red, it freaks me out a little I’ll confess, but you could easily double the colouring in this recipe if you wanted.

Now I don’t mean to brag but Papa Cam did say that his mom had only ever made him birthday cakes and they call came from mixes, and it definitely wasn’t the best cake he’d ever had, it was the best birthday cake any one had ever made him specifically. That’s the closest to a compliment as I’ve ever gotten from him.

Red Velvet Cake

3/4 cup Unsalted Butter, Room temperature

1 1/2 cup sugar

2 egg

6 Tablespoons unsweetened cocoa powder

1 Tablespoons red food coloring mixed with 4 Tablespoons water

2 teaspoon vanilla extract

1 cup buttermilk

2 1/4 cups all-purpose flour

1 teaspoon salt

1 teaspoon baking soda

3 teaspoons distilled white vinegar

  • Preheat oven to 350F
  • Butter and Flour 2 9inch round cake pans
  • Sift the flour, salt and baking soda together.
  • Cream butter and sugar together until light and fluffy
  • Make a paste of the vanilla, the cocoa and the food coloring
  • Add this paste into the butter sugar mixture until combined
  • With the mixer on medium add in the eggs on at a time scraping between each additional.
  • Add in the vinaiger.
  • Alternate the dry and wet ingredients finishing with dry. Do not over mix.
  • Pour into prepared pans and bake until an inserted skewer comes out with only a couple moist crumbs, about 30 minutes.

Cream Cheese Icing

12oz. Cream Cheese, cut into cubes

1/2 cup Unsalted Butter, Room temperature

3 Cups Icing Sugar

2 tsp Vanilla Extract

  • Cream butter and sugar together until fluffy.
  • Add vanilla and mix until combined.
  • On low speed add the cream cheese one piece at a time waiting until combined before adding the next piece.

Sunday Mornings


Sunday mornings are made for bagels and the New York Times magazine.

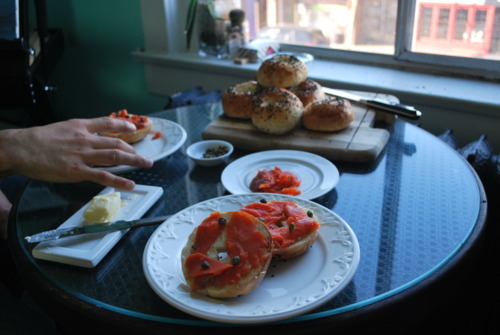
I grew up very close to the big jewish neighbourhood in Toronto and on Sunday mornings we used to go to this amazing bakery called The Old Fashioned Bagel Factory. You would watch perect rows of bagels come out of the oven on a conveyer belt and they would pick them straight off pop them into a brown paper bag and roll the top down so when we got home they were still warm. We would stop on the way home to pick up Western cream cheese and Kristapsons smoked salmon.

Since then, I have moved across the country and live quite a ways away from from a good bagel place, if there is a good bagel place in Vancouver which I am beginning to doubt. So on Sunday morning I woke up with a mission, I needed a real bagel, I needed good smoked salmon and I needed it stat.

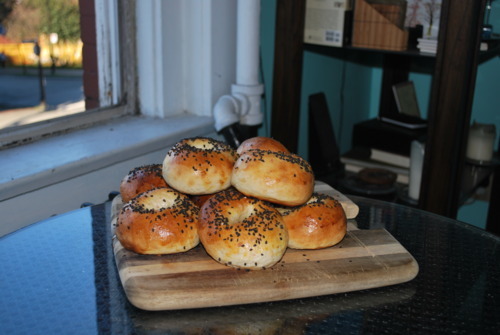
So I made bagels on Sunday morning.

Bagels are really not that hard. I promise. I’m sure if you planned your bagel cravings you could make the ones from Peter Reinhaardt book that take 2 days and they would be exceptional. But I made very good bagels on under 2 hours. Which, I think, is pretty good!

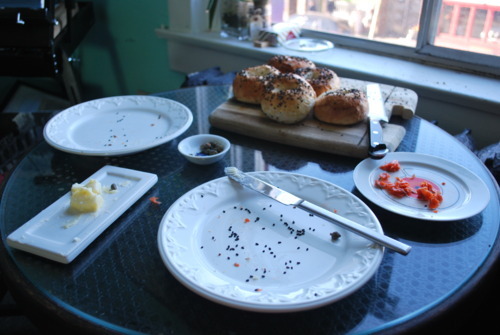
Crazily out of this Sunday morning madness the hardest thing to find was cream cheese! So if your wondering where it is in the picture it was substituted for with butter.

2 teaspoons of active dry yeast
1 ½ tablespoons of granulated sugar
1 ¼ cups of warm water (or more if needed)
3 ½ cups (500g) All Purpose Flour
1 ½ teaspoons of salt

1 Egg

Additional toppings, like sesame seeds, poppy seeds, caraway seeds or even just some course salt. I used black sesame seeds (because I had some at home, and some pink Hawaiian salt and they looked so pretty with the black and pink!)

  • Mix yeast with sugar and 1 cup of water. Make it body temperature, so test the water against the inside of your wrist. If it feels barely warm you’ve got the temperature. If the water is to hot it will kill the yeast, if it’s to cold it was stunt the yeast and take longer to rise.
  • Mix the flour and salt in a mixer or in a bowl if your feeling energetic enough to knead it by hand.
  • When the yeast mixture starts to get foamy on top scrape it into the mixer and start kneading.
  • When it has become a smooth and elastic dough do the window test. Take a little pice and squish it until its very thin. Then pull in gently, if you can see through it your gluten has developed enough. If it rips keep kneading.
  • Once the dough has been kneaded enough cover it with a towel and let it rise for about an hour or until it has doubled in volume. My apartment it pretty cold this time of year, so i put it beside (but not on!) my oven and leave me oven on with the door a little bit open. This may seem wasteful but it won’t rise otherwise!
  • Once the dough has doubled put it out in the counter (unfloured!) and cut it in half, then half again then half again so you have 8 even pieces.
  • Here’s the hard part- form then into perfect balls. Cup your hand over and slowly swirl the piece of dough into a circle. You want the bottom to catch on your unfloured surface and swirl together so that there isn’t a seam. Then stil your finger through in the middle and stretch out the hole until its about an inch wide. This will take some practise. If your having alot of trouble you can always roll it into a rope and then wrap them together.

  • Preheat your oven to 425F and bring a large pot of water up to a boil.

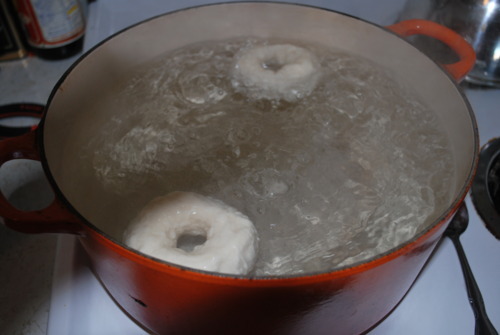
  • When the water is at a rolling boil carefully drop a couple bagels into the pot. They should float to the surface almost immediately, if not carefully poke them with a wooden spoon and they should pop up right away. Let them float for about a minute and then flip them. If you like your bagels really dense you can leave them in for longer.

  • Line the bagels on a lined baking sheet.

  • Beat the egg in a small bowl and brush your bagels with it. Then sprinkle your toppings on and bake them until they are a beautiful amber colour.

  • And look! You made bagels! Well done.

I went to a party last night and, not for the first time, I volunteered to make dessert. I’ve been dying to make Martha Stewart’s 100 Grande Cake which has layers of caramel and crisp puffed rice covered in dark chocolate in between 3 layers of dark dark chocolate cake. Delicious right? Well I will have to keep imagining that now ( I will make it soon i promise!) because when I woke up I got a call to go into work. Now I am not complaining about going into work, Lord knows I need to, but it does mean that my timeline was seriously diminished. A couple hours for cooling chocolate and icing a cake was now totally out of the picture. Enter the brownie.

A brownie shouldn’t take more then 15 minutes to prepare. I made a slightly more complicated brownie from the “Baked Explorations” book by Matt Lewis and Renato Poliafito. Oh my goodness I love that book. This brownie has a layer of salted caramel in it that really makes it the fudgy-est darkest brownies I have probably ever known. The addition of sour cream also helps bring down the sweetness so you can taste the caramel without getting a toothache. I didn’t have a 9-13 inch pan so I made mine in a 11inch round pan and served it in slices with whipped creme fraiche ontop. Unfortunately there were a few drinks involved and I completely forgot to take a picture of it plated. So I do apologize.

Salted Caramel Brownies- Adapted by “Baked Explorations”

Salted Caramel

1 cup Sugar

2tbsp Corn Syrup

1/2cup heavy cream

1 tsp Salt (Fleur de Sel if you have it!)

1/4 cup Sour Cream

Brownie

1 1/4 cup AP Flour

1 tsp Salt

2 tbsp Dutched Cocoa Powder

11ounces Dark Chocolate

1 cup Butter

1 cup Sugar

1 cup Brown Sugar

5 Large Eggs

2 tsp Vanilla

1 tbsp Coffee

  • Preheat oven to 350F
  • Butter and flour a 10inch round cake pan

For Caramel:

  • Combine sugar, corn syrup and 1/4cup water in a medium sized pot.
  • Put on medium heat and stir until sugar has dissolved
  • Stop stirring and bring heat up to high. Let caramelize until a deep amber color appears.
  • Immediately take off heat and stir in cream. It will boil up so be careful!
  • Add in sour cream and stir until combined. Put into a boil to cool

For Brownies

  • Melt butter and chocolate over a double boiler
  • Take off the heat but leave ontop of hot pot. Add in sugars and stir to combine
  • Take off hot pot. Add in 3 eggs stir until barely combined then mix in the remaining 2. It will get cakey if you mix to much at this point.
  • Stir in flour until just combined.
  • Pour half of batter into prepared pan.
  • Drizzle Caramel ontop. Use an offset spatular to spread it out.
  • Spoon remaining brownie batter ontop and carefully smooth out top.
  • Bake for 30 minutes or until an inserted skewer comes out with only a few moist crumbs.
  • Cool, cut, eat, enjoy!