Babies and Bananas

Sunday was an exciting day. Jordan and I went to his parents place for an early dinner and we were just about to put on our boots and go for a walk when Jordans sister called and said her water broke! so we put the soup that was simmering on the stove into a box and grabbed our bags and hopped into the car to look after her 2 year old while they went to the hospital. It was very exciting. Before we left our house that morning though I made a Pumpkin cake. It’s a modified recipe from “A Cook’s Companion” by Stephanie Alexander. If you don’t own this book already, go buy it right now. Seriously.( http://www.amazon.com/Cooks-Companion-Complete-Ingredients-Australian/dp/1920989005/ref=sr_1_1?ie=UTF8&qid=1296171719&sr=8-1) I am a relatively new fan to Stephanie Alexander, I was introduced to her by an Australian friend a couple years ago, but now i wonder how i ever survived without her. This woman is magical. Seriously.

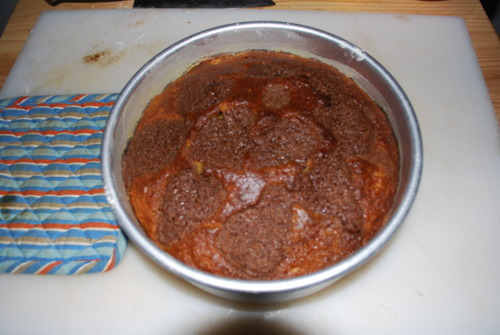
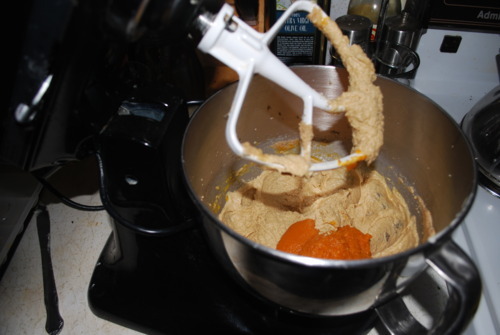
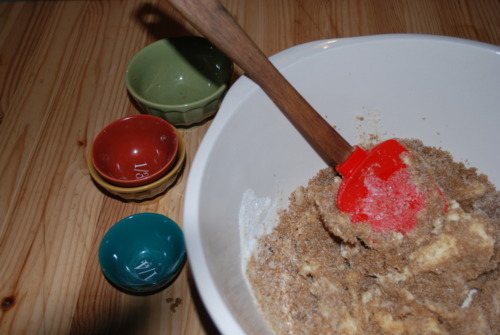
So her banana cake is the best banana cake i`ve ever had. By a long long run, but heres the thing. I HATE raw bananas. Passionately. So in order to not have to smell them and mush them to make banana cake I added tinned pumpkin instead. And hot damn is it tastey! It`s beyond moist and delicious.  But heres what makes this cake (in both its incarnations) so good. You make this topping of brown sugar, butter and a little flour and it becomes this amazing caramelly crunchy bit on the top. I`m not lying Stephanie Alexander is a Godess. So here it is, If you want to make this banana cake instead just use 1 cup of mashed bananas, the pumpkin is more subdued so it needs an extra 1/2 cup.

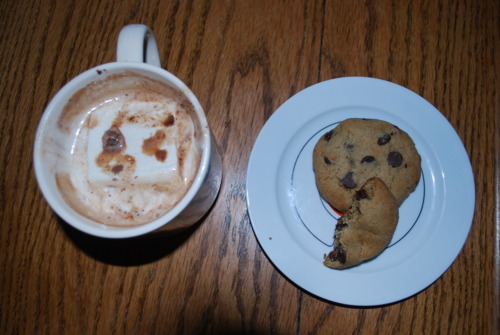
(Disclaimer- because of the excitement I didn’t get a picture of it while it was cut,  which is to bad, Because its certainly not beautiful in the tin, but I promise, you will not be dissapointed by this cake either in looks or in flavour!)

Pumpkin Cake

125g Unsalted butter

1 1/2 cups Sugar

2 Eggs

1 1/2 cups Pumpkin Puree (or 1 cup mashed bananas)

250g AP Flour

1 tsp Baking Soda

1 tsp Cinnamon

1/2 cup Buttermilk (or 1/2 cup milk with 1tsp Lemon Juice)

  • Preheat oven to 350F
  • Butter and flour a 8 inch round pan
  • Cream butter and sugar until fluffy
  • add in eggs one at a time beating well between each addition
  • Alternately add in wet and dry ingredients, starting and ending with dry.
  • pour into prepared pan
  • Add dots of topping onto top of cake (recipe follows) and bake until an inserted skewer comes out with only a couple crums (about 45 minutes)

Topping:

3 tbsp Chopped Nuts of your choice

3 tbsp AP Flour

1 1/2 tsp Cinnamon

100g Soft Butter

  • Combine all ingredients until just combined

Sweet and Salty

I can’t remember when or how I stumbled across dolce de leche but I’ve been a huge fan ever since. Dolce de leche is sweetened condensed cream cooked until it caramelizes. It’s basically heaven. AND it’s astonishingly easy to make. I mean, I’m sure if you did it the traditional way it would be agonizing, but all I do is put the entire can (unopened full can) in a pot of boiling water and keep it boiling for 3 hours. Now, disclaimer, you must keep the water over the can. If you don’t the pressure can change and I’ve heard the can explode. But I’ve made it countless times and I have never had any problems. Just put the can in the pot cook it for 3 hours and then let it cool before opening. It’s really that simple. And you will be left with beautiful creamy caramel sauce.

Sauce that makes coffee into something extraordinary. Sauce that, thinned with a little cream, is exceptional over pancakes or waffles. Sauce that, mixed with a little cream and a little icing sugar, makes the best icing ever. Or you can sandwich it between shortbread cookies, or swirl it into ice cream. The options are endless and they are all delicious.

We went to a friends for dinner last night and (because now that I have a blog I need to pawn deserts off on people) I brought desert. I made some dolce de leche earlier in the week so I thought I’d use that because I knew our lovely hostess Liz loves it. Now this desert maybe seems like a lot of work but I assure you, it took me less than an hour including baking time to make it all. The pot de crèmes are so easy to make and to transport which is always important. I made mine in ramekins but if you have oven proof tea cups or espresso cups those would be charming.  I made some coconut lace cookies with them because I always think something creamy needs something crunchy. In fact, if you have a blow torch you could easily make these into a crème Brule but I don’t so I made a cookie instead. These cookies are fun too because once they’re baked but still warm they are very pliable so I wrapped mine around a rolling pin ad they get nicely curved. And I doubled the salt from the original recipe to ofset the sweet of the dolce.  And then because everything was so sweet I made a compote with blood oranges, although of course you could use any citrus you wanted to. And guys, it was super good.

Dolce De Leche Pot de Crèmes with Coconut Lace and Blood Orange Compote

2 Egg Yolks

1 Large Egg

1 cup Dolce de Leche

1 ½ cups Whipping Cream

2 strips of Lime Zest.

·         Preheat oven to 300F

·         Bring several cups of water to a boil.

·         Bring cream and zest up to a boil.

·         Meanwhile mix egg, yolks and dolce de leche. It will be a little hard to mix, I recommend a whisk.

·         Add cream into egg mixture very slowly so that you don’t cook the eggs, whisking the whole time.

·         Pour mixture into ramekins or other individual oven proof dishes.

·         Put ramekins into a casserole or pie dish, something with edges roughly as tall as the sides of the containers. (I made 5 ramekins and a 10inch cake pan worked well for me!)

·         Pour boiled water into dish being careful not to splash any into the ramekins.

·         Cover with tin foil and poke a couple holes in it.

·         Bake for about 30 minutes or until the custards seem thicker but still wiggle a little in the middle.

·         Cool at room temperature for about an hour and then transfer into the fridge.


Coconut Lace Cookies

3 tbsp Corn Syrup

6 tbsp Butter

9 tbsp Brown Sugar

¼ + 2 tbsp AP Flour

½ tsp Salt

¼ cup shredded coconut

·         Preheat oven to 350F

·         Mix corn syrup, butter and brown sugar in a pot on medium heat until butter is melted

·         Mix in flour and salt

·         Bake on a parchment lined sheet until bubbling throughout and starting to caramelize around the edges. These cookies will really spread out so you can only do 4 per sheet. Mine all bunched up together so while it was still warm I cut them into strips. This seemed to work pretty well.

·         Sprinkle coconut on top and bake again for another minute until coconut starts to brown.

·         While still hot you have the option of squishing them into fun shapes, draping them over a tea cup to make a bowl or rounding them over a rolling pin which is what I did. You have to work quickly because they become brittle as they cool. If they don’t turn brittle as they cool, put them back in the oven for a minute or so.


Blood Orange Compote

3 oranges

1x1 inch piece of vanilla bean, or ½ tsp vanilla extract

·         Segment oranges: cut the peel and pith away from the oranges so that the outside has no membrane and it’s only the flesh. Carefully cut in between the membrane of each slice that you can pretty slice again, with no membrane.  Once all the slices are removed transfer any juice left over into a pot with the vanilla

·         Bring juice to a boil and reduce until barely a syrup.

·         Pour over orange and taste. If it needs a little sugar add it!

Southern Comfort

My boyfriend lived in Florida for 2 years and to say southern food made an impression on him would be an enormous understatement.  We had a debate for at least a year about fried chicken before I would dare even make mine for him (although he swears up and down it ranks as the best he’s ever had!) and don’t ever try to get between that man and some pulled pork so help you God. So today, when I had little to do besides turn yesterdays braised beef into a brisket chilli of sorts I thought I do up some cornbread too.

Don’t be deceived while it’s baking. It will get quite dark on the outside and you might be worried but don’t. You get a beautiful crispy outside and a wonderful moist interior. You might also be alarmed at the amount of  butter in it and if you are such a person I bet you could substitute at least half of the butter for milk and it would still be darn good. But, I love butter and I love cornbread so there you have it

It’s not an overly sweet cornbread which I like and I usually throw in scallions and cilantro and cheddar cheese into it. The cheddar makes it moister the next day and the best part about cornbread might be the next day toasted with poached eggs on top.

Claire’s Cornbread

1 1/3 cup AP Flour

2/3 cup Cornmeal

1/3 cup Sugar

1 ½ tsp Baking Powder

¾ tsp Baking Soda

¾ tsp Salt

¾ cup Butter, Melted

2 Large Eggs

½ cup milk

3 Scallions, chopped

A small handful of cilantro, chopped

½ cup Cheddar Cheese, grated

·         Preheat oven to 325F

·         Mix dry ingredients

·         Add in wet ingredients

·         Stir until just combined,

·         Pour into a buttered loaf pan and bake until an inserted skewer comes out with only a couple crumbs, about 45 minutes.

comfort food

I have been unemployed for over a month now. I’ve started to get some serious cabin fever. And as I can’t afford to much out of the house these days I thought I’d do something about the apartment I’m feeling so stuck in. Not surprisingly I found lots to fix. Today I repainted our bookshelf, and I’m going to sand down our island counter top and restrain it tonight while watching the John Cusack classic, Better Off Dead. I felt busy and for the first time in a while I think I’ve been extremely productive, which feels really good.
So I thought I probably needed a treat.
A request was put in for chocolate chip cookies, and I know it’s not overly exciting but I really think these ones are intensely good. They are soft and chewy and moist and very very easy to make. Which is important because I adamantly make my cookies by hand. I never use my mixer. There’s something so terrifically nostalgic about using a spatula or wooden spoon and mixing the butter and sugar and then adding the eggs in one by one. I do find this recipe gets a little thick at the end so generally I end up sticking my hands in and mixing them like that. Sometimes it just feels good to get your hands dirty.

Chocolate Chip Cookies

1 cup Butter- room temperature

¾ cup + 2tbsp White Sugar

1 cup tightly packed Brown Sugar

2 Large Eggs

3 cups A.P. Flour

½ tsp Salt

1 tsp Baking Soda

1 tsp Baking Powder

1 tsp Cinnamon

1 tbsp Vanilla

1 lb Chocolate chips or chunks

·         Preheat oven to 350F

·         Cream Butter and sugars until combined

·         Add in eggs on at a time mixing well between each addition

·         Mix in all dry ingredients until almost combined

·         Fold in chocolate

·         Roll into balls and bake for 7-10 minutes depending on size. They should still be quite soft on the top. Let cool on the baking tray.

Local Fruit in January

I try to eat local. I do. In the summer I gorge on beautiful berries and melons and tomatoes and I tell myself that this is absolutely okay because in the winter I will ration and I will eat root vegetables and i will like them so help me god. And this plan works beautifully in the fall on the first day when you can see your breath and the squash are so ripe and roast them with apples that burst at the skin they’re so sweet and juicy. Doesn’t it sound marvellous?

Tragically the apples aren’t quite as nice anymore. The flavour is there but they don’t have that perfect crunchy juicy fall feeling anymore, which makes sense really, it’s not fall anymore.  BUT that doesn’t mean they’re not good for baking. Au contraire mon amis they can be delicious for baking. So today we’re making apple cake.

This is one of my all time favourite cake recipes. It easily makes the jump from apples to blueberries and, if you have the patience to pit them, it’s amazing with cherries. It makes absolutely wonderful muffins and a terrific coffee cake with a little crumble on top but a friend of mine bought me the sweetest mini bundt pans so I used those instead.  And though this might sound a little decadent, I’m pretty sure I’ll be eating one for breakfast tomorrow!

Local Apple Cake

2 apples, nearly any kind will do

½ cup sugar

½ cup Butter

1 cup Brown Sugar

3 Eggs

2 cups All Purpose Flour

1 tsp Baking Powder

1tsp Baking Soda

1 tsp Cinnamon

1 cup Sour Cream

1tsp Vanilla

·         Preheat oven to 375F if using small molds, 350 if a larger pan.

·         Chop up apples into small-ish chunks. Put in a pot with sugar and cover with water. Simmer until soft, about 10 minutes. Cool.·         Using the paddle attachment on an electric mixer cream butter and sugar until light and fluffy, about 3-5 minutes

·         Add in eggs one at a time scraping down the sides of the bowl in between each addition.

·         Keep motor running on high for about 5 minutes to really get the eggs beat. The mixture might split but don’t worry, it will come back when you add in the dry ingredients.

·         Bring the motor down to low and add in half the dry ingredients, then all the sour cream and vanilla and then the rest of the dry.

·         Fold in the apples.

Put into buttered and floured pan and bake until a skewer inserted in the middle comes out with only a couple crumbs on it

I dusted mine with icing sugar but as  ate it i realized it would be incredible with a little maple syrup drizzled ontop…

Something Healthy for a Change

When I first moved away from home, it took me a while to figure out this whole budgeting thing. You know, spend all your money now, you won’t have money later. Even for basics like food. I learnt my lesson though when I completely ran out of cash. I walked to and from the restaurant I worked at (which fortunately fed me dinner) I  stopped hanging out with friends for a couple weeks and I started living off of anything left in my kitchen. I had however made oatmeal cookies the week before so what I had was butter and oats. So all I ate was granola. I ate an alarming amount of it and I did it for weeks. And when I got the pay check that gave me the freedom to buy new food I decided that I still loved granola and simply bought some nuts and dried fruit to add to the mix. I love granola and I now keep a big container or it on hand at all times. I switch up the nuts and fruit, sometimes I add dried cherries, sometimes I put in pecans, but for the most part it stays the same. I’ve switched from butter to oil; I like the texture of it better but feel free to substitute. I also use sweetened coconut in mine because that’s generally the kind of coconut I have kicking around. However, if you wanted to use unsweetened, add another 1/3 cup of sugar.


Granola

4 cups Rolled Oats

2 cups roughly chopped almonds

1 cup sweetened coconut

½ cup canola oil

½ cup honey

1 cup dried apricots roughly chopped

1tbsp chopped candied ginger

·         Preheat oven to 300F

·         Mix everything except apricots and ginger

·         Put mix onto a parchment lined tray and bake for 30-40 minutes stirring every 10 minutes or so until it gets golden and cluster-y and the nuts are nicely toasted

·         Cool down

·         Add in dried fruit and ginger and enjoy!

A Very Good Pancake

Yesterday the man of the house went shopping and brought back some fruit. So i woke up this morning thinking that I would be healthy and eat a pear for breakfast. Unfortunately it was hands down the worst pear I’ve ever eaten. I was dry and sawdusty and totaly inedible.However, little makes me sadder then throwing away food so sliced them up and poured maple syrup on top and cooked it on medium heat until the pears were just about to fall apart and the syrup is thick. The fruit gets mapley and the maple gets fruity and its super delicious. If you forget about the pears for a little bit then m’dears they are maple caramelized pears and it was completely on purpose. Now you can do all sorts of things with this maply fruity goodness but I like it best on pancakes.

So my healthy breakfast went out the window.

 There are a lot of blogs out there saying that they have the best ever recipe for pancakes and as such I won’t pretend that I do. BUT these are the best pancakes I’ve ever had. They’re very very moist and they’re very light and fluffy and they soak up syrup like a sponge. Which is very important. So here it is,

A Very Good Pancake Recipe

1/4 cup butter, melted

1 1/4cup Flour

1tbsp Sugar

1tsp Salt

1/2tsp Baking soda

1/2 tsp Baking powder

1 egg

1tsp Vanilla extract

1/2 cup Sour cream

1 cup Milk

Canola oil for frying

(If you don’t have any sour cream you can just omit it and add 1/4 cup extrfa milk and the juice of half a lemon)


·   Mix the dry ingredients

·   Mix the wet ingredients

·   Mix together until just combined, some lumps are okay.

·   Fry in canola oil until puffy and golden and delicious!


Salted Caramel Semifreddo

Not to long ago I was in Paris and while I was there I ate an extraordinary amount of sweets. There was morning pain au chocolat, followed by nutella crepes, mid afternoon tarte au citron and on more evenings then I would like to admit there was creme glacee, or ice cream. Dear Lord that ice cream was good. And when i came back I jones for it. I know that sounds silly but I really did. And theres just no point in eating a chocolate croissants or a lemon tart in vancouver there are deffinatly some reasonable gelato shops that keep me in check when my ice cream radar gets to low. However, good ice cream costs a pretty penny my friends and as I am, shall we say, between employments currently, I am pinching my pennys best I can.

I love to idea of making ice cream, and its not hard it really isn’t BUT it involves an ice cream maker and while i do own one, its on the other side of the country, and so its not helping me out much these days. Cue semifreddo. Salted caramel semifreddo no less. It sounds of fancy, and decadent. and it is! but its also very easy and is best done a few hours in advance. So if your having one of those nights you just need ice cream (and trust me i have lots) or if your having people over for dinner and you need something delicious and easy try this! If you have some good chocolate you could shave it with a vegetable peeler ontop to make it look nice or toss some fresh raspberries or strawberries, ooh or peaches. I love carmel and peaches. OR you can have it as a midnight snack, like I did last night.

Salted Caramel Semifreddo

1/3cup of Sugar

1/4cup of Water

2 Large Eggs

1 tbsp Vanilla

1 1/4 cups whipping cream

  • Whip 1 cup of the cream until it holds soft peaks when you lift up the whisk. Put in the Fridge.
  • In the bowl of an electric mixer fitted with the whisk attachment crack both eggs and whisk until frothy.
  • In a small pan with high sides warm the sugar and water on medium heat stirring until its disolved.
  • Stop stirring, turn it up on medium high heat and cook sugar until it caramelizes a beautiful deep amber. Be very careful at this point the sugar will go from tasty caramel to burnt caramel really quickly.
  • Turn off the heat and add the remaining cream and vanilla. It will bubble up like crazy, don’t be alarmed just stir it until all the lumps are gone and it’s all very smooth.
  • Turn the electric mixer on and let the eggs get frothy again for about a minute. Then slowly slowly add in the caramel. Have it drip down the side of the bowl. The hot caramel is cooking the eggs right now and you don’t want them to curdle so take your time and pour slowly.

  • Leave the mixer on until the mixture cools down and then fold in the whipping cream and pour it into a loaf pan.
  • Put it in the freezer and in an hour you will have beautiful restaurant quality ice cream in your freezer!!